Admiral Von Shtupp was
depressed. Though he had accomplished
his mission in his last battle with the hated Britannians, it had been a close
battle. The Britannians were becoming
more troublesome, obviously trying to keep pressure on the Prussians, and
restricting the Prussians movements in the Caribbean.
Worse, the Britannian
Dreadnought was another issue. So far,
it had proven to be invulnerable to even the SMS Kaiser Karl, a Heavy Battle ship and Von Shtupp’s Falship. The only thing that may prove to be of help
would be the SMS Graf von Zeppelin , a
Blucher Dreadnought. Unfortunately, it
was at port taking on supplies.
Von Shtupp’s only hope
was that they wouldn’t encounter the cursed Britannian Dreadnought on this
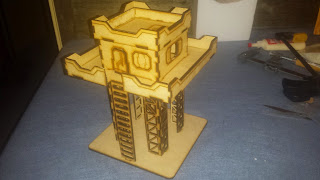
patrol. At least, he had access to a Sky
Fortress and a Pflicht Skyship squadron.
This patrol was
another Search-And-Destroy mission. The
Prussian High Command believed as long as Prussia could keep the pressure on
the Britannian Fleet, it would prevent the Britannian Fleet wouldn’t be able to
mount an invasion on the Prussian Caribbean Stronghold.
Now they just had to
find a Britannian fleet and hope the Dreadnought was not there.
++++++++++++++++++++++++++++++++++++++++
Once again – the Dastardly Britannians were after the Proud
Prussians. Once again, both admirals had
multiple fleets and we rolled to see what each commander would face. I cursed the dice as once more, my nemeses,
the Dreadnought, appeared.
Prussians had the Operational Advantage, the Britannians had
Strategic Advantage.
The Battle Zone had 5 islands in the 6 sectors, 3 on the
Prussian Side, 2 in the Britannian side.
(I’ll call the Britannian side “North”.)
Kingdom of Britannia
(KoB) Deployment (Right to Left; West to East):
Kingdom of Britannia Deployment
- 4 Attacker Frigates
- 2 Doncaster Bombers (Widely Seperated)
- 2 Vanguard Submarines (Widely Spread)
- 2 Fighter SAS – 5 Tokens each
- 1 Majesty Dreadnought w/ Pulse Generator (Commodore’s Flagship)
- 2 Agincourt Gunships
- 4 Frigates
Prussian Empire (PE)
Deployment (Left to Right; West to East):
Prussian Empire Deployment
- 5 Saxony Corvettes
- Kaiser Karl Battleship (Commodore’s Flagship)
- Fighter SAS – 5 Tokens
- Imperium Sky Fortress w/ Torpedo Bomber SAS (5 tokens) and a Recon Token
- Fighter SAS – 5 Tokens
- 3 Pflicht Scoutships
- 3 Arminius Frigates
- 3 Hussar Gunships
All Fliers on both sides started Obscured and the Subs
started Submerged.
We drew our missions, selected our Tactical Action Cards
(TACs) and we were ready to play!
Start of Game
Turn 1
TAC Phase: The Britannians decided to start things off and
played “Lost Orders”. Prussians stopped
it by playing “Lost Orders” (to Graham’s disgust). 20VP each and the fun had begun!
Britannia won the initiative!
The Doncaster Bombers started things off on the Britannian
side, flying forward but not targeting anything in the first turn. The Prussians stalled, buzzed the Recon token
over the Central Island. Britannian
Fighters moved forward about a 1/3 of the way across the table. The Prussian Pflichts then stayed in the clouds,
moved forward and fired their forward Teslas through the clouds into a Doncaster. The hapless Doncaster suffered a Triple-Crit
and exploded in a shower of sparks and fire!
His wingman was so surprised, he failed his Disorder Test! OWWW!
Pflichts take down a Doncaster!
Having realized the Pflichts were a serious threat, the
Dreadnought moved from behind the island, fired on the Pflichts and damaged 2. The Sky Fortress moved forward, over the
Center Island and fired its Tesla at the remaining Doncaster, and got inflicted
a Crit! (3 Raging Fires!)
On the right, the Britannian Frigates moved forward cautiously
about ½ speed, trying to bait out the Prussians. It didn’t work as the Prussians sent a
Fighter SAS out in front of the Sky Fortress (withing 4” – just in case I
needed to). Back in the center, the
Britannian subs stayed submerged and turned to starboard. Sadly, they had no targets. In response, the Prussian torpedo Bombers
moved to the west side of the table, to keep some distance from Britannian
Fighters and (hopefully) be in attack range next turn. Britannian Fiighters moved forward, side by
side with the previously activated squadron.
Prussian Frigates moved forward, followed the Pflichts. Finally, back on the east side, the
Britannians activated their last squadron – 2 Gunships. The Gunships made their minimum move and
declared they were going onto “Slow Maneuvers” next turn. That ended the Britannian activations for the
turn.
That left the Prussians free to maneuver without worrying
about a counter-move. First, the Prussian
Gunships maneuvered around the island on the east, fired on the Frigates, and successfully
sank 2 and damaged 1! The Frigates
compounded the issue by failing the Disorder test! A 2nd failure in a single
turn! The Corvettes moved forward at about
½ speed, with no targets. Finally, the
Kaiser Karl turned its guns on one of the subs.
In spite of all 3 turrets being linked, only the Speeschleuder managed
to hit and crit a sub (Hard Pounding – 3 AP left)!
Prussian Attack on Frigates!
In the End Phase, the Britannian Bomber put out all 3 fires,
though it still lost all its AP to the Rally Phase. The Britannian Frigates lost both their AP,
but were otherwise ok when they rallied.
VPs:
KoB: 20VP
PE: 140VP
End of Turn 1
Turn 2
In the TAC phase, the Britannians played “Radio Intercept
and rolled a +3 to their Initiative Roll!
The Prussians Won Initiative anyway! ;-)
Prussian Torpedo Bombers attacked the damaged Sub, but due
to the subs CC, only managed to damage the sub – leaving it afloat (?buoyant?)
with 1 Hull Point left! The Subs both
surfaced, turned their tubes towards the Kaiser Karl but failed to damage the
Battleship with their torpedoes. The
Subs did shoot down 2 Torpedo Bomber tokens with AA, then silently submerged
once more.
Prussian Fighters attacked and shot down the last Doncaster
Bomber for the loss of 1 token.
Prussian Fighters shoot down the 2nd Doncaster!
Britannian Fighters attacked and shot down the remaining 3
Torpedo Bomber Tokens for the loss of 1 token.
1 Prussian SAS destroyed! The
Prussian Gunships on the East went forward at full speed. Broadsides sank 1 Frigate while the turrets
concentrated on a single Gunship. The
Attack missed a double-Crit by 1 hit – and caused Guns Damage! The Britannian Fighters attacked the Pflichts
and caused a Crit (Nav Lock) for the loss of 3 tokens. Prussian Fighters launched their attack on
the same Britannian Fighters and shot them all down for no loss.
Prussian Gunships sink a Frigate and Cripple a Gunship!
The Britannian Dreadnought turned to port, lining up with
the Kaiser Karl. The torpedoes failed to
damage the Kaiser Karl and the other attacks failed to damage the Pflichts, but
the turrets successfully sank all 3 Frigates in 1 activation! OUCH!!!
Dreadnought Destroyes the Prussian Destroyers!
Taking a chance, the Pflichts dropped out of the clouds to
attack the Sub and the Dreadnought.
After failing to damage anything, only 1 Pflicht managed to climb back
into the clouds.
Back to the East, the last Britannian Frigate circled around
the stern of a Prussian Gunship and managed to crit the ship (Fusion Leak – 1 token)!
Back in the Center, the Prussian Corvettes advanced and sank
the damaged Sub with Concussion Charges!
Corvettes Sink A Sub!
Britannian Gunships moved forward and turned off Slow Maneuvers
(they could go normal speed next turn).
Though the torpedo turrets did no damage, the Gun Turrets managed to
damage the previously damaged Prussian Gunship.
To waste an activation, the Prussian Recon buzzed more towards the east. Finally, in the last Activation for the
Britannians, the Frigates on the west side formed a Line of Battle and blasted
the Prussian Corvettes, sinking 3 of the 5 ships!
Pounding of the Prussian Corvettes Begins...
The Prussian Sky Fortress came down out of the clouds and
made an attack run on the sub and a Frigate, using 2 bomb bays on the sub and 1
on the Frigate. The Frigate was sunk,
but the Sub escaped damage. The
Prussains then played “Break Neck Maneuvers” (perform a Swift Maneuver on a
2+), but it was cancelled by the Britannian with “Espionage”; though it did
give the Prussians an extra 40VP. The Sky
Fortress did fail to climb back into the clouds, though.
In the Prussian’s Final Activation, the Kaiser Karl turned
to starboard, then attacked the Sub and a Frigate. Sadly, it only damaged a Frigate.
In the End Phase, the Britannian Gunship failed to reapir
its guns. The Prussian Gunship suffered
another Hull Point damage due to corrosion and the damaged Pflicht was unable
to unjam its rudder – no turns this next turn!
VPs:
KoB: 170VP
PE: 360VP
End of Turn 2
Turn 3
In the TAC phase, the Prussians played “Battlefield Repairs”
and repaired 2 HP on the Pflichts (2 with no damage, 1 with 2HP). The Britannians got 60VP for not cancelling
the card
Britannia won the Initiative! (Prussians rolled Snake-Eyes!)
Britannian Frigates moved and attacked the Prussian
Corvettes and sank 1. Frigates AA fire
failed to damage the Sky Fortress.
Another Prussian Corvette Sunk!
The Sky Fortress repurposed a fighter SAS as Torpedo
Bombers, then climbed back to “Obscurred as it moved forward and bombed the sub
with all 3 bomb bays, finally causeing a crit (Shredded Defences).as well as
having lost an extra AP as they were Tesla Bombs! (Nope!
No idea how that would work under water.)
The Britannian Dread played “Stoke the Engines”, which was
quickly cancelled with “Lucky or Unlucky Shot”!
40VP each! Undaunted, the
Dreadnought turned to port. AA shot down
a Torpedo Bomber and broadsides sank the last Prussian Corvette! The Main Turrets rotated and fired on the
Kaiser Karl: Double- Crit! Worse: the
first Crit was a Sturginium Flair! The
Karl teleported straight back – about a ¼” away from the table edge! The 2nd Crit took out the Shield
Generator! Things were not looking good
for the Karl!
Last Prussian Corvette Sunk!
Sturginium Flair put the Kaiser Karl . . HERE?!?!?
Here, the Prussians made, arguably, an error in judgment. Worried the Britannian Gunships might get
away, the Prussian Gunships activated – 1 ramming the undamaged Britannian
ship, all 3 within boarding range of the damaged ship! The ram failed to do any damage to either
gunship so both turned to disengage. The
Prussians then fired on the undamaged Britannian Gunship, causing a Double-Crit
(Both “Guns Damaged”), and successfully prized the other!
The Ram Failed - BADLY!
The Gunship is Prized!
The Britannian Fighters attacked the Torpedo Bombers and
shot down 3 tokens for no loss. The
Prussian Pflichts (well, 2 of them anyway), turned towards the Britannian
Gunship. The Gunship’s shields saved it
from the Tesla Weapons. The Britannian
Gunship charged forward in an attempt to retake her prized sister-ship. Guns and torpedoes failed to damage the
Prussians, but worse, the Prussian Prize crew, manning the captured Gunships
AA, shot down all the enemy AP as they attempted to board, and left the
Britannian Gunship with no AP!
That was one Boarding that went FAILED!
The Prussian Kaiser Karl turned hard to starboard, preparing
to hide behind the island next turn (if he could get away fast enough)! As it turned, the Karl managed to sink a
Frigate.
The Kaiser Karl sinks a Frigate!
The Britannian Sub surfaced and turned its torpedo tubes
towards the Kaiser Karl. In spite of
Karl’s damage, the torpedoes failed to damage the Karl, but worse, the Sub
failed to dive again, left exposed on the surface! Sadly, the Prussian Torpedo Bombers were
badly depleted, so they moved towards the Sky Fortress to replenish next
turn. (If I had activated the Torpedo
Bombers instead of the Gunships earlier, I probably would have sunk the sub
before I had lost too many SAS tokens.)
The lone Britannian Frigate on the east moved forward and
shot at the Pflichts, but caused no damage.
The Prussian’s Recon Flight buzzed around a bit and Prussian Fighter SAS
moved back towards the Sky Fortress for replenishment next turn.
In the End Phase, the Britannian Gunship repaired one of the
2 Guns Damaged tokens (it would still be damaged next turm).and the Sub
repaired its Shredded Defences. On the
Prussian side, the Kaiser Karl failed to repair her shields and the Pflicht
failed to fix its Nav Lock. The Prussian
Gunship did manage to stop the corrosion this turn.
At this point, sadly, I realized I had to pack up and pick
up my wife – DANG! So CLOSE!!!
VPs:
KoB: 310VPs Mission: All Smalls (Done) & 50% of the fleet
value (Incomplete)
PE: 610VPs Mission: All Mediums (Incomplete) & 50% of the
fleet value (Done)
A Draw!!!
++++++++++++++++++++++++++++++++++++++++
ARRRRGGGGHHHHHH!
This is the classic “Neither side got there but both were
CLOSE” games. It really could have gone
either way at this point. Britannia
needed 190 points (the cost of the Kaiser Karl). I needed to sink or capture a Sub and Gunship
– both VERY possible as both are damaged and both would be easily boarded with
low AP on board. I think it really would
have gone to whom ever got the initiative.
We rolled “just to see” and Britannia would have had 1st
turn. I might have forced a draw, but I
think Kaiser Karl was doomed.
Kaiser Karl did quite poorly this game. Very little impact on the battle zone other
than acting as a fire magnet (for which it did really well!). The only weapon that proved useful was, once
again, the Speerschleuder. It was useful
against the Subs, but it wasn’t the “wonder weapon” I needed against the Subs.
The wonder weapon would come from the Sky Fortress. The Torpedo Bombers were highly effective
against the Submarines (as they were intended to be). By having the Sky Fortress, I was able to
repurpose a fighter squadron to do another attack. I just failed to do it before they got
attacked. The second error I made was
not devoting all 3 Bomb Bays against the Submarine in Turn 2, but that was the
first time I ever tried to do such an attack.
Next time, I’ll know better.
The Pflichts and Hussars were both good choices, but I find
full squadrons of both is very expensive.
At 1000 points, it limited what I could get for Smalls.
Speaking of the Smalls, OUCH! First, the poor Arminius Frigates never had a
chance – the Dreadnought decided they shouldn’t exist anymore and so they were
gone! That was unexpected. I expected him to go after the Pflichts, the
Gunships or the Kaiser Karl, but not the Frigates. Talk about using a sledge hammer as a fly
swatter! The Corvettes, well, that was
all my fault. I figured they were lost
so I decided to take out the one Sub as a last gasp. They didn’t need to be wasted like that. I just blanked out and couldn’t decide what
to do with them.
On the other side; DANG that Dreadnought!!! I’m really beginning to hate that ship! There’s only a few ways to deal with a
Dreadnought at 1000 points. Ignore the
Dreadnought and concentrate on the rest of the fleet. Concentrate all effort on the
Dreadnought. Bring your own
Dreadnought. Agree neither side will use
Dreadnoughts.
It’s up to each player and group how to do deal with these
ships. At this point, in a friendly game
like this, I try to keep an open mind because I like the challenge of facing
such a threat.
This time, there were 3 Medium choices, which was nice. The Doncasters didn’t do anything, but that’s
because I’ve faced them before and I HATE TORPEDOES!!! They had to be targeted immediately, with
extreme prejudice!
The Gunships, well, they got shot and hurt first, and were
also stuck by themselves in the corner once the Frigates were decimated. Outnumbered 3 to 2, they were going to have a
hard time, no matter what.
The Subs were neat. I
don’t think we ever really seriously used them before and the submerged rules
made them that much more difficult to deal with. They may not have been used to their greatest
potential, but I think that was simply because they didn’t get close enough. Another turn probably would have made the
difference.
The Frigates were full strength and well used for the most
part. Any issues with them were due to
casualties and bad luck with dice.
Overall, I think they did quite well.
Anyway, a good but frustrating game. I wish we could have gone on 1 more turn to
see what would have happened. Next time,
I’ll have my revenge!!!
Until Next Time, Good Luck!

