Showing posts with label CY6. Show all posts

Friday, April 8, 2016

BatRep: CY6! - Road to Rabaul Campaign Book, Showdown (Mission 5)

So, this was the final mission in the first section of the campaign called “Nowhere To Run: Darwin”. 

The date is June 15, 1942 @ 12:32 at Darwin. 

The Japanese have changed their tactics and are resorting to High-Altitude Bombing with multiple escorts.  Fighters of the American 9th Fighter Squadron give chase.

The Altitude is HIGH-BOTTOM. This changes the handling characteristics of both fighters and bombers (the bombers, not so much).  

For the Japanese Zeros, they’ve dropped from stats “A4+3” to “B4+1”.  A loss of 2 Agility and a lesser maneuver chart!  The P40s dropped from “B4+2” to “C4+0”.  Climb rates for both fighters were cut in half!  Apparently, both dove (or fell out of the sjy) just as fast as before, so the Americans had the advantage there.

The Japanese had 9 Betty Medium Bombers in 3 flights of 3 “V’s” with 2 flights of 3 Zeros (one flight east, the other west of the bombers) acting as escort.  Mission: Get the bomber off the table!  (Japanese get VPs for each bomber that makes it to base).

The Americans have 2 flights of four P40 Warhawk fighters.  Mission: Shoot down the Bombers!

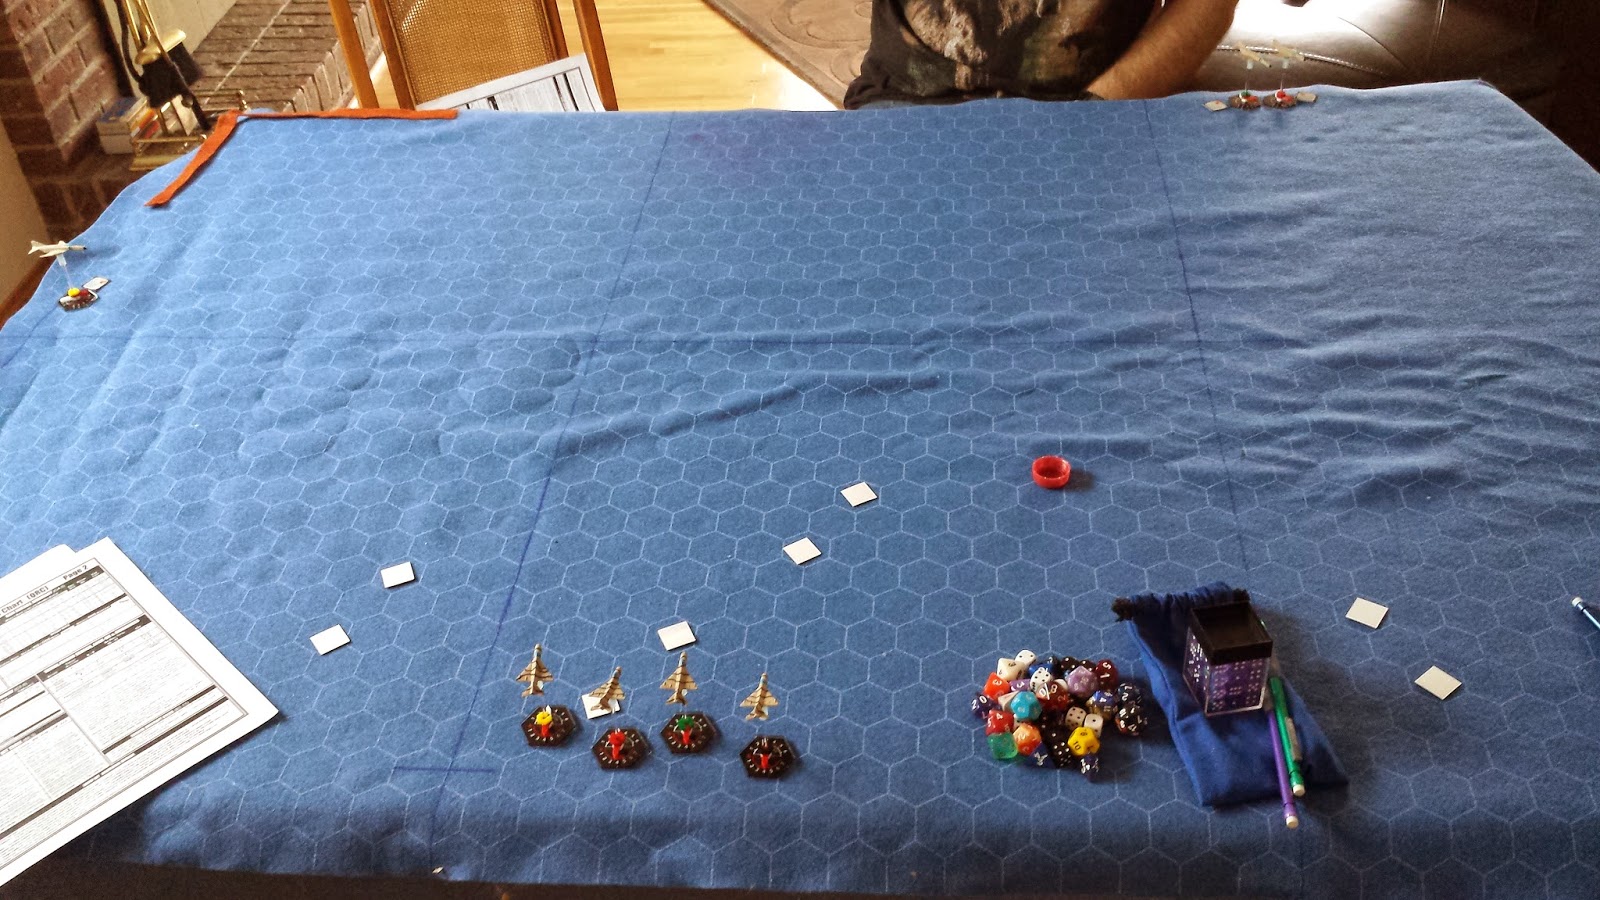
Deployment!

American Extra Rules: Can’t remember!  I forgot to write it down!
Japanese Extra Rules: Combat Stress – One Random Betty suffered Airframe damage but became a Veteran crew!  This ended up becoming Bomber 7 – one of the leaders of a 3-ship V formation.

Betty 7 Becomes Vet, but Damaged!

Turn 1:
The Betty bombers move towards home (pretty much all they’ll be able to do all game).

Zeros on the east side of the formation are too far out of position and turn left, hoping to intercept the Americans in a turn or two. Or three. Or…

The other Zeroes move straight, ready to intercept the Americans.
The front formation of P40s split, two went after the bombers, two went to buy time by engaging the Zeros.

Guns blazing, and the fight was on!

One P40 was shot down going head-to-head with Zeros, but managed to damage a Zero in the exchange of fire!  Another P40 shot down one of the Bombers.

P40s get their 1st Kill!

Zeros & P40s Go Head-To-Head!

Two planes shot down and 2 damaged at the end of the first turn.  And it would only get worse!

End of Turn 1 / Beginning Turn 2


Turn 2:
The Americans failed to damage anything, but the Zeros shot down another P40!

Zeros Tag-Team another P40!

End of Turn 2 / Start Turn 3


Turn 3:
Things didn’t appear to be going well for the Americans.  2 more P40s were shot down and this time a Bomber caused Engine Damage to another P40.  The Japanese lost another Bomber, this time the Veteran Crew in the damaged Bomber #7.

P40s and Bombers Trade Shots!

Zeros Continue To Pummel P40s!


End Turn 3 / Start Turn 4


Turn 4:
The Americans started putting on the pressure and successfully shot down another Betty Bomber.

Another Betty Bomber Shot Down!

End of Turn 4 / Start Turn 5


 Turn 5:
The American pressure was starting to yield results; 1 more Betty Bomber was shot down this turn and another bomber damaged for no loss to the Americans!

1 Betty Damaged, 1 Betty Shot Down!

End of Turn 5 / Start Turn 6


Turn 6:
The Damaged Zero dove to disengage this turn.  

The P40s managed to damage another Betty, but the Zeros shot down another P40!

Another Betty Damaged, another P40 Shot Down!

End of Turn 6 / Start of Turn 7


Turn 7:
The Zeros went to close in once more on the Americans, but the remaining P40s suddenly dove and disengaged, leaving the Japanese alone…

End of Game!


At this point, 4 Betty Bombers had been shot down, 2 damaged and 3 undamaged and 1 Japanese fighter was damaged.  Rolling to see what happened to the damaged aircraft, both bombers and the Zero crashed (dismal rolling on my part).

5 American P40s had been shot down, 1 damaged.

Final VP Counts:

Japanese:
12           -3 Bombers Undamaged @ 4VP each
20           - 5 P40s shot down @ 4VP each
 1            - 1 P40 Damaged
33 VP

Americans:
48           - 6 Medium Bombers Destroyed @ 8VP each
 4            - 1 Zero Shot Down
 4            - 2 Veteran Crews shot down @ 2VP each
56VP
American Victory! 

Great Battle.  It looked like the Japanese might pull off a Victory, but the Americans pulled off a couple of good hits in the end and the bombers crashed (counting as kills)!  Those 2 bombers made the difference between American & Japanese Victories!

Now, If you’ve read my earlier reports, you know the Campaign Book is split into multiple Mini-Campaigns.  This was the last mission of the “Darwin” missions.  Checking these battle reports, the Americans won 3 missions, the Japanese 2.  Per the Campaign Rules, winning 3 or 4 missions is worth 1 Campaign Point.  Winning all 5 missions is worth 2 Campaign Points.  Thus, the Americans are in the lead with 1CP vs 0CP for the Japanese.

The book contains 3 more mini-campaigns:
Port Moresby    (5 Scenarios – worth maximum of 2CP)
Wewak                (7 Scenarios – worth maximum of 3CP)
Rabaul                  (7 Scenarios – worth maximum of 3CP)

Overall Campaign points are compared at the end of the campaign, the difference determines:
Even Score          Draw
1-3 Wins              Minor Victory
4-6 Wins              Major Victory
7+ Wins               Crushing Victory!

Based on how often we play CY6! And these battle reports, we might finish the campaign by . . 2021?!?!?!

Port Moresby Campaign is Royal Australian Air Force vs Japanese Nave – almost all Fighter vs Fighter missions.  There are a couple with Japanese VAL Dive Bombers thrown in for a change of pace.

Wewak Campaign is back to the US Army Air Corps taking on both the Japanese Army & Navy Air Forces.

The final campaign at Rabaul is the US Marines and Navy taking on the Japanese Navy and Army, with US Army Long Range Bombers thrown as well.


Anyway, I hope you’ve enjoyed this write-up!  Now go paint some figs and have fun! 

Sunday, May 24, 2015

BatRep: CY6! - Jet Age: Red Target: Skyhawk

Sorry for the lack of activity!  It seems after years of contract work, I finally landed a Permanent Position!  With my Professional Life stabilizing, hopefully I can post more frequently than of late!

So Graham wanted to do some “Check Your 6! Jet Age” and this was the next mission in the campaign book: “Star And Pyramid”.  So, away we go!

Date:  25 July, 1970, 1000hrs.
Location:  West of the Suez Canal (Egypt)
CAB:  Low & Surface Low (Ground level to ~ 9000ft)
Situation:  The Soviets had started deploying their own troops and pilots to Egypt.  Israel restricted missions to within 25 miles of the Suez to prevent engaging the Soviet pilots.  It didn’t always work…

A flight of Israeli A4’s is on their way to attack an artillery position when they are intercepted by Soviet Fighters in the area.

Mission:
3 Artillery Guns, with 2 Light AA Weapons and 2 Man-Portable SA-7 IR Missiles protecting the guns.
AA and SA-7 must roll a D6 and roll 3+ to target an enemy fighter within 6 hexes of a friendly.  If failed, they MUST target the friendly aircraft.
Israeli:
4 X A4H’s must try to destroy the 3 guns.  Each Gun is a Point Target and takes 2 Damage Points to destroy.  The A4’s have a Medium Bomb Load and count as Fully Loaded. 
Soviet:
MiG 21MFs have 4 X AA2 IR Missiles each.  Shoot down the Israeli Aircraft before they complete their missions.

Optional Rules:
Soviets: One SA-7 Battery has Skilled Crew instead of Green
Israeli: Half the A4’s (1 Skilled and 1 Green) are delayed and don’t arrive until turn 3

Deployment:
Guns were deployed as far away from the Israeli Table edge as the rules permitted.  Light AA was deployed in between Israeli and Guns.  The SA-7 missiles were deployed hidden – to be revealed when (if) they fired their missiles.

Deployment Before the Optional Rules were rolled...

Israeli Deployment AFTER Optional Rules were rolled!


Turns 1-3:
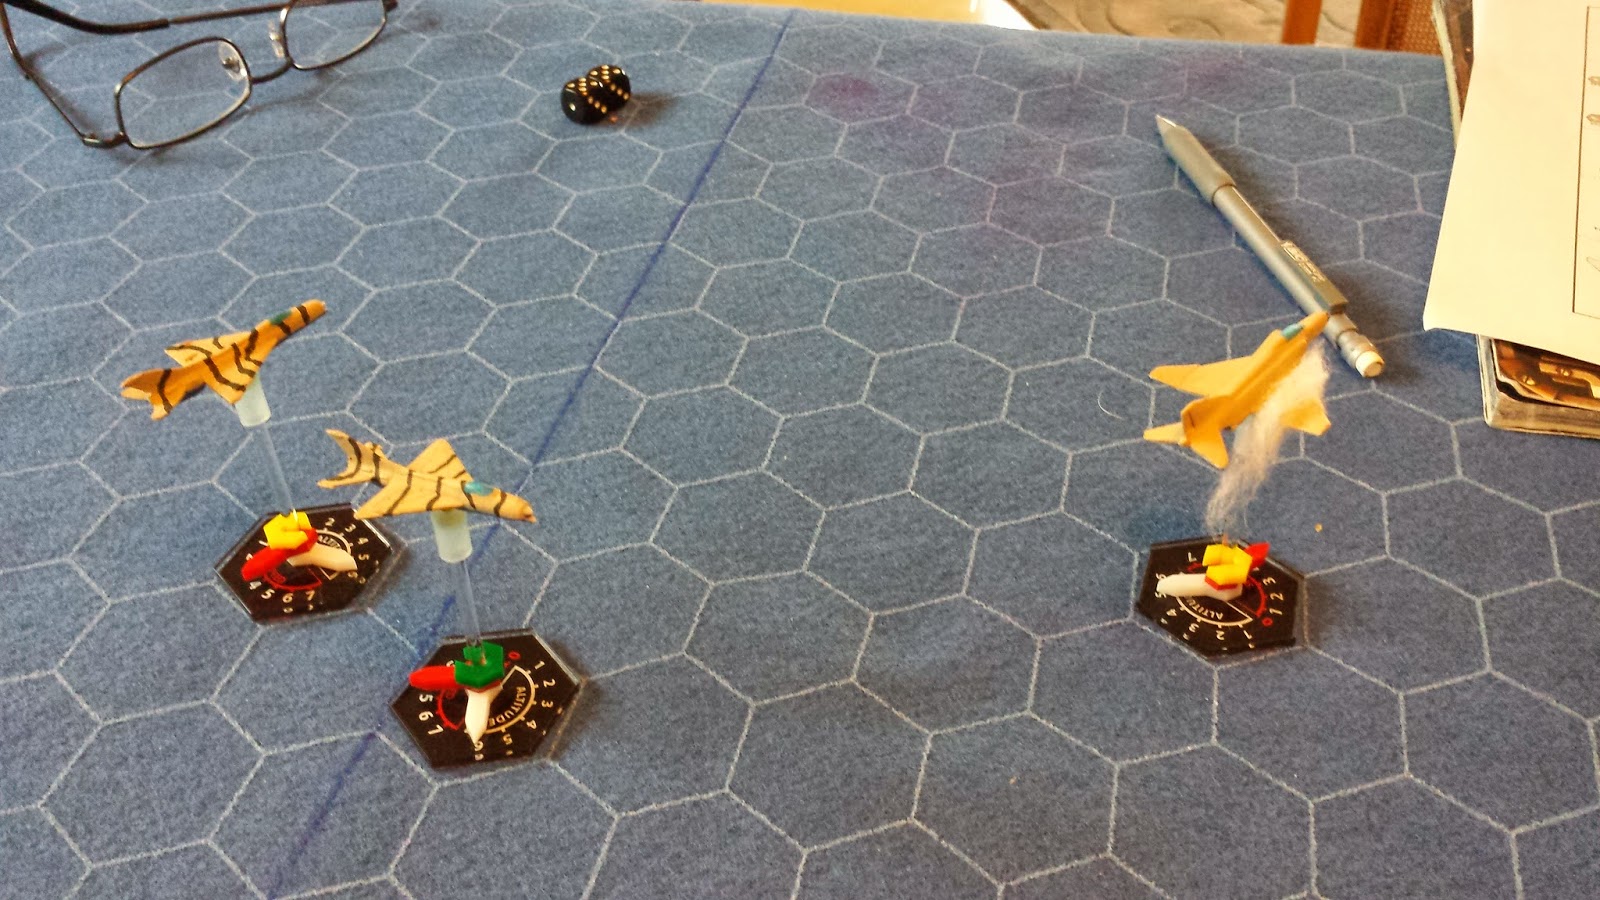
The Israelis, forced to fly as two separate flights, moved forward at max speed (5 with full loads), and climbed to TAL 5.  MiG–21’s maneuvered to get rear aspect shots with AA-2 IR Missiles.  The Green MiG managed to get a Missile shot, but then we realized he couldn’t fire as he had performed an Immelman.

Turn 4:
AA and SA-7 Fire missed the A4’s.  The Green MiG launched an AA-2 missile, but missed.  The Black A4 made an attack on one of the Guns, but failed to hit it!

Missile Away . . And MISSED!

Turn 5:
The Black A4 made a Steep Immelman, but realized too late he reduced his air speed to Zero!

AA guns failed to hit either A4, and the Yellow A4 made a successful Dive Bomb Run on one of the guns, but only damaged it (Single hit).  Both MiGs fired AA-2 Missiles at the Yellow A4, but both missiles missed their targets.

A4 makes successful hit while the other STALLS!

Turn 6:
The Black A4 managed to recover without stalling the aircraft!  The Yellow A4 made an Extreme Turn to port.  The Yellow MiG made another Missile Attack on the Black A4, but missed AGAIN!!!  By ONE!

Another Missile Attack Fails To Hit!

Turns 7-8:
Lots of maneuvering, but no one was hit or damaged.  The “late A4s continued to fly straight forward, 1 behind the other. 

End of Turn 8

Turn 9:
As the 2nd Flight of A4’s flew by one of the AA Guns, the Gun managed to get a direct hit on the Blue A4, which caused the bombs to detonate and destroyed the A4!  The explosion killed the crew before they could eject!  The SA-7’s fired their last missiles, but both missed their targets.

AA Gun Shot Down An A4!

The Green MiG fired another A2 Missile and FINALLY, it homed in and destroyed Yellow A4!  No parachutes were seen as the A4 fell from the skies.  Two Kills in 1 turn!

MiG FINALLY Gets a Missile Kill!


Turn 10:
The Green A4 managed to make a successful bombing run and destroyed one of the Guns with a Direct Hit!  All other shooting missed!

A4 Destroys a Gun!


Turn 11:
The Game would end in turn 12 and Graham conceded the game at this point.

Final Score:
Israel:                   3 Points (1 Gun Destroyed)
Soviets:               10 Points (2 Planes – 5 points each)

Soviet Victory

 +++++++++++++++++++++++++++++++++++

This was a tough mission and the fact that the Israelis were forced to come in as 2 waves instead of 1 really hurt their chances!  Graham really was at a huge disadvantage in this mission as a result.

It also didn’t help in missions like this that your opponent knows EXACTLY what your mission is.  We’ve been spoiled by Dystopian Wars where you draw Secret Random Missions.  Knowing the Israeli Mission meant I could place the Guns, the AA guns and the SA-7’s to make it as difficult as possible.  While in reality, it makes sense in a war-setting to make a defense in depth like I did, it makes it that much easier when you know exactly which direction they’re coming from.  I think it might have been more interesting if the Israelis could roll randomly which table edge they came in on or how deep into the table they could deploy.

Also of note; I believe this is the first time EVER that we had ground fire actually take out a plane in Jet Age!  I needed to roll 11 or 12 on 2D6 to get a hit, so I really wasn’t expecting anything from the AA guns.  The SA-7’s on the other hand only needed 7+ to hit and they all missed!  I had placed the SA-7’s so that they would get at least 1 god missile shot as the A4’s approached the Guns, but it didn’t work!

Which brings up an interesting point.  I kept missing my “To-Hit” rolls all game by 1!  It was so bad that Graham broke out into a laughing fit somewhere around turn 7 or 8 and couldn’t regain control for a couple of minutes.  Ironically, after this fit, I shot down 2 planes in one turn.  The dice must have felt sorry for me…


Good game for me, but again, I think the Israelis (and Graham) really drew the short straw on this one.  Sorry Graham!

Sunday, October 19, 2014

BatRep: 2-Kill Over The Canal (Check Your 6! Jet Age)

Before we start - please check out the Events Page.  Posted new information regarding Legiocon 2015 & JimCon.  If you're in Winnipeg or the surrounding area - check it out!

++++++++++++++++++++++++++++++++++++++++

Needing a break from DW for a bit, we decided to face off in Check Your 6! Jet Age.  Once more, we decided to do a mission from the Star and Pyramid campaign book.

The Date: 10 July, 1970, 09:30

Location: West of the Suez Canal, Egypt

Situation: Russians have decided to help Egypt by deploying a SA-3 Surface to Air Missile System (SAM) to help defend the Suez.  The new missiles have caused problems for the Israelis and they have launched a mission to take out one of the SAM sites.

Mission takes place between Surface and Low CABs (Combat Air Bands), giving both players a total of 12 TALs (Tactical Altitude Levels) to maneuver within. 

The Israelis launch 4 A4H Skyhawks, fully loaded with (medium) bombs and 2 Mirage IIICJ Fighters with Drop tanks and 2 AIM9B Infrared Missiles (IRM) each.  Israeli Aircraft deployed to the west of the Suez Canal at Low Cab, TALs 1 & 2 (equivalent of 7 & 8 TALs above ground).

The Egyptians had the SAM SA-3 battery, which deployed hidden, also had a Light AA battery and a Medium AA Battery to deploy, not hidden.  The Egyptians also got to deploy 2 cloud formations (10 hexes each).  Finally, on patrol were 2 MiG 21MF fighters, each with 4 AA2 IRM.

Egyptians rolled Special Mission Rule “Tactical Training” and deployed hidden (I actually plotted their moves off the table).  Israelis rolled “Israeli Intelligence Operations” and discovered the location of the SAM site!  It was no longer hidden and the enemy knew exactly where to go and bomb it!  Ouch!

Mission - Israeli Forces:
Get more Victory Points than the Egyptians by destroying the SAM site and/or Fighters!

Mission – Egyptians:
Have More Victory Points than the Israelis!  Start with 10VP if the SAM site is intact at the end of the game.  As well as normal Kill points for Aircraft, Egyptians get, 1 VP for every Israeli Aircraft still in Zone A, B, C or D at the end of Turn 15!

Start of the Battle


The Battle:
Turn 1:
Things started slowly with the Israelis moving straight forward.  The AA and aircraft failed to spot each other.  This was because everyone was beyond the visual range for this game.  In spite of the Radar, the SAM was unable to detect any Israeli Aircraft.  The MiGs, hidden at CAB Surface, TAL1, moved forward towards the Israelis and the Suez on the southern half of the map.


Turn 2:
MiGs (still hidden) continued to move forward.  The Israelis started to turn to port (left) as they reached the Suez.  Mirages dropped their drop tanks in preparation for Air Combat Maneuvers.

In the Discovery Phase, the Mirages spot the Medium AA battery, but the battery failed to spot the Mirages.  The A4s failed to spot anything (they were out of range), while the SAM finally spotted the Israelis over the Suez.

The Egyptian’s SAM got a Missile Lock-on one of the A4s over the Suez.  Not enough to fire, but it would be able to next turn.


Turn 3:
MiGs continued straight forward at low level.  The A4s started a dive to the Surface CAB level, TAL 5 and turned towards the SAM site.  The Mirages continued towards the A4s, not turning, not dropping into the lower CAB.

In the Discovery Phase, the MiGs are finally Spotted by the Mirages and placed on the table – almost Head-to-Head with a flight of A4s!  The A4s spot the Light AA Battery.

Finally, the SAM launched 2 SA-3 missiles at one of the A4s, and while 1 missile malfunctioned, the other detonated with a Proximity Blast to the Israeli Aircraft.  

The A4 managed to avoid Major damage, but suffered a Lucky Hit (he rolled Double 6’s on his Robustness Save)!  Rolling on the Lucky Hit Table, the A4 suffered “Elevator Damage”, forcing the plane to do a Steep Dive next turn (fortunately he had the height to avoid crashing).  The A4 also suffered damage to the Afterburner (not that the A4 had one) and was not able to perform Special Maneuvers or Extreme (tight) Turns for the rest of the game.  Fortunately, the A4’s Wingman was not behind the damaged plane as it could have suffered damage from debris falling from the damaged aircraft!


Turn 4:
The MiGs flew straight forward, climbed to TAL2, still below the A4s going the opposite direction.  The damaged A4 dropped to TAL2, below the Radar Horizon, so the SAM site lost Lock-on with the damaged plane.  The rest of the A4s dove to TAL3 and increased speed to 5.  The Mirages dropped to Surface CAB, TAL5 and increased speed to 7.

The SAM got a Lock-on on another A4, but was unable to fire this turn.  No one else had a shot.


Turn 5:
The MiGs do a Split-S and are in good position to launch their AA2 Atol Missiles – Except you can’t launch these missiles after performing Extreme Turns or Special Maneuvers (DRAT)!  The A4s continued forward and the Mirages continued to head towards the A4s, side-slipping and dropping more altitude.

In the Discovery Phase, the SAM site discovered the A4s were too close to launch, so proceeded to get Radar Lock on a Mirage.

Finally, 2 A4’s did a strafing attack on the Light AA battery, which fired back.  Sadly, the AA Battery failed to hit the A4s, though the A4s succeeded in destroying the Light AA Battery.

Light AA Battery Destroyed!


Turn 6:
The A4s continued forward, towards the SAM site while the MiGs hit the Afterburners for an extra 2 spaces movement to close in on the A4s while the Mirages performed an Immelmann Turn to lose speed and gain some altitude.

One MiG launched a missile at an A4, but the missile malfunctioned and spiraled away, uselessly.  The Other MiG launched a missile at the A4 with Elevator Damage and caused Airframe damage with another Proximity Blast. 

MiGs damage a Skyhawk!

The SAM Site lost its target as the Mirage, turning towards the MiGs, also turned towards the SAMSite, increasing the minimum distance required for the SAM to activate.  As long as all the aircraft were facing the SAMs, the Minimum Range was increased to 30 Hexes – all aircraft were now well within this range.  The SAM site would not have another opportunity to shoot unless one of the Aircraft turned sideways or away from the SAMs.


Turn 7:
The MiGs used Afterburners once more, increasing their speed an extra hex/turn as well as moving an additional Hex this turn – still in good position for a Missile shot on the A4s.  The Mirages dropped in behind the MiGs.

The one MiG fired at another A4, but the missile malfunctioned once again!  The other MiG was unable to fire as a cloud blocked its Line-Of-Sight (you cannot fire IRMs through clouds).  The Mirages, found themselves too close to fire missiles and too great a height difference to shoot their guns at the MiGs.  They would attempt to remedy that next turn.


Turn 8:
The A4s were in 2 dual-plane formations.  One formation moved forward and prepared to strafe the SAM Site.  The other formation (with the damaged A4) moved forward beside the other formation.  The MiGs continued to tail the A4s and prepared to launch another volley of missiles while the Mirages prepared to launch against the MiGs.

The A4’s failed to damage the SAM site with their strafe attack while both MiGs launched missiles at the other formation.  Once missile malfunctioned and fell to the ground without the motor firing, the other spiraled directly into the tail pipe of an Undamaged A4, obliterating the plane!  No parachutes were spotted, the pilot killed in the massive explosion of the fully loaded bomber.

Splash 1 A4!

Before the MiGs could celebrate their accomplishment, a missile from the Mirages blew apart one of the MiGs!  Having diverted his attention to the attack on the A4s, the Mirages got into perfect firing position against the MiGs!  No parachute was seen leaving the MiG – another Kill!

Splash 1 MiG 21!


Turn 9:
Well, the inevitable happened.  The 2 A4s that strafed the SAM Site last turn over-flew the SAM Site and dropped their bombs.  The first bomb attack failed to damage the SAMs, but the second plane’s attack succeeded where the first had failed – Target Destroyed!  The Israelis had accomplished their mission!

SAM Site Destroyed!

Seeking revenge, the last MiG launched another missile at the A4s, but once again, the inferior quality control failed the pilot and the missile failed to track.  The Egyptian Pilot’s disappointment was brief as the Israelis’ quality control was better and a missile from the Mirages caught up and destroyed the last MiG!

Another MiG Destroyed!


Turns 10-15:
With the Egyptians’ planes gone and the SAM destroyed, there really was nothing to do except see if the Israeli planes could get across the table before their time was up.

The damaged A4 could not turn fast enough to avoid flying off the table (its damage prevented extreme turns and it was traveling just a bit too fast to make the turn it was required to avoid flying off an “unfriendly” table edge).  We rolled and per the rules, the plane crashed and the crew was captured – counting as a “Kill”.  That made it 2 “Kills” each.  

The Mirages made it off the table with plenty of time (nice to be a super-sonic fighter), but the remaining A4s made it off the required table section by the skin of their teeth.  No extra points for Egypt that way.


Victory Points:
Israel:
2 X MiG 21s @ 2 VP each = 4VP 
(We were both shocked at this one, but the campaign book was quite specific)
1 Skilled Pilot shot down =  2VP
Destroyed the SAM Site = 10VP
16VPs Total!

Egypt:
2 X A4 @ 5VP each = 10VP
1 Skilled Pilot shot down = 1VP
11VPs total!

Israeli Victory!

++++++++++++++++++++++++++++++++++++++++

WOW!  A Nail Biter!

When we first started the game, I offered Graham his choice of sides and he picked the Israeli side because he Liked F4 Phantoms!  I forgot to mention to him this mission didn’t use any.  ;)

After his initial disappointment, he thought I was cheating again when I told him the SAM site was hidden and then rolled that the MiGs were hidden as well.  He stopped complaining when he rolled that the SAM site was no longer hidden…

Overall, I think this was a very interesting mission.  It was the first time we used Ground Support and targets with these rules and it wasn’t as bad a learning experience as I thought it might be.  We hit a few rough patches, but mostly that was due to us having forgotten the rules or doing things out-of-sequence, but I think we got it all worked out by turn 6.

I did learn a few things, mostly by reviewing my mistakes.  First mistake was the deployment of the Medium and Light AA Batteries.  I tried to “bluff” the location of the SAM site by placing one in each of C & D sections of the map, but the limited ranges and the placements meant that the light AA only got to shoot as it was being attacked and the Medium was so far out of the way, it never got off a shot!  I probably should have placed the batteries in a line, East-to-West and closer to the SAM site so that the AA “might” have been able to protect the SAM better.

Mistake 2: I didn’t read the capabilities and, more importantly, the LIMITATIONS of the SA-3 SAM.  Due to the closing speed, the SAM needs more distance (and time) to lock-on and attack (30 hexes).  The table was only 45 hexes long.  I couldn’t shoot at anything approaching the SAM site once the planes crossed the Suez.  Side Arc is 15 Hexes minimum.  If I had noted that, I could have tried to Lock-on to a Mirage in turn 4 and launched in turn 5, possibly destroying a Mirage and maybe saving a MiG for another turn.  NAHHH!  This is me we’re talking about!

Mistake 3: In Turn 7, I kept the MiGs after the A4s when the SAM Site’s fate was pretty much sealed already.  I should have had 1 MiG Break-off his attack run and try to attack/disrupt the Mirage attack run.  Doing that, the other MiG MAY have lasted longer to destroy another A4 or more while the Mirages could (hopefully) be kept too busy to Interfere.  It was a gamble, but I at least wouldn’t have been doing a “blind sacrifice” to save an already doomed target.

On the Israeli side, I only see one “mistake” and that was the handling of the damaged A4.  If it had turned a turn earlier or reduced its speed, it wouldn’t have flown off the wrong table edge and allowed the pilot to be captured.  A bad oversight as it gave me more points.  Actually, as the plane was damaged, it would have had to make a safe landing roll (and failed) and the crew would have had to try and survive (and failed a 2nd roll) using the same dice rolls.  Graham rolled pretty badly on both.  I think that pilot was doomed, anyway.


Still, it was a good game and I look forward to another mission sometime soon!  I hope you enjoyed this!

Thursday, May 15, 2014

Product Review & BatRep: Check Your 6! – Jet Age

Long time between posts and suddenly I got 3 already in 1 week!  WOW!

So, took a break from Beta Testing and Graham and I decided to try “Check Your 6! Jet Age”.  The rule book has been out for quite a while, gathering dust on my shelf.  So this is the first time we ever played this game.

The Rules:
Basically, this is the classic “Check Your 6!” WWII game, updated with higher speeds, multiple Combat Altitude Bands, Radar and Missiles.

All players plot their movement in secret.  Then moves are made, starting with Out-Of-Control aircraft, slow Aircraft (bombers, etc), Green Pilots (Skill Level 0), then progressing through the Skills up to Aces (Skill +4).

Now the 2 games change a bit.  Due to Radar and “Beyond Visual Range” missiles, you try to first spot the enemy (using either Radar or Visual Spotting.  If you spot, you can attempt a Radar Lock and fire a Radar Homing Missile (RHM), or attempt to launch an Infrared Guided Missile (IRM), or just shoot him with your guns IF your plane has any!  (Have to remember, there are periods where nations thought that guns were obsolete and didn’t include them!)

Not only do you roll to see if missiles hit, you also roll to see if they MALFUNCTION!  Older types have a greater chance of failing than newer types (Vietnam was notorious for this, which is one of the reasons why they re-introduced guns).  Missiles also have a Minimum and Maximum range – also a good reason to have guns for those knife-fights!

IF you happen to attack with a missile, there is a chance it missile launch be detected (your opponent rolls for this) and if spotted, he may perform Evasive Manoeuvres, making it harder to hit and causing him to do Extreme Manoeuvres next turn.

Missiles that do hit have a chance to either do a Proximity (near) hit or Direct hit – having different numbers of dice for each.

Damage, Lucky Hits, Guns etc, all perform the same as the original CY6!  So, let’s play!

Like the original, CY6! – JA already has a number of scenarios and Campaign Books to help you plan missions or campaigns!

The Mission:
First Kill: Phantom          (Star and Pyramid Campaign book)
(This mission is also in the Jet Age rule book, but has been update in the Campaign Book.  I chose this mission as it was fairly simple and not too many aircraft.)

Date: 9 December, 1969, 1800 hours
Egyptian Ground Control detected an Israeli Reconnaissance Plane (RF-4E) and are directing a flight of 4 Mig-21F-13 Fighters in for the intercept.  Two Israeli F4 Phantoms are waiting to escort the Recon Flight home…

Israeli Forces:
RF-4E Phantom II has a recon pod and 1 Aim-9B Sidewinder IRM, as well as Wing Tanks, making it “Half Loaded”.  The plane will enter on the west (short) edge of the table, Low CAB, TAL2, speed 5.
2 X F-4E Phantom IIs, each with 2 AIM-7E Sparrow RHM and 4 AIM-9B Sidewinder IRM, plus Wing Tanks (making them also at Half Load).  They are loitering in the North East table corner, Low CAB, TAL4, Speed 5.

All planes have Rotary Cannons & all planes have Skilled Crew (+1)

Israeli Mission:
Get more Victory Points!  Damaged Fighters are worth 1VP, Destroyed are worth 4VP.  Bonus points for shooting down Veterans.  A Bonus of 2 VPs if the RF-4 goes off the table within the 15 hexes of the North-East Corner (Sector F, Edge 6)

Egyptian Forces:
4 X Mig-21F-13 Fighters, each with 2 AA-2ATOLL IRM and a Long Range Heavy Cannon (LRHC).
3 Crew are “Green” Crew (0), one is a Veteran Pilot (+2)

Egyptian Mission:
Get More Victory Points!  (Sound familiar?)  Also, the Egyptians get a Bonus +1VP if the RF4 exits the table from any other edge than the Israeli’s.

Planes will start off “hidden” (I will use extra tokens to represent double possible locations until they are spotted), flying in the Western side of the map, Surface Low CAB (Ground Level), TAL3, Any speed.

The Game Begins!
First, both players roll a D10 to determine an “extra” special mission rule, just like the original CY6!

Israelis rolled that the RF-4E suffered “Mechanical Problems” – it would suffer double reduced Agility at top speeds.  Egyptians rolled “Open Formation”, allowing them to deploy 2 MIG-21s in the bottom South-East table corner.
Initial Deployment
MIGs are represented by 4 of 8 white squares


Turn 1:
The Egyptian MIG21s all started to climb, hoping to conserve energy as they approached the enemy.  This turned out to be a mistake!  The Israelis spotted all the hidden MIGs in the first turn!  Re-reading the rules, if I had stayed at TAL 3, the Israeli Radar performance would have been greatly reduced!

The 2 F4s managed to get Radar lock on the 2 MIGs in the South-East corner, but not able to get “Lock-And-Fire”, so they couldn’t shoot this turn.

Going on…
The MIGs all sped up and moved forward, one looking to get in the tail cone of the RF4, another aiming for an intercept angle while the 2 in the South-East went head-to-head with the F4s.  Turned out to be a good decision – the MIGS (Black & Red) flew in too close for the F4s to use their Radar Missiles!  The angle was wrong for Heat Seekers (this time period, they were only useful if launched at the target’s rear arc).  The Israelis, having spotted the MIGs dropped their tanks so they were no longer at “Half-Load”

Intercepting the RF4


Eastern Hairball about to begin...


The fight quickly developed into 2 separate dogfights.  In the West, MIGs Green & Yellow fought with the RF4.  In the East, the 2 F4s (Red & Green) got into a tight turning circle with Migs Black (the Vet) and Red (Green Skill!).  Due to the tight turnings, both Radar Locks were broken.

Breaking Radar Lock!


First shot of the game was F4 Red taking a gun shot at MIG Red in turn 4, but missed.

By Turn 5, all the planes on both sides were flying at CAB Surface Low, TAL6 – all good altitudes for a gun fight!  Eastern fight was a tight-turning counter-clockwise circle.

Turn 6 had the MIGs in the FR4’s rear arc, but having done Extreme Maneuvers, the missiles couldn’t be fired! 
"Almost got him!"

 The Eastern “Hairball broke apart as both sides attempted to break the stalemate at the same time.

Turn 8, both MIGs in the west finally got off AA2 Atoll (IRM) Missile launches on the RF4.  The RF4 managed to spot 1 launch and dodged it, but the missile from MIG Green got a direct hit!  Sadly, Graham failed is Robustness Roll by 1, so only suffered Airframe Damage instead of being destroyed. 

RF4 Takes a HIT!

Meanwhile, in the East, F4 Green managed to get a Radar Lock On & Fire at MIG Green at a range of 21 Hexes, but missed by 1!

Turn 9 had the RF4 spin out of control as a result of his Evasive Manoeuvres last turn, falling a TAL level in the process and rolling a random hex side for facing.  Sadly, the rules state you cannot fire on an aircraft that is out of control.  MIGs Green and Yellow circle the stricken RF4, just in case…

The Vultures circle the Out-Of-Control RF4!

Turn 10 and the RF4 recovered from his spin, darn!  In the East, the climbing, diving, turning hairball continued, but F4 Green failed to hit MIG Black with guns.

Turn 11, MIG Green got a Missile Shot at RF4, but missed.  RF4 doing another Evasive Manoeuvres next turn.  On the other side, MIG Black and F4 Green go Head-to-Head with guns, both missing!

Turn 12 and the RF4 tumbles Out-Of-Control again!  (Dropped to TAL2!  If he falls 2 more, he crashes!)  In the East, MIG Red snaps a shot off at F4 Green, missing by 1!

Turn 13 and the RF4 continues to tumble!  The Hairball of the East continues as MIG Red Runs out of Ammo!  MIG Black missed a shot at F4 Green.

Turn 14.  DARN!  The RF4 recovers at ALT1!  MIG Black missed another gun shot at F4 Green.

MIG 21 Vet Runs Out Of Ammo?!?!?

Turn 16 and the RF4 managed to get off the table, but on the wrong edge!  Automatic 1VP for the Egyptians!  Meanwhile, the MIG Black took another Gun Shot at F4 Red, but ran out of Ammo!  NOoooo!!!

We roll to see what happened to the RF4 and because of the damage and flying off the table into Enemy Territory, it crashed, counting as a KILL for another 4 Points!  5VP for the Egyptians!

Turn 17 had both the Black and Red MIGs breaking from the Hairball, heading South-West as Green and Yellow MIGs head towards the F4s, having chased the RF4 away.  F4 Red failed to do a Lock On.

Turn 18 and MIGs Black & Red do a 180, heading back towards the F4s while MIGs Green & Yellow close in with the F4s, Head-to-Head.

Turn 19 and MIG Black fired a missile at F4 Red, but the missile malfunctioned!

Turn 20, the F4s had had enough and kicked in Afterburners, heading for home.  MIG Yellow fired an AA2 Atoll at the departing F4s, missing by 1!

We realized the F4s would escape next turn and called the game!

Egyptian Victory!  5 – 0!

================================================

WOW!  Good Game!  This was definitely a game of chance!  In the end, only one aircraft was hit and could have made it home successfully except for a bad dice roll!

If I kept records correctly, we fired off 6 Missiles of various types, and only 1 hit in the entire game.  Meanwhile, 9 gun shots resulted in NO hits!  Really bad rolling on both our parts!!!  My Dice are back!


Game Rules Impressions:

Having read many accounts of air combat in this era, the results of the missile reliability is pretty close to historical, so I would say the game is reasonably historic in its results.

The game system is pretty simplistic, allowing a short learning curve and quick, but fun games.  If you’re looking for a game that has lots of detailed Electronic Warfare, concerns of Fuel Consumption or lots of Beyond Visual Range fighting, this probably isn’t the game for you.  There’s not much detail here.  For example, while the MIG 21 has a different Maneuvering Chart than the F4, they both have the same +2 Agility Rating (Agility ranges from 0-3).  The Finesse points are all generalized for a more simple game play.  It’s Pilot Skill that usually wins the battles here – not performance factors of the aircraft.

While the game covers Jet Age from Korea through Falklands, the Aircraft Listings is not as complete as I would like.  They’ve concentrated on aircraft that are known to have participated in actual combat.  Some of the Cold War Warriors and weapon systems are not included.  (The CF100 “Canuck” for example or the Multi-Rocket Anti-Aircraft “Shotgun” Pods that were used for a very brief period.)  This makes it difficult to do “What If…” scenarios.  They even forgot to include the F18 Hornet in the 1st Printing of the book, though they included the stats in the Errata. 

On the other hand, like the Original WWII books, all the campaign books for Jet Age seem to be complete.  All major aircraft for particular warzones and battles seem to be included.  At this time, there are books for Korea, Egypt – Israeli wars from 1966 – 1973. And the Pakistani – India wars.  The Rule book also contains mini-campaigns for Vietnam, Falklands and Angola.  Between them all, there are a wide variety of missions and time periods to choose from.

One thing we noted during game play, is that you need to be careful doing classic Zoom Climbs.  While you can plot a Jet Climb that will let you climb 4 TAL levels in a single move, this will stall most aircraft.  Even Afterburners don’t help most aircraft from reducing speeds to dangerously slow speeds under these conditions.  So forget the “Viking Takeoff” with an F16 or F15 and expecting to keep accelerating straight up, forget it.  Those of you hoping to do some “Specialized Manoeuvres” that are aircraft-specific, forget it – those manoeuvres just don’t exist.  On the other hand, you can do High-Speed Yo-Yos (over 2 turns or more) or multiple Scissors, etc.  You can even do that “Maverick Stall” from the movie Top Gun, but I wouldn’t recommend it… 

Overall, this is a good to great introductory Jet Air Combat System for those who don’t want to get too detailed or over your head.  I look forward to playing more games soon!


Hope you enjoyed the read!

Wednesday, December 11, 2013

BatRep: Road to Rabaul Campaign Book, Fool Me Once

So it’s the 4th mission in the “Road to Rabaul” Campaign Book.  Graham was happy with the last battle’s results; the Americans totally munched the Japanese in an overwhelming victory.  If he wins this one, he’ll have guaranteed that he’s won the first part of the campaign.  I’m not willing to just let him just “take it”, though…

Historical Background:
April 27, 1942.
The Japanese had been fooled on the previous mission, not anticipating the increased fighter strength defending Darwin.  Their arrogance had cost the Japanese 8 of their 24 bombers.  They weren’t going to make the same mistake next time…

Bombers were setup 1st (naturally).  They had to cross the table to exit out of the middle table edge.  Due to the hex pattern of the table mat, this meant the Betties were going to have to side-slip (must have been a windy day!) across the width of the table, 2 hexes at a time, to exit the proper table edge.  The formation of 9 Betty Bombers (once again in a single “V” formation) were still loaded down.  The Americans would be on the offensive, this time with 8 P40 Warhawks in 2 flights of 3 and one flight of 2.  Unfortunately, one of those flights of 3 wouldn’t arrive on the map until Turn 3!  So Americans set up second, one flight of 2 (the flight leader was an “Ace” rating : +3 modifier on all dice rolls) to the right, the flight of 3 on the left, heading more or less straight to the bomber formation’s left edge.

(Note: The P40’s on the right look a lot like P39 Aircobras because they are!  I was short P40 models so the P39 did proxy duty!)

The Japanese Escorts set up last; 3 flights of 3 Zeros each.  Per mission guidelines, one flight on each side of the bomber’s “V” and the 3rd flight was set up in front of the bombers.  However, while height and speed are given, orientation was not specified.  So, Flight #3 was set up on the left – going head-to-head with the Americans on that side.  Flight #2 in front of the bombers were turned to face towards the bombers (they had obviously spotted the P40s earlier and had turned to intercept) facing where they hoped the Americans would be at the end of turn 1 while Flight #1 lined up behind the bombers, facing forward, adjacent to the 3 hex zone covered by Flight #2.  This created a 6 hex zone “Kill Zone” that the Americans on the right had to fly through. 

The Battle Begins...

By overwhelming and killing the 2 P40’s on the right with 2 full flights, I had hoped that Flight #1 would continue to fly straight ahead (without having to turn) and engage the American reinforcements as they came onto the table while Flight #2 kept the survivors (if any) busy or fly to the left and help out flight #3 on the left.  I didn’t realize at the time that the American Ace was in the smaller flight.  Also, this was the first mission (EVER) that the Japanese had GREEN pilots (no bonus for any dice rolls) and I wasn’t sure how well they would perform against the American fliers.  Historically, this was the start of when the Japanese war machine was unable to keep up with the demands for pilots due to their losses and fighting techniques.

Another cosmetic issue had to be dealt with: I had 24 flight stands and 26 aircraft on this mission.  The last 2 bombers on the end of the “V” formation were left to sit on the ground as a result.  If you see them in the photos, they haven’t run out of gas or flown too low – we just ran out of flight stands!  Sorry!  :-}

We rolled for mission variable rules:
Americans rolled “Hill of Beans” – no special rules.
Japanese rolled “Java Veteran” – one Skilled Zero is promoted to Veteran.  I chose to promote the flight leader from Team #3.

Turn 1:
So, the game started!

The Betty Bombers side-slipped to the right (as I explained earlier), towards the middle of the opposite table edge. 

Hind sight being 20/20, I think this took Graham off-guard as suddenly his P40’s on the left were no longer facing the bombers, but Fighters!  He flew straight forward towards Flight #3 as the Zeros also closed in for a Head-to-Head pass.

On the right side of the map, the American Pair turned to engage Flight #2 in a point-blank, Head-to-Head pass while the Zeros of Flight #1 could only fly forward, unable to provide supporting fire this turn.

Tracer fire was hypnotic between the fighters as the bomber crews watched in fascination.  On the right, the flight leaders failed to damage each other from a range of 1 but 2 Green wingmen blasted each other out of the sky – First Blood on both sides!  (Got to love simultaneous fire!!!)

First Blood!  (I got you 1st!  NO! I got you 1st!!!)


On the left, again in a head-on-pass, most of the tracer fire was ineffective but the Zero’s Flight Leader managed to get a good solid cannon hit and another American P40 disintegrated under the heavy-hitting cannon fire. 

Another Head-To-Head Encounter Ends Badly...


Ouch!  Two P40’s shot down in the first turn!  This left just 3 American fighters on the table against 5 Zeros!  Worse, the ace was left by himself against 5 Zeros!  The bombers hadn’t been threatened or damaged yet and the American reinforcements were still 2 turns away before they even got on the table!

End of Turn 1


Turn 2:
Once again, the bombers continued their right Side-Slip.  And waited…

On the right, the Lone P40 Ace did a hard-left turn, sliding out of the firing arc of the Zero leader who had done a Split-S while the surviving wingman flew forward and out of the way.  Flight #1 continued straight ahead, prepared to intercept the American as he engaged the bombers next turn.

The American Ace Gets Away!

 On the left, the two American fighters did a hard left turn towards the bombers,  The Zeros of Flight #3, anticipating some sort of trickery, had broken their formation.  The flight leader had done a Split-S maneuver and just managed to get the lead P40 in his (narrow) gun arc.  His wingmen had both done hard turns, one to the left, the other to the right, just to clear off any P40’s that might have maneuvered onto the other’s tail.

Tracer fire stitched across the sky, searching for a target.  The American Ace on the right took a medium range shot, but failed to damage a bomber this turn.  (WOW!  I FINALLY PASSED a Robustness Roll!)  Both P40s on the left also missed their targets.  The Japanese flight leader, however, made a successful hit on the lead P40 on the left.  Checking the damage tables, Graham needed to roll a 9+ to prevent damage to the plane.  BOX CARS!!!  Graham rolled a 12, handily passing his Robustness Save, BUT it was still a double, indicating a “Lucky Hit”.  So we rolled on the “Lucky Hits” table.  The result?  “Pilot Killed – Plane Crashed”!  So close but so far…

Death by Lucky Hit!

Sadly, the Zero that shot down the P40 had his own problems.  He had held down the trigger a little too long and was now out of ammo.  He had no choice now but to disengage…

This left the Americans with only 2 P40’s on the table.  While his reinforcements would arrive next turn, Graham’s flight of 3 P40s would be too far away to get involved for at least 3-4 turns.  And the bombers still were undamaged!

End of Turn 2


Turn 3:
Unsurprisingly, the bombers side-slipped to the right…

On the far edge, the flight of 3 P40’s came onto the table.  From a distance, they could only watch and encourage their comrades over the radio.  On the right, the P40 Ace charged head-first at the bombers, a Zero following not far behind while Flight #1 moved forward 3 hexes, flying over the bombers.

On the left, the American P40 turned to the left, just a little too soon, leaving all the bombers outside his firing arc!  Actually, it was a fortunate error as a Zero had anticipated the “proper” turn arc and would have had a shot if the P40 ended its move where it should have.  The Zero that ran out of ammo last turn did a power climb, effectively taking it out of the fight.  It would continue to climb out of the battle over the next two turns.  The last Zero, which had turned hard left last turn, was now well out of position and continued to turn to the left, hoping to get into the proper facing before the reinforcements could engage.

Bad Angle, But Safe From Zeros!

From Point-Blank range, the American Ace missed his target (He rolled Snake Eyes!)!  (Fortunately, because he rolled so low, his Ace was NOT out of ammo!).  Meanwhile, multiple bombers and two Zeros were shooting at the American Ace.  The nbombers failed to hit.  Both Zeros hit the hapless fighter, and though the Pilot made the Robustness Save against one hit, he just couldn’t dodge the damage of the 2nd hit.  The American Ace was down!  Sadly, the Zero that got the killing shot also ran out of ammo this turn.

Death of an Ace!

This would leave the Americans with only 4 fighters on the table, of which only one was in position to do anything next turn.

End of Turn 3


Turn 4:
In a Surprise Move; the bombers side-slipped to the Right!  (No!  Really!)

Basically, the last P40 fighter of the original force made an attack on the bombers, successfully hit one, but in a surprise (to BOTH of us), the bomber passed its Robustness test; no damage!  A Zero put the hapless P40 out of its misery.  The American Reinforcements could do nothing but watch hopelessly.

The Last Casualty

Looking at the table, Graham did the math; 3 P40’s against 6 Zeros and 9 bombers.  (The Japanese had started with 9 fighters, but 1 was shot down and 2 ran out of ammo.)  The bombers hadn’t been damaged yet and he was still 2-3 turns away from engaging.  By that time, the Zeros would have gotten back into proper position and approaching the bombers would have been near-suicidal.  Graham conceded the game and the remaining P40’s dove away for home…

End of Turn 4 & Game!


Victory Points:
Americans:         4 pts      (1 Zero shot down)
Japanese:            22 pts    (5 X P40s = 20, Ace shot down: +2)

Also, I was supposed to get points for the bombers getting off the table.   9 Bombers off the table successfully= 9 X D6 VPs which we didn’t bother to roll!  Another 9 to 54 points depending on how well I could roll!!!

Overwhelming Japanese Victory!

Wow!  Complete turn-around this mission.

You have to ask yourself: Why?

First off, obviously, the Japanese had more escort fighters.  That makes a huge difference.  More importantly, I got to choose where they were (somewhat) and what direction they were facing AFTER the Americans were deployed.  That was a HUGE difference.  Last mission I had less choice and placed 1st.  As a result, one flight never really got involved in the fighting - I was defending bombers with 3 fighters against 8 P40's.  There was no way to stop the American onslaught under those conditions.  This mission, with more fighters and better placement, every flight had at least 1 round of shooting and a kill.

Next, you have to discuss the American deployment.  Having 3 fighters delayed for 3 turns meant an uncoordinated, piecemeal attack.  Worse, it meant they were outnumbered from the beginning of the game thoughout to the end.  This is a complete reversal of the last mission and while Graham tried his best to pierce the fighter cover, he just didn’t have the time he needed to attack the bombers before his planes came under fire.

Finally, Graham’s unbelievable luck last game deserted him.  Last game he made countless Robustness Saves.  He just was unable to do that this game.  The one time Graham did make the save, the pilot was killed by a lucky hit.  The problem is, when you take a hit with a low velocity cannon (the Zeros all have 2), you need to have failed the roll by 1 or 2 to suffer only damage.  A difference of 3 or more will result in instant destruction due to the destructive power of the cannon.

Overall, I don’t think this or the last mission were truly fair.  Both missions were designed to make it nearly impossible for a fair fight.  As a historical perspective, they are both accurate as the battles turned out historically (in this battle, it was a historical failure for the Americans).  As a “teaching tool” or “historical experience”, it was a good mission.  As a fair fight – definitely not!

So where does that leave us?  Tied at 2 games each!  Next game will be the tie-breaker and the last mission of this phase of the campaign!


Unfortunately, it IS another bomber mission…