Showing posts with label Guadalcanal. Show all posts

Saturday, December 29, 2012

BatRep: CY6 – Guadalcanal: Mission 6: “On the Run”

So, no new posts this week - good thing I kept those old "Check Your 6!" reports handy!!!  So; another blast from the past:

==============================================


So, Graham and I started the 6th Mission.  Once more I forgot the camera, but managed to take shots using my cell phone.

 Mission starts with a little dialog and decision making.  Americans launch Marines in Wildcats & Army Air Corp in Aircobras to intercept the Japanese bombers approaching Henderson Field.  Due to the Army fighters being delivered without proper Oxygen gear (?!?), the Wildcats leave the Army Fighters to catch up as best they can.  Unfortunately, the mix-up delays the intercept and the Marines don’t get to the bombers until after the bombers have dropped their payloads on Henderson Field.  (Bombers did pretty bad – only managed to knock out 3 US Aircraft on the ground out of a possible max of 8.)

 Initial deployment:

Japanese with 9 Betty Bombers (all Skilled) in a V-Formation, trying to fly off the eastern board edge (Approximately 30 hexes away), escorted by 2 groups of 3 Zero fighters (all Skilled Pilots) within 15 hexes of any bomber.

Americans with 5 Wildcats, 1 Veteran pilot, 2 Skilled pilots and 2 Green pilots.

We rolled for Variable rules:

Americans ended up replacing the 2 Green pilots with a single Skilled pilot (Group now had 4 planes: 1 Vet, 3 Skilled).

Japanese rolled to replace 2 Skilled pilots with 2 Green pilots.  I decided to put both green pilots into 1 group with a Skilled flight leader.


Deployment:

Bombers were deployed as far forward as I was allowed for the scenario.  I placed the group of all Skilled pilots about 3 hexes in front of the bombers, between the American fighters and my bombers.  I placed the 2nd group another 3-4 hexes in front of the 1st group of fighters.  That way, in the event the “Green” group got bushwhacked, the Skilled Zeros should be able to take decent shots at the Wildcats.  That was the theory, anyway…


Turn 1:

Basically, we moved closer.  I started side-slipping the “Green” Zeros to my right, while shifting the “Skilled” group to the left.  I hoped to catch Graham in a pincher in the next turn or two.  Bombers would continue to fly straight and level, 2 hexes per turn throughout the game (unless mentioned elsewhere).


Turn 2: No Picture:

DISASTER!!!

Ya know the old joke about the left hand not knowing what the right was doing???

I had each Zero “group” on its own check sheet.  Unfortunately, I mixed them up!  I gave the right orders to the wrong groups!  As a result, my Zeros on the right, turned further right and the squad on the left went and turned further left!  Left a WIDE open hole in my formation for Graham’s Wildcats to fly through!


Turn 3:


So, in wild desperate maneuvering, I got my Zeros facing the right way again.  The “Green” group was too far out of the way to help this turn, but the “Skilled” group managed to catch Graham’s Wildcats in a deflected angle attack.  One Zero went head-to-head with the Veteran Wildcat (In the picture, he's facing the wrong way - I had removed the model from the stand for a pic and forgot to face the correct direction.).  Though the Vet Wildcat hit and blew the Zero out of the sky, the Zero managed to do engine damage to the Vet before he was destroyed. 


Turn 4:
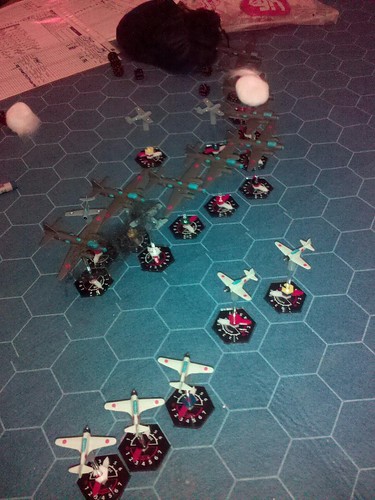

Graham, realizing his Wildcats would be easy pickings if he played it safe, tried to “Razzle-Dazzle” me and split up – going in two directions.  Two Wildcats broke left and failed to do any damage.  Two Wildcats flew through the bomber formation and broke right, each going after a bomber – destroying one (Big white Cotton ball) and damaging the other (Airframe damage – white cotton stream).  The bombers opened fire with all guns that could be brought to bear – no effect.  The “Skilled” Zeros group could not turn fast enough to engage this turn, but the “Green” group got shots off at the Vet Wildcat, failing to damage but now one was in a good tailing position.


Turn 5:
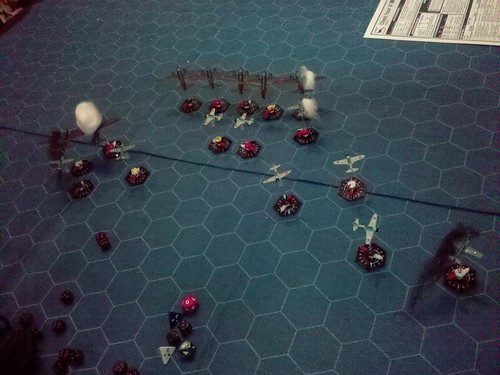

So, the two Wildcats attacking the left wing of my bomber formation were becoming a major nuisance.  The two fighters shot down the previously damaged bomber and damaged another bomber (Engine damage – black smoke).  His damaged Vet tried to disengage by flying towards the board edge, with a Green Zero on his tail, guns blazing (and missing).  The last Wildcat did a Split S or Immelman and went after the bombers on the right wing of the formation.  The Skilled Pilot from “Green group” anticipated the maneuver and caught him with a second blast of weapons, causing Airframe damage, but running out of Ammo in the process!  The remaining planes of the “Skilled” Zero group went after the fighters chewing up my left wing and blasted away, failing to hit.  Bombers also fired and failed to hit.


Turn 6:


So, the last remaining bomber on the left wing – with engine damage, slowed to Speed 1 and did a side-slip to the left, taking himself out of the pursuing Wildcats’ line of fire (WHEW!).  The damaged Vet Wildcat and the Green Zero ended up in the same hex and managed to avoid a collision (Vet passed his crew check, the Zero did not).  The remains of the “Green” Squad went after the damaged Wildcat on the right wing – I had forgotten one was out of ammo, so placed white cotton on the base as a “reminder” for future turns.  His wingman missed but sped up to try and catch-up to the Dang Yankee Flier!  The Damaged Wildcat managed to damage the bomber in front of it, in spite of the attention he was receiving.  On the Left wing, the “Skilled” zeros opened fire and one managed to destroy one of the cursed Wildcats, but ran out of ammo in the process!  TWO Zeros out of ammo now!  Bomber gunners threw out another ton of lead into the skies to “dissuade” the Americans.  At this point, it dawned on me that in the previous 3 turns, I had rolled misses, by 1, over a dozen times!  The problem wasn’t damaging the Wildcats when I hit – it was hitting them in the 1st place!  The only weapons that were hitting were light machine guns (usually required a 5+ roll on 2D6 to save from damage).


Turn 7:
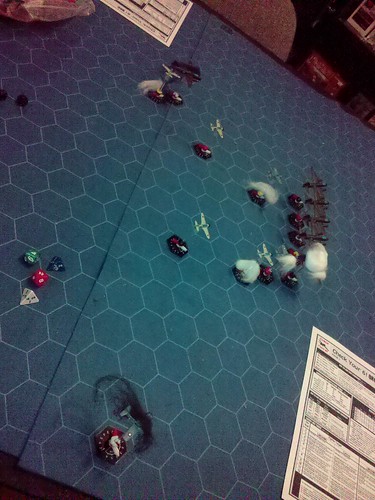

Well, the Zeros without ammo started to climb to take themselves out of the battle.  The Green Pilot and the Vet Wildcat again ended up in the same hex – this time Colliding!  The Zero pilot was killed and his plane tumbled into the sea, whereas the Wildcat just kept chugging on…  The undamaged Wildcat shot and missed his target, while the damaged Wildcat managed to blow up the damaged bomber, but also ran out of ammo in the process!  Three Fighter planes ran out of ammo in 3 turns!!!


Turn 8 – The remaining (Armed) Wildcat finally shot down the bomber he had been after for 3 turns.  The Zeros and Bombers were unable to hit any of the remaining Wildcats. 

At this point, we ended the game.  Graham was down to 1 operational Wildcat and decided he would have left the battle area rather than risk it all.

Graham’s damaged Wildcat was destroyed trying to land (Failed Aircrew check by 1), bringing a total loss of American Aircraft at Henderson Field to 5 (1 shot down, 1 crashed on landing, 3 bombed).  That leaves Americans with only 21 planes left at Henderson Field.  In Mission Victory Points, that would be 1 fighter shot down and 1 damaged: 5 VPs total.

================================================= 

Japanese suffered horribly at my hands.  4 bombers destroyed (32 points), 1 damaged (2 points), 1 fighter destroyed (crashed in collision – 4 points) for a total of 38VPs.

Japanese still have only 900 troops on the island.


So – what went wrong with the Japanese this time?  Two things.

 First: That mis-plot in turn 2 totally screwed up my strategy and allowed the Wildcats a full turn that I should have been able to shoot at them and hopefully get into tailing arcs for following turns.  That was 6 planes worth of shooting that went up in smoke.  It also made 3 planes out of arc and range on turn 3 as well.  So in all, it cost me 9 aircraft worth of shooting.  I probably could have hit and done damage with at least 4 of those shots.  More importantly, it meant I was not able to tail the Wildcats starting in Turn 2 and made it harder to re-engage after I corrected my error.  Dad-gum Air-Traffic controllers on the Japanese radio!   :oops:

 Second: Rolling.  Dice.  Stinks.  Those bombers have guns facing every direction.  On average, each of the bombers had a single shot at one of the Wildcats every turn.  Many had 2 or more shots from turn 3 through 5.  To miss over a dozen shots by a single pip of the dice was demoralizing and depressing.  My curse with dice has been renewed.  I need to break that kind of jinx in my head, heart and soul.  Maybe then things will work better for the Japanese.
 

Wednesday, December 5, 2012

Guadalcanal Missions 2, 3, 4 & 5!!! Pilot Debrieffing


So – Lucky us! We managed to pull off 4 missions this afternoon!
(Actually, we only played 2 games. The 3rd and 4th missions were actually “Role-Playing” scenarios. I had to complete these after the fact as Graham had no interest in them.)

Second Mission of the Campaign was “The Bait”.
 
The Japanese plan was to bait out the hiding the American carriers by launching a raid using the light carrier Ryujo. The remaining Fleet Carriers would then locate and attack the American carriers. Of course – it was more or less a suicide mission for the Ryujo…

The Japanese launched their Kate Bombers (5 – all Skilled aircrew) escorted by 8 Zeros – led by Ace Vidlersan, with 5 skilled pilots and 2 green replacements. The Americans would intercept with 8 Wildcats, led by Ace Logan, a veteran pilot, 2 skilled pilots and 4 Green pilots.

The Kates were in a V formation, 2 elements of 3 Zeros – one on left side, one the right and the ace with his wingman following closely (3 hexes) behind the Kates. The Americans were in two waves – all Green pilots in a line abreast formation in the first wave, with the Skilled, veteran and ace pilots in the second wave, 2-3 hexes behind the 1st formation.

It was a rather quick and brutal affair – game ended turn 5. Basically, the formations closed on each other. Turn 3, the Kates tried to dive under the Wildcats, and actually avoided the Green crews in the first wave, while the Zeros attempted to hit the Wildcats on the flanks. The Kates got shot up by the second wave of Wildcats in a series of Head-on engagements: 1 Kate exploded from Critical hit, 1 pilot was killed and crashed by a lucky hit and a 3rd plane was badly damaged. The Japanese Ace and his wingman managed to share a kill and shot down one of the green pilots, but the remaining Zeros all missed their targets. Turn 4, the Americans successfully anticipated the Kates trying to dive away next turn, plotted Split-S for all the fighters and destroyed the remaining Kates. The Zeros, having failed their missions, climbed away and ended the game turn 5.

Campaign results: Loss of a Green Pilot reduced US Aircraft availability down to 27 planes. Japanese troops on the island remain at 300 strong.

As the Japanese commander, I had made quite a few bad errors. I miscalculated the turn that the planes would close into firing range and my fighters in the flanks were not in position as a result. Worse, I made an assumption that by forcing the Americans to do head-to-head attacks, the Americans would miss as they would suffer a -2 penalty to hit my Kates. I expected a lucky hit or two, not the devastation that Graham managed to inflict in a single head-on pass! I should have planned to attack and break up his charge on the bombers before they reached the bombers rather than hit them as they hit the bombers. I then forgot to dive my Zeros after the Kates and Wildcats in Turn 4, so I was hopelessly out of shooting range (2 Altitude Levels – can only shoot 1 level difference) by end of movement in turn 4. By the end of shooting phase of turn 4, I had already lost all the Kates and the mission was over.

Graham and I handling that many aircraft became kind of tedious. Fortunately for me, the Bombers basically maintain their same plot so there’s little or no change. Handling 8 fighters by oneself is cumbersome and problematic. The more formations, the more difficult it is to track and keep everything straight. I actually had to roll Crew Checks for Zeros on the 1st mission because I misplotted and 2 fighters ended up in the same hex at same altitude – twice! Also, at one point, we had 16 fighters, and 5 Kates in a mass about 8 hexes wide and 3 deep – multiple hexes with multiple planes. A very congested situation – we had to be twice as cautious to avoid confusion.

==========================================
Third Mission was a Role-Play mission. Enterprise was badly damaged as a result of the previous day’s “bait” mission, so transferred aircraft to Henderson Field (+10 US Aircraft = 37 Total).

The Japanese tried to rush a convoy to the island during the day. The Americans were able to discover the run and attacked, successfully hitting the convoy – forcing it to return to Port. In the battle, the Americans lost 3 more planes in the actions over the convoy. The Americans also managed to launch a successful B17 Raid that hit the Japanese forces on the island, causing the Japanese to lose 100 troops!

Total American Forces: 34 Planes at Henderson
Total Japanese Forces: 200 Troops on Guadalcanal
=========================================

Fourth Mission of the Campaign: “Bouncing Bettys”
In response to the attacks on their convoy, the Japanese launch a bomber raid (9 Medium-Sized Betty Bombers) on Henderson Field. The Bombers approached Henderson in a single V formation – with NO Escorts within 20 hexes of the western edge of the map (45 Hexes wide). The bombers were able to get a bonus of 6 hexes closer to the Eastern edge (Banzi!) and were allowed to dive from TAL 4 down to TAL 2 during the mission (“We’re going in!”). (Got both rules by rolling a 9.) Americans deployed within 15 hexes of south east corner and got “Trigger Happy” rule – all Green pilots MUST shoot if they have a possible shot.

Once again, Bombers just advanced forward – this time at Speed 2 - towards the Eastern edge every turn. With guns on the bombers facing all directions, I should be able to do something! I hoped…

The Betty bombers were more robust than the Kates (R1 compared to R0 – it seemed to make a HUGE difference!). Most of the guns on the Betty are Light Machine Guns (D4 damage - very hard to require more than a 4+ save on 2 X D6), but I was hoping for some Lucky Hits to help out (rolling doubles on the Robustness save causes a Lucky Hit). While I got a couple, Graham was able to pass crew checks to avoid the effects of most. He caught fire a couple times but put them out before the fire caused damage to his planes. The Rear guns on the Betty are a Low Velocity Cannon (D10 damage) and did most the real work for me.

The bombers managed to damage two Wildcats which crashed on returning home (both green pilots: -2 Aircraft availability = 8 Victory Points). In the end, 3 of the Betty bombers made it off the table to complete their bombing missions. Using Victory Points in a “single Mission” mode, a medium bomber was worth 8 points, so Graham would have 48 points for downing 6 bombers, whereas each bomber getting off the table was worth 10 VP for the Japanese for a total of 38 points for the Japanese. A win for the Americans. However, my 3 bombers successfully destroyed another 6 aircraft on the ground, for a total of 8 aircraft lost for the campaign in a single mission!

Americans: 26 Planes Left
Japanese: 200 Troops Left

With the Betty Bombers in the 2nd game, it was difficult trying to keep straight which bombers had shot which weapons and that caused some confusion. I thought I was clear, but a couple of times, Graham thought I had made mistakes – doubling up on bombers. Turned out he hadn’t realized I was shooting waist guns at different targets from the same bomber whereas he thought I had moved onto another bomber. While I was able to handle the plotting, the directing of Defensive guns for 9 planes really slowed down the game. Unfortunately, I don’t think it could really have been sped up with more people handling the load. You had to calculate shooting for each arc on each plane separately. That was Potentially 27 shots per game turn from the 9 bombers to track!
==========================================

5th mission was another Role-play mission.
Japanese were given option to send 1000 troops on fast destroyers or 4000 on slow transports. Having already failed to reinforce the island once already, I decided the fast destroyers were a safer bet – Especially travelling at night.

The Americans decided to send 10 aircraft out to search for the Japanese fleet, holding 16 aircraft back to launch a strike when the fleet was located.

Playing with the numbers per the instructions, rolling some dice, and the result was in:
American fliers would spot the fleet as dusk settles over the island, but looses the fleet in the darkness. They would not be able to attack the fleet.
The Japanese were able to unload 700 troops without incident.

Americans: 26 Planes Left
Japanese: 900 Troops Left
================================

So far - Campaign has been interesting. Definitely find the larger battles really should be played with 2 or more players per side, but it can be managed by a single person with patience.

Also, using 2" hex maps was better than 1.5" (size of the base of the flight stand we used were 1.3 - 1.5"). It allowed us to shuffle 2-3 planes in a single hex when we required it. While it shortened the play surface a bit smaller than the recommended 45 Hexes by 30 Hexes, it hasn't made a huge difference. Shuffling the starting positions usually works to get the same results.

Sunday, November 4, 2012

Guadalcanal BEGINS! Pilot Debriefing for “Check Your 6!”

I'm a little busy at the moment, but I think we need some material to add to the Blog.

This is a Battle Report for Check Your 6! - Graham Logan and I played the campaign Last Summer, and it was originally posted on Imagaine Games & Hobbies Forum in April, 2011.

I'll try to add more new stuff next time!

===============================================================


So, I finally got things put together and assembled.  It was time to play!

In case you’re not familiar with “Check your 6!”, it is an Air Combat game that uses Pre-plotted, semi-simultaneous moves and simultaneous fire.  That is:

- Everyone plots their next move at the same time, but are moved in Phases dependent on the skill level of the pilot, nationality, tailing, etc...  Better pilots move later and have an opportunity to change their move codes (but not by much) dependent on what they see developing before their move.    All shooting is done simultaneous – you don’t have to worry about losing your chance to shoot before you are shot down.

It is a Hex-based game – needs to be played on a map of some sort with hexes.  Preferred hex top is 45 hexes long by 30 hexes wide.  1.5” hexes are about the right size for a 4’ X 6’ table.  Models can be any scale, but unless you have a larger surface, I would stick to smaller models.  1/144 scale is good for small games (2-4 planes per side), but larger battles should be on 1/300 scale.  Bombers at 1/144 scale can be quite large and overhang smaller hexes by quite a bit.  You could user paper counters as well.

There is a 3D element to the game.  Usually, a battle will take place in a single Combat Altitude Band (CAB).  This determines things like Ground, Cloud Boundries and aircraft performance as you go higher into the atmosphere.  Most planes suffer the higher they go unless designed for the higher bands.  Each CAB is broken up into 6 Tactical Altitude Bands.  This can be represented a number of ways, but basically, you can usually shoot one level up or down as well as your own TAB (with some criteria).

Playing our 1st mission in the Guadalcanal Campaign book.  (“Taking the Measure” if you happen to have the book!)  Capt. Graham of the Imperial Japanese Navy was leading an escort mission of 6 X A6M2 “Zeros” on a carrier strike.  They couldn’t find the carriers, so proceeded to fly to Tulagi to find targets of opportunity.  They ran into 4 X F4F “Wildcats” from the newly arrived Marines of VMF 223 at Henderson Field.

Check your 6! gives little tweaks to the missions by rolling a D10 and special narrative Campaign provides additional modifications.  For this mission, Graham had 1 fighter that had to add an Extra +1 to all his crew checks on 1 aircraft (his choice) and start rolling for low fuel after Turn 12.  If he failed that roll, his planes had to break off and try to escape as quickly as possible.  His six planes were deployed on the far Eastern edge of the board, having to fly to the North-West corner (his “safe” edges), about 45 hexes away, in two 3-plane formations.  The Japanese fighters were all “Skilled” Pilots.

My fighters had to deploy in two formations of 2 fighters in the South Eastern section of the map, one flight 15 hexes away from the other, determined by random dice roll.  Fortunately, they were more or less Line-Abreast formations.  Originally, I had 1 “Veteran”, 1 “Skilled” and 2 “Green” pilots.  However, the random event table gave me a free upgrade for 1 “Green” pilot to become “Skilled”.  I had the Vet with the remaining Green pilot on my left and the two Skilled pilots in the other 2-man formation to the right.

On to the destruction…

Graham and I started off facing each other, Graham at Altitude 5, me at Altitude 4.  For the first 3 turns, we more or less closed with each other at maximum speed (4 hexes for both plane types), myself slowly climbing from Level 4 to 6, while Graham maintained Altitude5.  Suddenly, at turn 4, I pulled off my first “sneaky” move.  While Graham plotted to fly straight and close to within shooting range with both flights, one on one, I suddenly dove from Altitude 6 to 5, gaining an extra hex in movement, and turning my Right-hand flight to engage Graham’s flight on the left – so both of my flights closed on one of his!  Graham’s flight on my right couldn’t make the turn quick enough (we made an error here, he should have had the opportunity to try to modify his plot, but I mixed up the rules a bit here).  Graham found his three fighters on my Left in a partial cross fire, with both of us at “medium” range (4-6 hexes apart).

Not that it helped much…

It would take 2 more turns of shooting at each other before, finally, my Veteran did an Immelmann turn (1/2 loop upwards)  as a Zero passed by and hit the Zero as it passed.  The Zero took Airframe Damage which reduced his Agility.  One of my Skilled pilots would finish off the job next turn.    Doing mostly head-on-passes, both Graham and I had to roll VERY well: usually 11+.  During this time of maneuver and shooting, Graham had also managed to hit a few times. 

We quickly discovered historical accuracy of the game at this point:  Historically, American fighters would not engage in a 1-on-1 dogfight with the Japanese Zero as it could out turn them.  They would do High-speed hit-and-runs.

Although the Zero was more maneuverable on paper, it had a -1 agility penalty when flying at maximum speed (4 Hexes).  This was causing a penalty to Graham’s ability to hit me as we had been continuously flying at Speed 4 to close.  When he realized this, Graham slowed his Zeros from Max speed (4) to speed 3.  While doing this gave him a bonus on his to hit rolls, it let me keep my speed advantage and allowed me to break away and maintain that important 4+ Hex range that made his cannons difficult to hit with.

Also, Graham was hitting with his Light Machine Guns but couldn’t damage the Wildcats with them – they were too tough!  In order to use the Low Velocity Cannons that were on the Zero, he had to close to be within 3 hexes as there was a -2 penalty to hit at medium range.  At Medium range (4 – 6 hexes), Zeros needed 11+ (2D6) to hit with the cannons (no other penalties or advantages), but at Short Range, he would be able to hit on a 7+ (2D6). 

As long as I was able to keep my speed up and do Hit-and-run, I was doing well.  I was able to keep the Zeros at the 4-5 hex range which was driving Graham nutz! 

Finally, when Graham did hit with his cannon, his luck failed him.  Each weapon class does damage based on a dice roll.  Light machine Guns on the Zero based their damage on a D4.  Heavy Machine Guns on a Wildcat do damage on a D6.  Low Velocity Cannons on a Zero (it has 2) do damage based on a D10.  To complicate matters – IF you roll maximum on any dice, it counts as having missed!!!  You DON’T want to roll maximums!  If you roll too high, you can hit with the light machine guns and still miss with the cannons.  When only Graham’s light machine guns were hitting, they only did 2 X D4 damage.  When hitting with Everything, Graham’s Zeros caused 2 X D4 + 2 X D10 damage.  When Graham finally hit with his cannons, he rolled very low on the D10, wasting his hits.  You add up the Damage roll, cross reference a Robustness table and based on your damage and the planes Robustness, determine what save you need to roll.  Add in my higher toughness, I was saving (on average) 5+ on 2D6.  Same hit on a Zero would require a save of 7+, but I was hitting with 6 Heavy machine guns – 6 X D6 damage - his save was typically 10+ or more.

After maneuvering around each other, all we were able to accomplish were mostly head-on passes, requiring very-high numbers to hit.  After the first Zero was shot down, Graham was finally able to get a good shot with a cannon hit on a Wildcat, causing engine damage.  The Wildcat proceeded to “Out-Fall” the Zeros out of the combat area (dropping below Tactical Air Band 1) and get away.  The Vet Wildcat Pilot managed to get on the tail of another Zero.  I rolled a decent shot and blew the Zero out of the sky in one burst!  (If you fail your saving throws by too large a sum, you bypass damaged and go down to Destroyed.)

Around this point, Graham decided he better run away before he ran out of fuel.  About Turn 9, he started to scatter and climb most of his aircraft in different directions.  Unfortunately, Wildcats don’t climb as quickly as Zeros.  As I wasn’t expecting the climb, he got out of my Altitude range on the turn 9 and kept on climbing until Graham was able to get away with his remaining 4 Zeros.

Final Tally:

  • 2 Zeros Destroyed – 8 VP
  • 1 Wildcat Damaged – 1 VP  (Would crash on landing – possibly changing this to 4VP)
US Marines win the day!

 ===============================================

Based on the Campaign rules, I rolled for the Damaged Wildcat.  It would crash on landing.  This meant the US would lose 2 planes for the American Fighter Availability.  I didn’t gain any aircraft for destroying the Zeros (needed to roll a '6' on each of 2 dice).  28 Fighters left at Henderson Field to defend the entire island campaign…