Showing posts with label Dystopian Wars. Show all posts

Tuesday, March 15, 2016

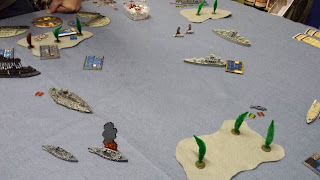
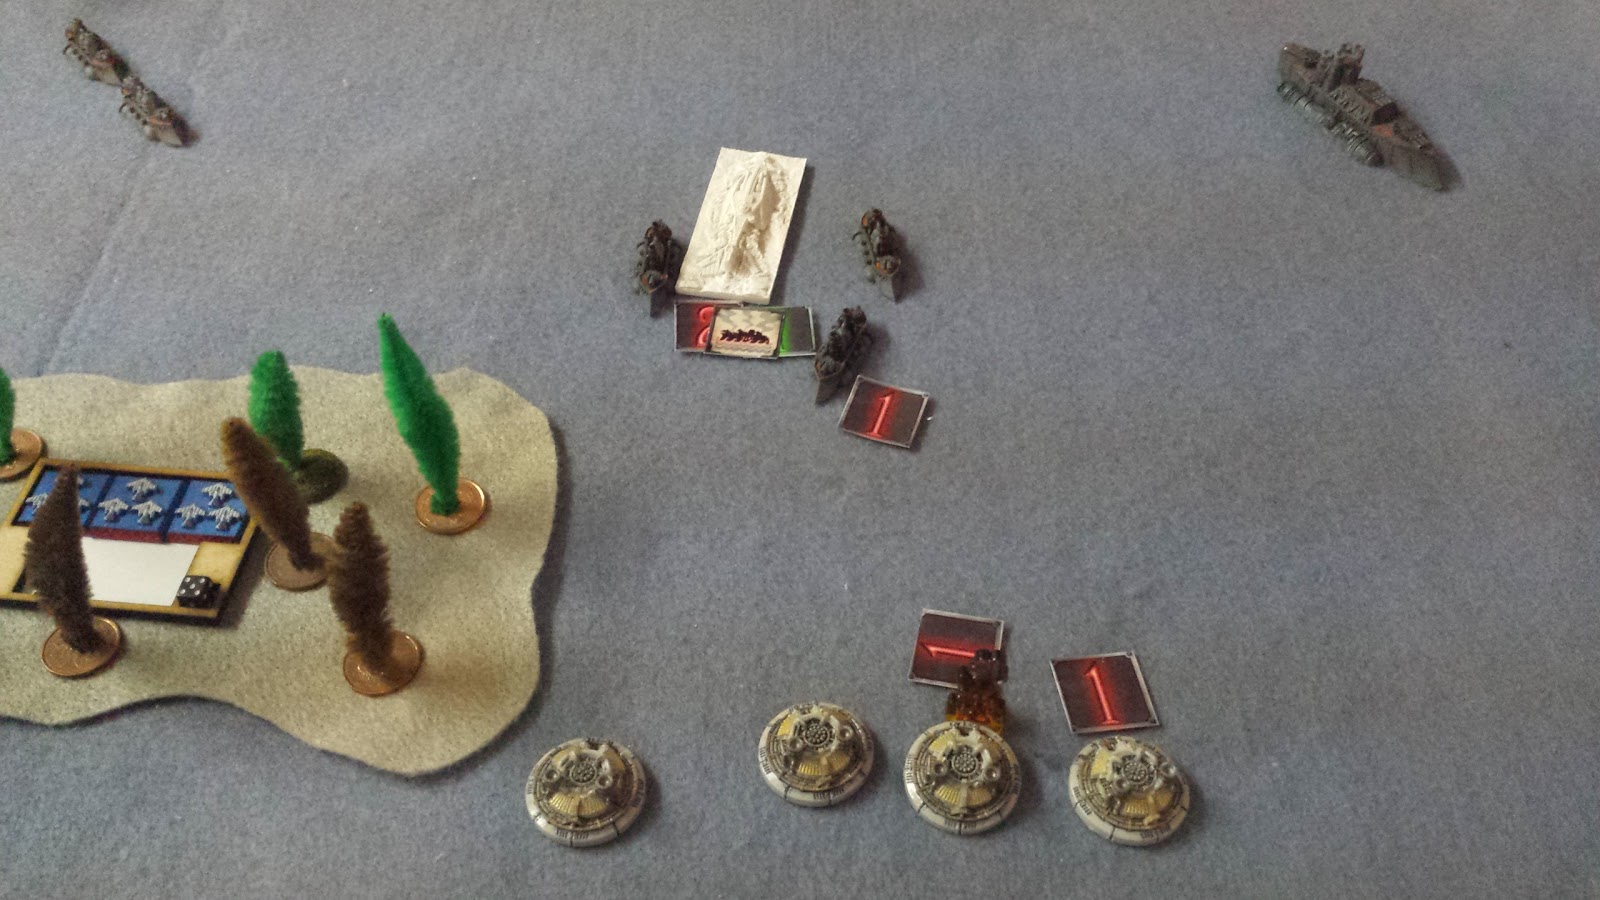
BatRep: Dystopian Wars – 1000 pts Covenant of Anarctica vs Prussian Empire

 Admiral Von Shtupp felt worried.

Once again on the SMS Graf von Zeppelin, the Blucher Dreadnought (and his Flagship), Von Shtupp was out on patrol.  Rumor was that there was an unknown fleet in the area.  A force that seemed to attack quickly, then disappeared.  It all sounded strangely familiar.  Von Strupp just hoped he was wrong…

“Admiral!  The Lookouts have spotted ships on the horizon.  It appears to be a couple of Antarctican Drone Carriers!”

“TWO Carriers?”

“Yes Sir!  Two Fleet Carriers – Pericles Class!  A Battleship has also been spotted!”

“Alert the fleet!  Battle Stations!  Tell the Havels to launch Fighters only!  We’re going fully defensive on Fighter Squadrons!”

This is going to be a long day…
+++++++++++++++++++++++++++++++++++++++++

Haven’t played Dystopian for a while.  (I’ve been playing Infinity lately – a friend is preparing for a tournament nearby.)  Anyway, we blew the dust off the figures and decided to try to remember the rules!  

This report is probably a week late, but better late than NEVER!

This Battle Report is going to be a little different.  To save time, we only recorded the casualties and things of note.  This was supposed to let us get more “playing time” and hopefully complete more turns!

Order of Battle:
CoA Squadrons:

- Percles Fleet Carrier (Commodore’s Ship)
- Percles Fleet Carrier
- 1 Aristotle Battleship
- 3 X Platos Cruisers
- 3 X Plato Cruisers
- 3 X Diogenes Frigates
- 2 X Diogenes Frigates
- 2 squadrons of Drones


PE Squadrons:

- Blűcher Dreadnought w/ Shield & Tesla Generators
- Kaiser Karl Battleship
- 1 Havel Light Carrier
- 4 X Stolz Destroyers
- 5 Saxony Corvettes
- 2 Squadrons of Fighters


Turn 1:
No TAC were used in the TAC Phase.
CoA won Initiative!

Prussians basically moved forward (except the Carriers who stayed hidden behind an island).  The Prussian Dreadnought turned to bring all turrets to bear, shot and crit 2 Cruisers (One sufferest “Chaos & Disarray”, the other “Weapons Damaged”)! 

It looked like the Prussians would have made it through without suffering damage but once the Prussians ran out of activations, which changed when the Prussians lost 2 Destroyers to a long-ranged attack.

Blűcher Opens up and Platos Suffer!
Stolz Destroyers sunk by Cruisers


VPs:
CoA:      40
PE:         0


Turn 2:
Both sides played TACs: Prussians played “Lost Orders” and made the CoA lose their “Battlefield Repairs”!  Anarcticans played “Radio Intercept” to boost their chances at winning the Initiative.
COA won Initiative.

The CoA sank 4 Corvettes with multiple attacks from the Anarctican’s Cruisers, Carriers, Battleship and Frigates!  So much hatred for my Corvettes!!!  (I wonder what his mission is?)

Meanwhile, the Prussians sank a Plato with the Destroyers, another Plato to the Corvettes (before they were sunk, of course), and destroyed 6 Drones! 

The New Drone Rules indicate that instead of being stockpiled and launched again in another turn, there is a chance that Drones will be permanently destroyed in the event the Drone was shot down or scrapped!  This is a HUGE change for CoA and Graham had to quickly re-evaluate his tactics!

 Stolz Avenge their Squadron Mates!
Corvettes Sink Another Plato!
Carrier Sinks Corvette and damages 2 more!
Corvettes get Revenge!
Corvettes start to sink...
And Sink...
and sink some more...


End of Turn 2


VPs:
CoA:      200
PE:         185


Turn 3:
Prussians played “Radio Intercept”, but it was cancelled by the Anarcticans with “Flank Speed” (60pt Card to stop a 20pt card???  I Asked Graham if he was certain, but he insisted!)
CoA won Initiative.  Again…

This turn, the Anarcticans got off lightly.  They lost a single Frigate that made an attack run on the light carriers, to the other Carrier’s broadsides!

The Prussians lost their last Corvette to Dive Bombers and the last two Destroyers to Battleship and Frigates!  The Dreadnought had played “Devastating Barrage” but the Covenant played “Espionage” to cancel it!

There goes a Destroyer...
Frigates attack a Light Carrier, Causing a Crit!
but the Carrier Strikes Back!


End of Turn 3


VPs:
CoA:      305
PE:         310


Turn 4:
The Prussians played “Battlefield Repairs” on the Battleship –restoring it back to FULL hull points!  (The Covenant had over-used their TACs and didn’t have the points to stop me from playing the TAC!)

Why change anything?  CoA won Initiative!

This time, the Anarcticans didn’t have much luck (well, they HAD sunk all the small ships).  The Prussians lost only 1 Light Carrier!  Oh, wait!  It gave up extra Strategic Points!!!

The Prussians (well, I) screwed up!  As the Kaiser Karl was closest to the enemy fleet AND expected a HUGE amount of fire in response to having repaired itself, I panicked and moved it first.  Karl sank 2 Frigates and a Cruiser by itself.  Two squadrons of Torpedo Bombers sank another Cruiser, but because I mobed the Battleship first, I blocked Line-of-Sight (sorta) to the last Cruiser!  As a result, the Dreadnought couldn’t fire its secondary weapons and its primary weapons counted as “Obscurred”, resulting in half the dice per weapon!  As a result – we didn’t even damage the last Cruiser.

Karl Kills A Kruiser..er..Cruiser!
Covenant Battleship fires the Particle Damage & Causes - NO DAMAGE?!?!?
But still sinks a Carrier!


End of Turn 4 & Game!

Game was called on account of time at this point.

VPs:
CoA:      470        “Thin Their Ranks” – All Smalls + 50% of fleet (1 completed)
PE:         470        “Break Their Backs!” – All Mediums + 50% of Fleet (0 Completed)

Technically – a Draw, but Really???
+++++++++++++++++++++++++++++++++++++++++

WOW!!!  Could it get any closer?!?!?
Technically, neither of us completed both our missions, but CoA at least was half way there.  If I could have had 1 more turn, I “probably” could have sunk the last Cruiser, getting me over 50% AND all the Mediums.  On the other hand, I would probably lose my other Carrier and Graham would have won, or worse, both drew a Draw anyway!

I did screw up with the dreadnought, so I have no one else but myself to blame.  I pretty much knew that my smalls were the targets after Turn 2, but I couldn’t have hidden them fast enough to save them, so I opted to go out fighting.  Besides, all together the smalls were worth just over ½ the 500pts he needed to win.  The rest of the fleet was tougher to deal with.

We did get an extra turn, but we were also interrupted multiple times by observers and friends stopping by to chat.  Doing a stream lined report did save some time, but I don’t know if it was worth it.  I sort of miss the details.

What do you think?

Sunday, November 15, 2015

Dystopian Wars: Kingdom of Britannia vs Russian Coalition (1000pts)

Admiral Dimitry Orlov was relaxing in his cabin on the Russian Borodino-Class Battleship, Georgy Pobedonosets II ("St George the Victorious II").  It was good to be home once again, back at sea.

Once more, Orlov was being sent to the Britannian Embassy to partake in some war games.  He dreaded these games as there was no glory in defeating an allie in a wargame, but penalties for failure were real (what with the Russian Political Police).

++++++++++++++++++++++
So, after many moons, I finally got a chance to play a game.  (Don't you hate "Real Life" getting in the way?)

Deployment:
Britannia, north edge, west to east:

  • Hood Battle Cruiser
  • Ruler Battleship with Guardian Generator
  • 4 Attacker Frigates
  • 2 X 5 SAS Fighters
  • 4 Attacker Frigates
  • Hood Battle Cruiser
  • Ruler Battleship with Guardian Generator
  • Eagle War Rotor

Russia, south edge, west to east:

  • 3 X Saransk Skyships
  • 4 X Novorod Frigates
  • 5 SAS Fighters
  • Borodino Battleship with Torpedo / Rocket Jammer (Commodore)
  • 3 X Savoy Cruisers
  • 5 SAS Fighters
  • 4 X Novorod Frigates
  • 2 Chany Strike Submarines

The Start of Game

After deploying terrain and fleets, we drew our random mission cards.  Neither side liked the mission they drew, so we both announced we were doing the default 70% of the enemy fleet mission.  Blah!

Turn 1:
No Cards played during the TAC phase. 

Russians won initiative for Turn 1.  (DANG!)

Russians started things off by moving a squadron of fighters forward, over the island on their side.  The Britannian War Rotor turned to starboard, stayed in the clouds and moved towards the table centre.  Russians wasted an activation by moving the other fighter squadron forward, moving beside the other squadron over an island.  By this point, my opponent realized I was killing activations and started moving his fighters to prevent me from getting a decent shot at something valuable…

Having nothing else that I could “waste”, I moved the two Russian Strike subs forward (submerged).  A squadron of Britannian Frigates moved forward and fired on the subs, but were unable to damage the submerged Russian ships.  The squadron of Frigates on the east side moved behind the island, out of sight of the Britannian forces (with much harsh language from the Britannians, I might add.  Do you sing the Queen’s Anthem with that mouth?). 

Britannian Fighters moved to join the previously moved fighter squadron over the island in their deployment zone.  Russian Frigates in the west moved to Port (mostly to get out of the Battleship’s way and to avoid getting rammed).  The western Britannian Hood moved forward, turned to port and damaged one of the Skyships with long-ranged turret fire.  To stall for time, the Russian Cruisers moved forward their minimum move.  The Britannian Frigates on the west side moved around the corner of an island but found their weapons were all out-of-range.   

Running out of things to move, the Russian Command Ship moved out, trusting in the Tzar, God and Ablative Armour to keep her safe.  Though she was able to get the Lord Hood into gun range, the Range Band 3 Salvo failed to damage the (lucky) Battle Cruiser.  The western Britannian Battleship charged forward like a hound released from its leash and fired on the Russian Battleship.  Surprisingly, the Jammers stopped ALL torpedoes from hitting the Russian ship while Ablative Armour once more prevented damage to the great ship!

For the last activation of the Russians, the Skyships stayed hidden in the clouds, moved forward and fired on the Lord Hood.  Once more, the there was no damage caused to the Britannian Battle Cruiser.  Commander has a horse shoe hidden somewhere on that boat!

With the Russian Activations complete, the Britannians were able to activate their remaining fleet without worrying about Russian Retaliation.  The other Lord Hood moved out and fired on the damaged Skyship, but failed to damage it.  Finally, the last Britannian Battleship played “Stoke the Engines” and moved straight forward to get into range on the Russian Fleet.  Sadly, they were unable to damage anything this time. 

Ironically, the only Victory Points this turn were for the Russians as a result of them allowing the TAC to be played on the Britannian Battleship!

End of Turn 1


Victory Points:
KOB:      0
RC:         40

Turn 2:
In the TAC Phase, the Britannians played “Radio Intercept” (rolled +1 for their Intiative roll) while the Russians played “Espionage” and discarded the Britannian’s “Battlefield Repair” TAC!  20VP each!

Britannia won the initiative – by 1!

Britannia started things off with a bang!  A squadron of fighters “jumped” a squadron of their Russian contemporaries, and successfully shot down 2 token!  For a loss of 5!  The entire Britannian squadron was wiped out!

The Russian Battleship failed its Sturginium Boost roll (does it ever pass it?) and moved forward at maximum speed towards the Hood Battle Cruiser, and crit the Britannian warship (Generators offline), though the Battleships secondary guns failed to cause any damage.

The western Hood moved forward at maximum speed and finally managed to damage the Russian Battleship, though her AA guns failed to damage the Skyships.   The Russian Subs surfaced and attacked the eastern Hood, but failed to damage the Britannian ship.  The Russians then played “Break Neck Maneuver”, but the Britannians cancelled it with “Brace For Impact”, giving up 20 more points to the Russian Cause. 

Of course, the Russian Subs failed their Maneuver test and were caught on the surface by the Britannian Frigates who formed up a perfect Cross-fire for their torpedoes at Point-Blank-Range, before realizing they were too close for torpedoes!  Oops!  It didn’t matter, the turrets made quick work of one (sank with a double-crit) while the other was damaged.  Ther ferocity of the attack shocked the surviving Sub Commander and the sub failed its Disorder test!  First Blood to Britannia!

Frigates Sink a Sub!

The Russian Cruisers failed their Sturginum Boost roll, but managed to move forward far enough to get the damaged Hood into Turret range.  When the smoke cleared, the Hood was gone!  Russia’s First Blood!
Lord Hood Sinks

The remaining Hood Battle Cruiser prepared for a Hit-And-Run attack; turned to port and crit the damaged Skyship (Weapons damaged), then continued forward, hopefully out of arc of any retaliation.

The eastern Russian Frigate squadron popped out from behind the island and sank 1 frigate, damaged another but failed to damage the Hood with their mortars.

Britannian Frigates Are Attacked!

The eastern Britannian Battleship turned to starboard and opened fired on the Russian fleet.  Two Frigates were damaged but the sub was undamaged!

The remaining full-strength Russian Squadron attacked the remaining Britannian Fighter Squadron and shot down 4 tokens for a loss of 4 tokens which left both squadrons with a single token each!
On the west side of the battle zone, the Britannian Frigates moved forward and managed to damage another Skyship.

The Skyships  moved forward, dropped mines in front of the Britannian Battleship and made a turn to starboard, then spotted one of the Frigate Squadrons (only 1 spotted token, sadly).  The Skyships’ guns failed to do any damage.

The Britannian Battleship got its revenge by turning to starboard, avoided the mines and destroyed one damaged Skyship, crit a Cruiser (Guns Damaged) but failed to damage another Cruiser.  The Skyships failed their Disorder Test!

Skyship Destroyed!

The Western Frigate Squadron sort of hid behind the main fleet line, but using the Spotter token, managed to sink one frigate with Indirect fire (the first time ever I can think of that the Russians successfully used Indirect fire)!

Russian Indirect Fire Sinks a Frigate

The Britannian War Rotor turned to starboard and attacked the surfaced sub, but once more, the sub escaped damage.

In the End Phase, the Britannians had nothing to repair or roll for.  The Russians successfully repaired the Cruiser’s guns and then we started to roll to recover from the failed Disordered tests.  The Skyships lost 2 AP on the damaged Skyship, but the Russian Sub was down to 1AP & 1HP after their roll!  The Sub was almost lost!

Victory Points:
RC:         280
KOB:      150

Turn 3:
In the TAC phase, the Russians played “Radio Intercept” (got +3) and gave the Britannians another 20 easy points.

(For the Russians, this was the “all or nothing” turn – I NEEDED 1st turn for my plans to work.)

Russians won Initiative.  (YAY!)

While it looks like the Russians are doing well, the opposite it true.  In order to win, I would need to sink, prize or Derelict 2 of the 3 Battleships and War Rotor.  So far, I wasn't making ant headway there... 

The Commodore took first activation and did something I always forget to do; I declared the Commodore’s Order!  “Sturginium Overload” – All ships with Sturginium boost automatically pass their test; all without get +1” movement anyway!

As the Commodore was on the Battleship – away we went at Full Speed!  At RB2, the Battleship got a Crit on the western Britannian Battleship (Engines Damaged) ( JUST missed a double-Crit) and sank a Frigate.  WHAT?!?!?!  IS THAT ALL????

Russian Battleship Disappoints!

The Britannian Frigates on the east moved forward, sank a damaged Frigate and successfully boarded the surfaced sub!  Realizing that keeping the sub as a prize would leave his ships (and the sub) vulnerable to more boarding this early in the turn, the boarding parties all returned to their ships and left the Sub a Derelict!

Sub Derelict, Frigate Sunk

The Russian Cruisers moved out and played “Devastating Barrage”, which was cancelled with Espionage (more points for the Russians) and while the Turrets failed to damage the Battleship, the broadsides successfully sank another Frigate.

Cruisers sink a Frigate

The western Britannian Battleship moved forward at ½ speed (thanks to Engine damage) and failed to damage a Skyship, but did manage to crit one of the Russian Cruisers (Shredded Defences).  The remaining Skyships stayed in the clouds, moved forward and dropped a linked mine just in front of the other Britannian Battleship, then managed to damage the Britannian War Rotor!

The War Rotor made a 180 degree turn and moved forward.  Gunnery failed to damage 1 Skyship, but the War Rotor managed to Baord and Derelict the other Skyship for a loss of 4 AP.  The remaining Skyship failed its Disorder test!

Skyship Boarded & Derelicted

Frigates on the east moved towards the last Hood and successfully damaged the Britannian Battle Cruiser.  The Hood got its revenge by ramming and sinking 1 Frigate, then shot and sank another Frigate!

Lord Hood Rammed and sank a Frigate..
..Then Sank a Frigate!


The other Russian Frigates moved quickly towards the hood, but failed to damage it, though the mortars did sink another Britannian Frigate.

The eastern Britannian Battleship was forced to run over the linked mine – there simply wasn’t enough room to maneuver away in time.  Sadly, the linked mine wasn’t powerful enough to damage the great warship.  The Battleship then damaged the last Skyship, a Frigate and removed the Ablative Armour off a Cruiser!

For their last moves of the activation, the Russian Fighters “buzzed” towards the War Rotor (with no real hope of damaging the beast).  The remaining Britannian Frigates sank another Russian Frigate.

Another Russian Frigate Sunk

In the End Phase, the Britannians repaired the Battleship’s Engines and the frigates lost 1 AP to the Disorder Test.  The Russian Cruiser repaired its defences but the Skyship lost 3 AP!

The Derelict Sub and Skyship both crashed and/or sank to the bottom of the deep blue sea…

Victory Points:
KoB:       420
RC:         410

At this point I capitulated to the Britannian Commander, but we rolled to see who would get next turn anyway to see what would happen.  The Britannians won the init, moved their Battleship forward and blasted the Russian Battleship at Point-Blank-Range, which caused 3 Crits!  Two from Turreted attacks and 1 from Broadsides! (Raging Fires, Chaos and Disarray, Shredded Defences). 


At this point, there was no doubt that the Britannians would win the battle.  It would just be a matter of time.

++++++++++++++++++++++

Nasty Battle.  I knew the Russians were in trouble as soon as I saw Graham's list.  3 Massive/Large choices are always difficult to deal with and with only 1 Large choice on my side, I was overwhelmed.

I need to re-evaluate the use of Battle Cruisers.  I've not used them because I consider them sort of a "Glass Cannon"; unable to take significant damage.  However, Graham's use has shown how they can be used effectively.  I still think a single Battle Cruiser is too weak, but multiples makes your opponent split his fire (not to mention an extra activation is always nice).

Anyway, hard fought battle and Graham earned the victory.  Congrats!

Tuesday, June 16, 2015

BatRep: Dystopian Wars - 1500pts: Kingdom of Britannia vs Prussian Empire

Admiral Von Shtupp grumbled and fumed to himself. 

Even being on the bridge of SMS Graf von Zeppelin, the Blucher Dreadnought (and his Flagship), couldn’t rid him of the bad humor that surrounded him.  Von Shtupp’s pride had been badly bruised after his last defeat against the Britannians!

To make matters worse, he didn’t have his Carriers with him.  They were back in port undergoing retrofits.  There was no word when he would finally get his Air Support back. 

Finally, he was given a mission to track down the Britannians once more.  No Air Support, limited resources.  How was he supposed to even FIND the Britannians without airborn scouts???

Von Shtupp was an unhappy commander.

“Admiral!  The Radio room has received a message from fleet headquarters.  They’ve acknowledged that there are no fleet carriers or assault carriers that can be sent to help us, but they are attempting to route some resources our way.”

“Did they say if there were any Air assets available for us?”

“It was kind of Cryptic, sir.  They said to expect a rendezvous at 06:00”

“I guess we’ll need to wait.  They probably didn’t want to say anything in case the message was intercepted.”

+++++++++++++++++++++++++++++++++++++++++

“Admiral, sorry to disturb you but the lookouts report two ships approaching.”

“What kind of ships are they?”

“I’m not sure, sir.  They look to be Gunships or Cruisers in size, but they have carrier decks.”

Suddenly, the drone of aircraft could be heard overhead.  Multiple engines.  Something Large.  Something Von Shtupp couldn’t identify.

“Admiral!  The Lookouts report fighters coming in to land on the two new ships!  They are carriers!  But there’s two large fliers the lookouts have never seen before…”

Maybe things are looking up, smiled Von Shtupp…

++++++++++++++++++++++++++++++++++++++++++++++

Once more, the dastardly Britannians were seeking to interfere with the righteous fleet maneuvers of the glorious Prussian Navy!  The Scum!!!

Actually, we got the new boxsets and I wanted to try the new Prussian Toys.  The Prussian Reinforcements consisted of 2 Adler Heavy Bombers and 2 Havel Light Carriers.  I expected the Britannian fleet to want to test out their Halifax Bombers and Stalwart Heavy Destroyers as well.

I did some quick calculations and figured I could use both bombers AND the Carriers in a 1500pt list.  Anything less and there could be issues with the fleet compositions.  Graham was game, so off we went.

My first mistake was making 3 fleet lists.  The first 2 lists were minor changes in composition.  The third list was a radical departure from the other two.  It was “Gunship” heavy, the Havels would be providing all the carrier support for the fleet.  At 1500pts, I would normally prefer a second Carrier choice, but couldn’t fit it into this list.

So we rolled for fleets and of course, we picked the fleet I didn’t really want to use – the “Gunship” list!

We rolled out random terrain – lots of islands this time.  Britannia got Strategic Advantage, Prussia the Operational Advantage.  No advance forces this game, so Prussians made the Britannians start deployment.  Once deployed, we drew our mission objectives, drew our TAC, growled at each other a bit, and started to roll dice…

Setup:

Prussian Empire (West to East or Bottom to Top):


  • 5 Fighters SAS
  • 1 Adler Heavy Bomber
  • 5 Fighter SAS
  • 3 Arminius Frigates
  • 1 Blucher Dreadnought (Commodore’s Ship) with Tesla & Shield Generators
  • 1 Kaiser Karl
  • 1 Konigsberg Battle Cruiser
  • 4 Jager Strike Airships 
  • 3 Donnerfaust Support Cruisers behind the Jagers
  • 1 Adler Heavy Bomber 
  • 4 Fighter SAS
  • 4 Fighter SAS
  • 2 Havel Light Carriers, behind the Bomber and Fighters (and ISLAND)!


Kingdom of Britannia (West to East or Left to Right):


  • 4 Attacker Frigates
  • 1 Hood Battle Cruiser
  • 1 Agincourt Gunship
  • 3 Stalwart Heavy Destroyers
  • 5 Fighters SAS behind the Destroyers
  • 1 Majesty Dreadnought (Commodore’s Ship)
  • 2 Swift Corvette
  • 5 Fighters SAS behind the Corvettes
  • 1 Ruler Battleship
  • 1 Ruler Battleship
  • 1 Hood Battle Cruiser
  • 1 Eagle War Rotor


All Fliers were Obscured in the clouds to start.

Start of Game!


Turn 1:

TAC Phase: Britannia tried to play “Lost Orders”.  Prussia cancelled it with their own “Lost Orders” and gave up 20VP to Britannia.

Britannia won the Initiative.

Britannian Frigates started things off, moved forward at maximum speed but had no targets in range.  A Prussian Fighter SAS moved forward a bit, just to kill an activation.  The Britannian War Rotor moved to the East and fired on one of the Adler Bombers, but missed.  The Jagers stayed high and moved forward but found themselves out-of-range of the War Rotor.  The Hood Battle Cruiser on the West of the battle zone moved forward, turned to port and fired on the other Bomber. Despite the loss of two attack dice for Rugged Construction AND requiring 5+ to hit, the Britannians got a Double-Crit (Engine Damage & 1 Raging Fire) on the hapless Bomber!

Prussian Bomber Used As A Target Drone!!!

The other Western Prussian SAS moved towards the Table Centre.  The Britannian Gunship moved forward and turned to port, but was unable to shoot at the Bomber due to range and Rugged Construction Penalties!  Not wanting to risk more casualties just yet, the Prussian Frigates made a minimal move forward.  The Eastern Britannian Battle Cruiser moved forward and fired on the Jagers and successfully shot down 1!

First Blood!  Jager Bites The Dust!

The Prussians decided it was time to act.  The Donnerfaust moved forward at max speed, boosted by their Tesla Generators and fired their forward Speerschleuder at the Battle Cruiser and not only damaged the Britannian ship, but emplaced a Lightning Rod on it and fried an AP!

One of the Britannian Battleships played “Stoke the Engines” and moved at max speed around the corner of an island, turning to starboard to expose all turrets to the Prussians and managed to crit a Donnerfaust (Chaos & Disarray) and shot down a 2nd Jager with its broadsides!

Second Jager Shot Down!

The Kaiser Karl advanced forward at full speed and fired on the Battlecruiser, but due to the incredible Shields, failed to damage the smaller ship!  Britannian Heavy Destroyers moved forward, but found themselves out of range.  The Damaged Adler Bomber moved forward as fast as it could, but was unable to damage the enemy Battle Cruiser.  The Britannian Dreadnought felt sorry (???) for the Adler and moved forward so he could shoot it out of the sky, thus ended the bomber’s misery.  

Sorta…
Another Prussian Flyer Down In Flames!

On the East side, Prussian Fighters moved forward.  The 2nd Britannian Battleship moved forward and turned to starboard, but failed to damage anything with their guns.  Their Speerschleuder on the other hand managed to crit the Battle Cruiser (Guns Damaged), thanks to the Lightning Rod placed on it earlier.  Britannian Fighters started to move towards their Battleships.  Prussian Fighters in the East also moved forward.  Britannian Corvettes moved out but fired on no one.  The Prussian Carriers moved forward their minimum move – staying protected by the island just a little while longer.  The last Britannian Fighters moves forward – the last activation of their turn.  The last Adler bomber moved forward and crit the Battle Cruiser (Nav Lock).  Finally, the Prussian Dread moved forward at maximum speed and sank the Battle Cruiser with its forward Tesla Cannon and the turrets crit the Gunship (Engine). 

The First Britannian Loss!

In the End Phase, the Britannnians failed to repair their Gunship and the Prussians failed to repair their Donnerfaust.  Both sides used their Commodore’s Reroll, but it made no difference.

End Of Turn 1


VPS:
KoB        180
PE           180


Turn 2:

TAC Phase: Britannia played “Radio Intercept” and rolled a bonus +2 to the Initiative Roll.  Prussians gained an extra 20VP.

Britannia won the Initiative.

The War Rotor did a 180 (something new in the latest Fleet Lists!) and moved west.  The Rotor’s guns failed to damage any of the Jagers.  (At this point, I was pretty sure Britannia’s mission was 50% and all smalls.  Why I didn’t act on this insight, I’ll never know…) The Donners moved forward and turned to starboard, then fired on both the War Rotor and a Battleship, but failed to damage either.  Britannian Fighters attacked and shot down 2 SAW for the loss of 2 of their own. 

The Prussian Battlecruiser then activated, moved forward and used its Tesla Generator on the War Rotor and SUCCESSFULLY damaged the Generators!  First time the Tesla Worked that way!  The Battlecruiser then shot the War rotor with the Speerschleuder, damaged the Rotor and embedded a Lightning Rod!  Finally, the Cruiser’s turrets managed to crit a Battleship (Heavy Pounding: -3AP). 

Prussian Battle Cruiser Has A GREAT Turn!

The damaged Britannian Battleship turned to port and let loose.  The Torpedoes failed to damage the Dreadnought, but the guns Double-Crit the Battle Cruiser (Magazine Explosion: 3HP & Engines), leaving the Prussian with only 1HP!

The Battleship Fires Back!

The Jagers knew their time was limited and attacked the War Rotor and damaged the Britannian ship, thanks once more to the Lightning Rod!  The 2nd Britannian Battleship activated and sank the Battle Cruiser with a Torpedo Attack while the turrets damaged a Donner and the Battleship’s AA managed to damage another Jager.

Second Battleship Finishes the Job!

The Prussian Bomber moved forward at maximum speed and and fired on the War Rotor, once more damaging the Rotor AND adding another Lightning Rod to the Rotor’s Hull!

The Britannian Destroyers moved forward and starboard, sank 2 Prussian Frigates and shot down 2 tokens with AA from a fighter SAS!  

Heavy Destroyers Attack!

The Fighters started to fly back to the Prussian Carriers.  Britannian Fighters attacked and shot down a Jager for no loss.  

Britannian Fighters Take Down Another Jager

Prussian Fighters moved forward and attacked the War Rotor, once more caused damage for no loss.  The last Britannian Battle Cruiser turned starboard and sank the last Prussian Frigate!  

Last Prussian Frigate Destroyed!

Another Prussian Fighter SAS moved towards the Prussian Carriers.  The Britannian Dreadnought moved forward, blocked Line-Of-Sight to the damaged Gunship from the rest of the Prussian Fleet and damaged the Prussian Dreadnought.  The only problem was the Dreadnought stopped so close to the Gunship, the Gunship would have to collide once it activated.

The Prussian had a problem.  Their mission was to sink all the Mediums and 50% of the fleet.  We were quickly running out of time and with the blocked Line-Of-Sight, and the Prussian Dread shielding the Kaiser Karl, I had limited choices.  In the end, I decided to hope the Gunship would sink itself and made a hard turn to port with the Dreadnought.  The Tesla Gun and 2 turrets targeted the Battle Cruiser and Crit it (Engines) while the rear turrets and broadsides double-crit the farther Battleship (Hard Pounding: 1 & Fusion Leak: 1).  The Prussians then boarded and prized the closer (damaged) Battleship!

The Britannian Corvettes moved out and damaged a Donnerfaust, but worst, shot down the last Jager with AA fire!

Last Jager (And Prussian Small) Destroyed!

We were out of time at this point.  I revealed my mission and Graham confirmed his was all my Smalls + 50%.  It all came down to two activations so that’s all we played:

The Kaiser Karl moved forward to expose all guns and fired on the Battle Cruiser.  When the shields were rolled and the results were figured out, I had rolled a single crit while the Battle Cruiser still had 3 HP.  I rolled the Crit: 1 & 2!  ARGGGHHHHHH – WAIT!  I laughingly played “Jolly Bad Luck” – which can be used to reduce any Non-Red 6 by 1 – and called it a Magazine Explosion!  Graham quickly scampered for his TAC deck and dispelled it “Breakneck Maneuver”.  But for 5 whole seconds, I had sunk the Battle Cruiser!  Sorta…

We then checked the collision between the Britannian Dreadnought and the Gunship.  The Gunship damaged the Dreadnought through some (un)lucky rolls.  We then rolled the Dreadnought’s dice.  Sadly, it only damaged the Gunship.

OOPS!!!  Gunship Collides With Dreadnought!

The game ended with BOTH Britannian Mediums with 1 HP each…

VPs:
KoB        455         All Smalls and 50% of the Enemy Fleet (1/2 Completed)
PE:          610         All Mediums and 50% of the Enemy Fleet (Nothing Completed)

A DRAW!!!
++++++++++++++++++++++++++++++

<Sigh>

I just don't live right, I guess...

The hard part about these battle reports is writing up the Aftermath.  It's hard to be objective and not blame the dice.  Or the Opponent doing something underhanded.  Or the table rocked as I rolled.  Or . . You get the idea.

My Problems started during deployment.  I deployed my heavy stuff all on one side of an island and my opponent (rightly) concerned about the firepower on that side, kept most of his mediums on the other side.  I was actually thinking I might tempt the Mediums over but hind sight being what it is, yeah, I can't blame him.

Maybe my Problems started with the Fleet list.  It was a last-minute "I wanna try something DIFFERENT" but hadn't really thought out my strategy or tactics ahead of time.  I actually had plans on what I intended to do with the other lists.  I had no such plans for this one.  The low model count for Smalls didn't help me either.

Finally, I DID expect this one to go through 3 turns.  We never got to play that 3rd turn due to time issues.  (It's amazing how many people show up and want to talk to you, the more you have to do and the less time you have to do it!!!)  ((Not that I minded - it just made it harder to finish the game!))

I did capture that battleship in Turn 2, but to be honest, if the game had gone on one more turn, I would have probably lost the prize to Salvage as both the War Rotor and the other Battleship were near by.  I only left 4 AP on the Prize and kept 4 more on the Blucher. (Normally, I would probably left the Battleship Derelict and returned all my AP back to the Dread.)

So, that's my excuse for the Prussians "Underperformance" this time out.

What did I think of the New Units?


The Adler Bombers are interesting.  You can only take them in Squadrons of  1, so they can't support each other, really, other than to act as "bait".  Keeping the one bomber in the clouds kept it safe most the game, but Graham was more interested in all the Jagers to complete his objective - the bomber wasn't a threat until Turn 2 and not a serious threat until it could get into Bombing Range (which never happened).  On the other hand, the Western Bomber that got shot down in turn 1 took an amazing amount of fire to bring dow.  -2 Attack Dice for Rugged Construction and 5+ to hit made it very difficult to shoot down - it took the fire of the entire western board to bring it down (though it was a Dread's firing that finally did it in)!

I equate the Heavy Bombers to the Navy's Battle Cruisers - Glass Cannons.  They can dish out a LOT of damage (potentially) and as such are an important threat that needs to be neutralized.  However, as a unit of 1, they can't take a lot of attention - there's no one else to split damage over.  I think for them to survive, you need to take multiples of Heavy Bombers and / or Battle Cruisers and force your opponent to decide which one is a bigger threat.  Then prove they picked WRONG!!!  ;-)

The Havel Light Carriers didn't do much, but then they did what they were there for.  They provided more SAS to protect or attack with.  At 160 points for a pair, they're more expensive than a Rhine, but you get two ships with a combine HP value of 10 and potential for 2 X 4-token squadrons which gives you more fighting potential than 2 X 3-token squadrons of a Rhine and an extra usable squadron compared to the single 5-token SAS that the Rhine could put out (not to mention the possibly an extra activation(s) if you take the Light Carriers as Individual Units).  So I think there is a place for them in the Prussian Fleet.  They just weren't in a good place for this battle as they were too far from the front to rearm or replenish any of the SAS.

The Britannian Stalwart Heavy Destroyer IS a dangerous unit to face.  However, at 50pts a piece, they're approaching Cruiser Costs (Reiver is only 55) for less hull points and only 2 turrets.  Nasty but expensive!  This is a serious impact to the fleets 40% limit on Smalls.  Commanders will be forced to consider whether they want more Frigates and Corvettes rather than 1 Squadron of Heavy Destroyers.  

I'm disappointed I didn't see the Britannian Heavy Bomber, but such is life.  Maybe next mission.

My opponent kept his cool, kept his eye on the Objectives and if he had been a little more lucky, probably could have won this game.  It would have taken a lot more luck, but it was possible!  As it was, time and dice only let us have 2 turns and I was lucky to have squeezed a few more points than I should have - though it made no difference in the end.  I'm happy with a Draw as the game ended and it was still ANYONE's game!

Hope you enjoyed the show!  Have fun and Keep Your Head Above Water!!!