Tuesday, September 3, 2013

BatRep: Covenant of Antarctica vs Prussian Empire (1000pts - played Length-wise)


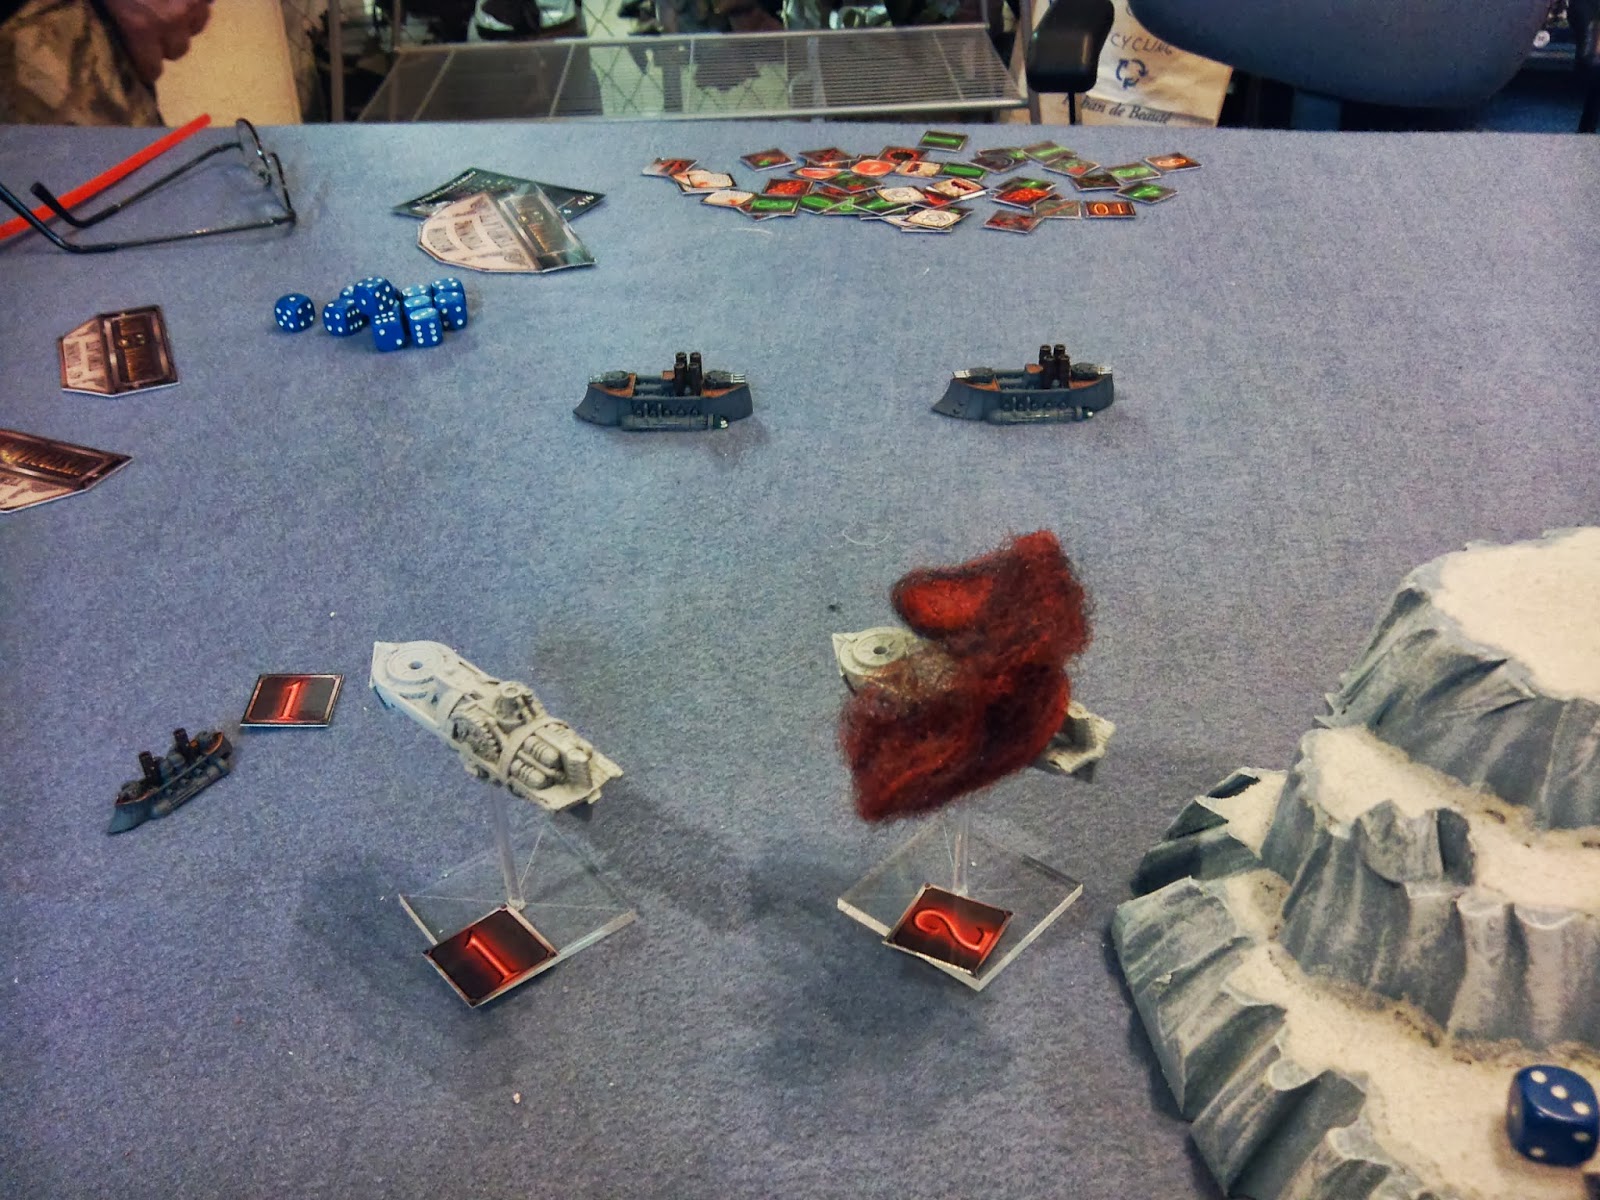
Admiral Von Shtupp had a smile on his face.  At Last!  Back at sea again.  And once more, back on the latest Dreadnought SMS Knesebeck.  Von Shtupp had reason to be happy using this famed ship once again as his flag.  The Emperor didn’t normally allow such a large task force this far out of the Baltic, let alone a Dreadnought.

The mission was simple: the government was fed up with the Covenant of Antarctica’s meddling.  Intelligence reports indicated that the CoA had a task force in the area (doing what was not so important).  Von Shtupp was to “interfere” and cause as much “confusion and destruction” as possible.

Now if only we can find those pesky tin heads…

“Admiral!  Large Antarctica Task force spotted by the Pflicht Scouts!  They’ve spotted us and have turned to intercept!”

“Battle Stations!  All ships turn to engage.  Have the carrier launch Dive Bombers and Recon Flights as soon as possible!”

Too bad it’s so late in the afternoon.  I hope the light lasts long enough…


So, in an attempt to catch Graham off-guard, I brought the Prussian Fleet instead of my Russians.  Unfortunately, Graham had the same idea and brought the CoA instead of his British fleet.  Dang!  Hate it when a plan back-fires like that!

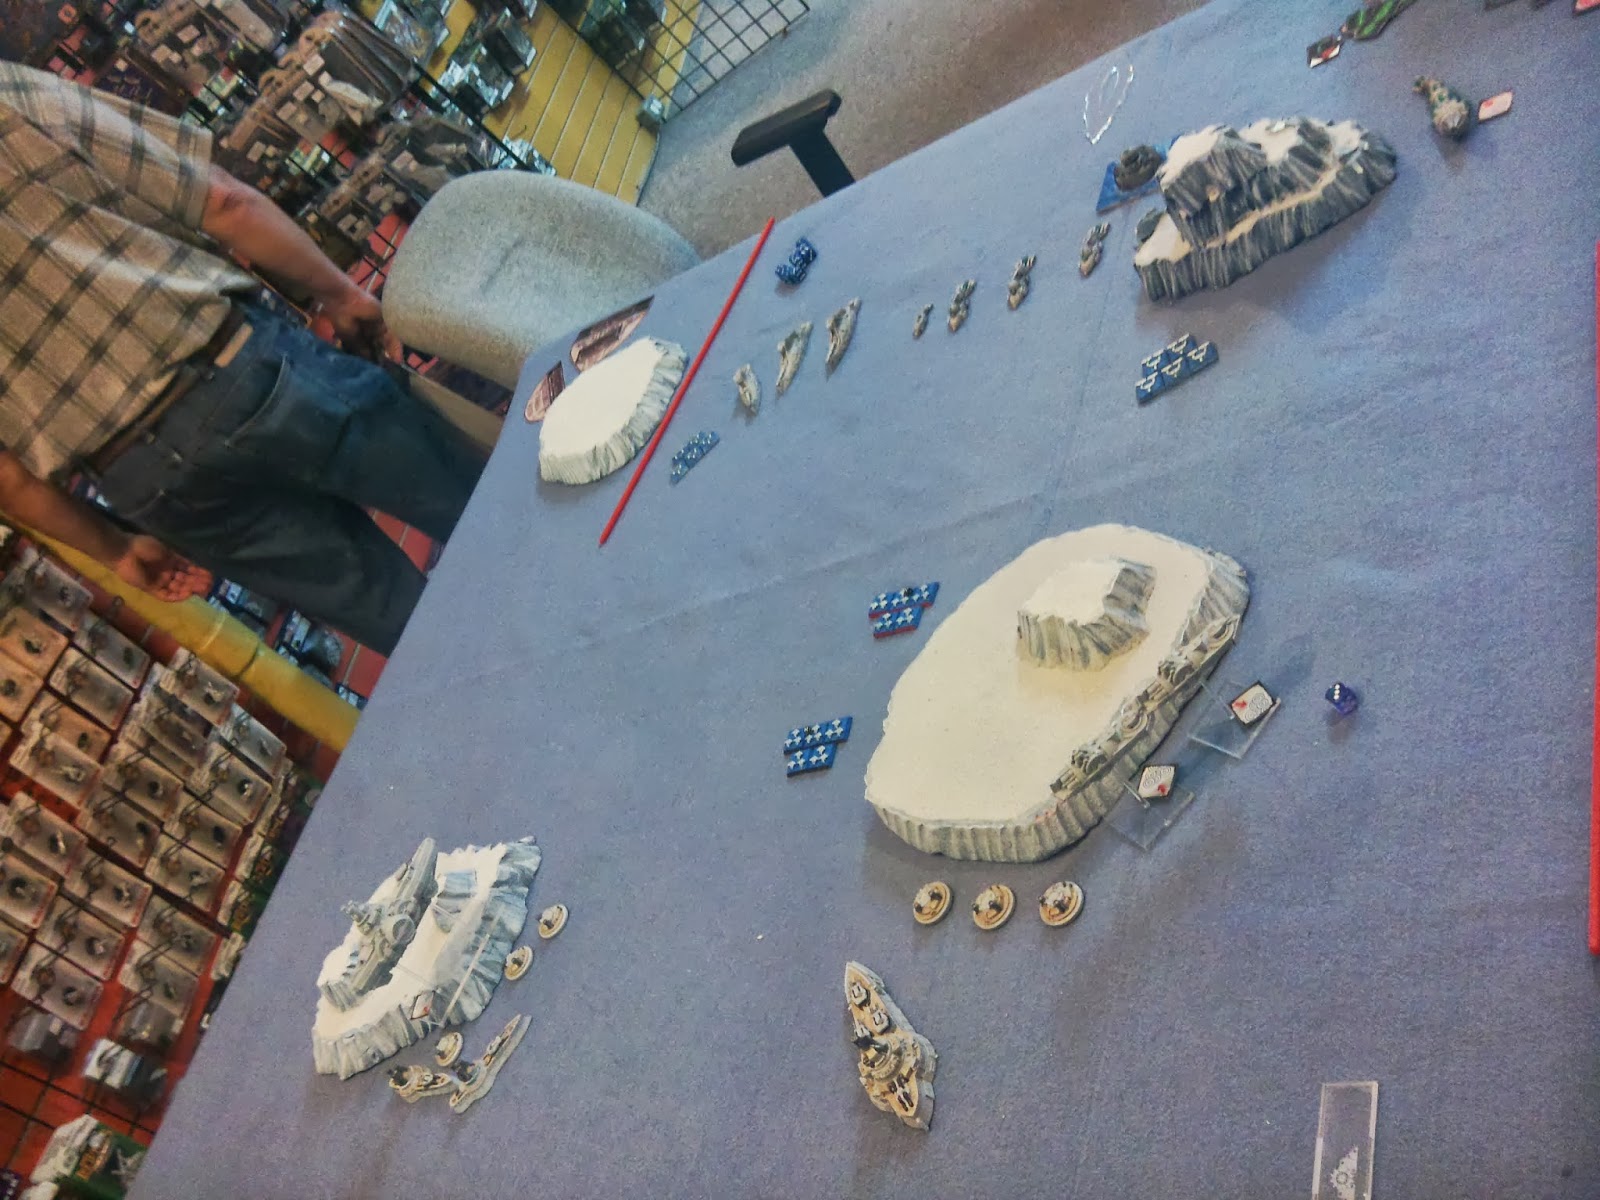
For a change of pace, we decided to play length-wise on a 6’ X 4’ table and randomly rolled terrain.  Once again, we got more terrain than we expected…


Prussian Empire (PE) Deployment: (Top to bottom)


Squadron of 4 Stolz Destroyers
Squadron of 4 Arminius Frigates
Recon Flight from Carrier
A Rhine Carrier
Flight of Dive Bombers
Squadron of 4 Arminius Frigates
Squadron of 2 Reiver  Cruisers
Flight of Fighters
Squadron of 2 Pflicht Scout ships (Obscured)
Flight of Fighters
Blűcher Dreadnought (1 Tesla & 1 Shield Generator)


Covenant of Antarctica (CoA) Deployment:


Squadron of 4 Diogenes Frigates, with a 2nd Squadron of 5 Diogenes Frigates behind
Squadron of 2 Ptolemy Bombers
Flight of Fighter Drones
Squadron of 2 Plato Cruisers with a 2nd Flight of Fighter Drones
Epicurus Sky Fortress (drones still on board)
Daedalus Large Skyship
Prometheus Dreadnought


Both sides rolled a ‘1’ for the mission objective – both sides were forced to take the 70% casualties or captured!

Long stretch of open water in the middle...
 

Turn 1:
CoA won initiative for the first turn.

As we were playing length-wise, First turn was pretty much juggling for position and moving forward.

Things of note:
  • 1 Squadron of CoA Frigates went over the sand bar at ½ speed
  • 2nd Squadron of CoA Frigates went the wide way around – towards the board center.
  • PE Recon flight moved forward at maximum speed (hoping to be able to spot for Turn 2)
  • All other PE tiny Flyer (TF) Tokens flew at ½ speed to conserve fuel
  • PE Pflicht Zeppelins moved forward while still at Obscured level
  • CoA Skyfortress launched a squadron of Dive Bombers  before moving.

 
The distance is getting smaller...


 Turn 2:
PE won the initiative for Turn 2

Second turn was mostly jockeying for position, though there were some shots fired…

  • CoA Frigate Squadron was stuck moving forward at ½ speed as they were still in the Sand Bar
  • CoA Fighters shot down the PE Recon Token when it strayed a little too far forward, for the loss of 1
  • CoA Large Skyship managed to damage one of the PE Pflicht Zeps
  • Both PE & CoA Dreadnoughts move passed their respective islands and started turning towards the center
  • PE Frigates managed to shoot down 1 TF Token and damaged 1 CoA Bomber
  • CoA Cruisers managed to move and turn to the left, damaging 2 frigates as Turrets & Broadsides came to bear
  • CoA Frigates torpedoed a PE Frigate Squadron, sank 1 and damaged another – the PE Squadron Broke!
  • PE Carrier managed to use its Bombard to damage a CoA Cruiser after moving into range – Direct Line of Sight


First Blood to the CoA!
 

In the End Phase, the PE Frigates rallied successfully.

Losses:
PE:          61
CoA:      0


Turn 3:
PE won the Initiative for Turn 3!

Now things started to get really nasty!

Prussian Cruisers started things off.  Moving forward at Maximum speed, they got in to range of the CoA Skyfortress and Crit it (Hard Pounding – 3 AP left) with turrets which caused the Fuel Stores to catch fire.  The PE cruisers then shot down 2 Dive Bomber tokens with AA, fired their Teslas independently at a bomber (2 AP and 2 HP left).  Good Shooting, Cruisers!

 
The CoA Bombers turned and retaliated by dropping their mines between the PE Cruisers and fired their guns at the Zeps – but both guns and mines failed to damage anything.  The PE Zeps turned and fired back at the bombers, but only managed to damage the previously damaged bomber.  CoA Dive Bombers attempted an attack run, but AA shot down all the tokens before they could drop their bombs!  The PE Dreadnought turned and brought all their turrets and Teslas to bear on the Large Skyship, getting a Crit (ANOTHER raging fire!) and then successfully captured a nearby CoA Bomber!

The Prussian Dread speaks out! 

The CoA Skyship turned to bring their turrets to bear on the PE Cruisers, dropped a mine and shot their turrets at a Cruiser, causing a Crit (Weapons Damaged)!

CoA Skyship attacks the Prussians!
 
The PE Frigates on the right moved forward and shot a CoA Cruiser, causing a Crit (ANOTHER Weapons Damaged?!?), then did something DUMB!  After I had started to move the Frigates, I “saw” only 1 AP left (there was another 4AP counter on the other side that I missed), so I attempted to board the Large Skyship.  First, only 3 Frigates were close enough to attempt to board.  Second, the Skyship split its AA across all 3 Frigates and in a brilliant display of AA gunnery, shot down 7 of the 9 Boarding Parties.  Finally – with only 2 AP left in the attack, the remaining 5 CoA AP destroy all the remaining boarding parties!  The 3 Frigates are all out of AP!  :O

Now that wasn't supposed to happen!
 

The CoA Cruisers moved forward, fired on 1 frigate, damaging it, captured another frigate (3AP left on the Cruiser), then fired their broadsides at another frigate squadron (which failed to damage).  PE Fighters moved forward at full speed and managed to shoot down 3 CoA Fighter Drone Tokens for a loss of an extra fuel (3 fuel left).  The 5 ship CoA Frigate Squadron made a torpedo run on a Cruiser (1 had its Line Of Sight blocked by other members in front), causing 1HP of damage, then fired their broadsides out both sides – and sunk a frigate in both squadrons!  Both PE Frigate Squadrons passed their Break Test!

CoA Frigates doing what they do best! 

A PE Frigate Squadron moved forward and damaged a CoA Frigate with their return fire.  The CoA Dreadnought moved forward and right, sank 1 Cruiser (Double-Crit) and a Frigate.  Both PE Squadrons passed their Break Tests.


The CoA Dreadnought speaks!
 
PE Fighters moved at max speed to intercept the last CoA Bomber, but caused only a single HP of damage.  The CoA Skyfortress launched another flight of Dive Bombers, then turned towards their own Dreadnought.  The Skyfortress managed to damage a Cruiser and sink a Frigate.

 
The Skyfortress tries to hide...


PE Dive Bombers hit the gas and moved forward at maximum speed.  CoA Fighters managed to intercept the Dive Bombers and shot down 1 Bomber Token for no losses.  The PE Carrier turned and fired its Bombard at the Large Skyship, causing a Crit (Hard Pounding – 2AP left).  The CoA Frigate Squadron attempted to move and torpedo the PE Carrier, but found they were just out-of-range.  PE Destroyers came out from behind the island, formed a line between the CoA Frigates and the PE Carrier, successfully screening the Carrier.  That ended the last PE Activation.

The Final CoA Activations had the remaining Drone Fighter Wing attack and destroy 1 Dive Bomber Token for a loss of 1 of its own, while the CoA Recon Token moved on top of a hill.


In the End Phase, the CoA started another fire on the Large Skyship (1AP left) and failed to repair the damaged Cruiser.  The PE Cruiser successfully rallied.

End of Turn 3!
 

Losses:
PE:          219
CoA:      219


Turn 4:
CoA Won Initiative!

The first CoA Frigate squadron made a torpedo run on the destroyers, but caused only a single HP of damage.  The PE Dreadnought activated, moved forward, Crit the CoA Dread (Systems Offline) and left the last CoA Bomber a Derelict (only 2AP left on the PE Dread!)

The Dreads face-off!

The Second CoA Frigate Squadron made a torpedo run on the last PE Cruiser, and sank it with a Crit.  On a long-shot, they fired a single Frigate’s broadsides at the PE Carrier but surprisingly managed to cause an HP of damage!

The Last Prussian Cruiser Sinks! 

The PE Frigates moved towards and fired on the CoA Skyfortress, causing an HP of damage, sank a Frigate with their rear-facing Teslas and in a desperate Boarding Action with only 3AP, left the Large Skyship a Derelict!  Though both remaining Frigates now had 0AP left!

The PE Frigates Last Hurrah!
 
The CoA Cruisers, out of anger, sank 2 Destroyers forming the Carrier Screen, then captured a Frigate from another squadron.

CoA Cruisers smash up the Carrier Screen! 

The PE Dive Bombers moved forward and made a successful bombing run on one of the CoA Cruisers, having sank it with a Double-Crit for no losses (3 fuel left)!

PE Dive Bombers avenge the Destroyers!
 
The CoA Dreadnought turned and caused a Crit on the PE Dreadnought (Hard Pounding – 0AP left!), and sank the last PE Frigate on the right.

CoA Dread fires back! 

The remaining PE Destroyers moved forward just enough to block as many CoA Frigates as possible from torpedoing the Carrier, then sank the last CoA Cruiser with a Crit!

PE Destroyers finish off the last Cruiser! 

The CoA Skyfortress fired on the PE Pflicht Zep, Critting it (Fusion Leak – 1 HP left)!  The PE Carrier managed to damage one of the CoA Frigates with its Broadsides, but the Bombard failed to damage the CoA Dreadnought.  Finally, the CoA Frigate Squadron attempted to avoid the PE Destroyer screen, but 2 Frigates collided with the Destroyers, 1 CoA suffering an HP damage.  The remaining 2 Frigates successfully avoided the collision and made a torpedo run on the Carrier, but failed to cause any damage.

Collisions and Torpedoes! 

The PE Pflicht moved forward, crit the Skyfortress (Hard Pounding – 0AP left!), and damaged 1 Frigate.  The CoA Dive Bomber Drones attack the damaged Pflicht and sent it from the sky in flames with a Double Crit.

No, it's not called Hindenberg! 

In the final moves of the turn, one PE Fighter Wing declared CAP on the Dreadnought and the other landed on the Carrier.
 

In the End Phase, the fires were put out on the Derelict CoA Skyship and the CoA Dreadnought was repaired


Losses:
PE:          515
CoA:      566

As it was getting late, we ended the game: A Draw!
End of the game!


Well, Von Shtupp accomplished his mission – that was a Bloody Battle!  We actually checked points twice as neither of us could believe that we hadn’t both lost the required 700 points to win the game!

On my side, I had a bunch of Frigates running around, firing torpedoes everywhere and just being a general nuisance.  On the plus side – all my Large Vessels were still in decent shape (though damaged – nothing was crippled) and all my flight wings were (more or less) intact.

On the CoA side, he’d lost his large Skyship, the Carrier was crippled and the Dreadnought was damaged.  He’d lost most of his “free drones” and the Carrier was crippled – reducing his ability to relaunch his drones.  On the other hand – he still had most of his frigates and their dang torpedoes…

We both think that whomever would have gotten initiative next turn would probably have won this game.  Both sides were too close avoid taking fire from the other side and both had the weapons to win it!

With regards to playing length-wise, I had suggested we play using the Alternate Deployment rules from the Hurricane Season book, but Graham wanted to keep it simple.  In the end, the game felt more “realistic” (as much as a fantasy game with giant robots and lightning weapons can…) as both sides jockeyed for their positions for 2 turns before really “going for the throat”.  It made the game more suspenseful.  I really enjoyed it.

Now I need to get out my paints and finish a fleet before the next box sets arrive…

Happy Gaming!

Sunday, August 25, 2013

BatRep: Kindom of Britannia vs Russian Coalition - 1000pts


First of all – Sorry!  I’m in the process of repainting my Russian Models and it shows in the photos!  :-}


Secondly, I’m not writing a story for this one.  It’s hard to justify 2 “Allies” fighting each other and there’s a flaw in the mission that made it less fair than it should have been.  I’m posting this as an example of a flawed mission rather than a fair game.


Graham and I decided to go for 1000 points, but in spite of the Russians and British being allies, we decided to fight it out anyway!  I made 3 lists and made Graham roll a D3 to pick which fleet he got to fight against.  He actually rolled against the fleet I wanted to do least of all.  I was worried I wouldn’t have enough activations and Britannia would win easily!


I had made up the table with the intention of testing trying to advance through or defend a gap.  However, with 1000pts each, I thought we needed a 6’ table instead of 4’.  This left a gap over 4’ which I thought was too large.  So I added another island in the Gap – creating 2 smaller gaps.


Russian Coalition deployment (Top to Bottom):

  • Fighters
  • 3 Novgorod Frigates
  • 2 Saransk Medium Skyships (Obscured)
  • Moskva Dreadnought
  • Reinforced Cruiser Squadron (2 Suvorov Cruisers & 1 Tambov Gunship)
  • 4 Novgorod Frigates
  • Tunguska Large Skyship (Obscured)
  • Fighters
  • 3 Novgorod Frigates


Kingdom of Britannia deployment (Top to Bottom)

  • 4 Attacker Frigates
  • Fighters
  • Majesty Dreadnought
  • 2 Tribal Cruisers (2 Turrets each)
  • Ruler Battleship (4 Turrets)
  • Fighters
  • Eagle Large War Rotor
  • 4 Attacker Frigates
  • Avenger Fleet Carrier


After deployment, Britannia rolled the default 70% of the fleet points captured or destroyed.  Russians rolled “Destroy the Core Forces” (everything except the War Rotor), so they decided to do the default 70% as well.


Turn 1:

Britannia won initiative!


On the right, British Frigates raced for the gap and tried to take their shots against the Russian Cruisers, but found they were Out-Of-Range.  Russian Frigates showed their bravery by hiding behind the peninsula.  The British Carrier launched a flight of Dive Bombers, then moved and turned to the right.  Russian Fighters moved maximum speed and ended their flight over the tip of the peninsula on the right.  Sensing a quick kill, British fighters on the right went max speed and attacked the Russian Fighters.  When the smoke cleared, both sides had lost 2 tokens AND 2 EXTRA fuel – leaving both squadrons with 2 fuel!
 

Russian Frigates start to move towards the gap on the left.  British Frigates moved to intercept but failed to damage a Frigate.  Concerned that the Russian Frigates were outnumbered, the Russian Medium Sky ships drop from the clouds, moved forward and left, fired their guns and sank 1 British Frigate!  First Blood to the Russians!


British Cruisers turn to the left, presenting their broadsides to the Russian Frigates through the gap on the Right, but found they were Out-Of-Range.  Russian Fighters on the left move at ½ speed towards the Medium Skyships to prepare to cover their movements.  The British Battleship turned and fired their turrets and broadsides at the Russian Cruisers through the right-side gap, but fail to damage anything.  The Russian Cruisers failed their Sturginium Boost roll, so only moved forward 6” – leaving them Out-Of-Range to the British Battleship!
 

The British War Rotor climbed to the Obscured level and moved forward.  The Russian Large Skyship also stayed Obscured and moved forward maximum speed.  British Frigates on the left gap moved forward at about ½ speed, holding their fire.  Russian Frigates in the center move forward, hiding between the Cruisers.  The British Dreadnought moved forward, turning to the right, but stopped early to prevent ramming one of their own cruisers!  The forward turrets fired at the Large Russian Skyship but failed to damage it.  As the final activation, the Russian Dreadnought passed its Sturginium Boost test and moved forward at maximum speed, the successfully used the Mimic Generator to copy the Torpedo Breaker (2) generator from the Gunship.


End of turn, the only casualty was 1 British Frigate (25 points)

 
(Sorry – forgot to take a photo!)
 

Turn 2:

Russians won the Initiative!


Russian Cruisers failed their Sturginium Boost, moved forward their maximum 6” and fired all turrets on the British Battleship, causing a Crit (Hard Pounding – 4AP left).  British Fighters on the peninsula again attacked the Russian Fighters, but this time all tokens were destroyed after both squadrons ran out of fuel.  Russian Frigates on the right popped around the corner and split their fire – mortars at 1 British Frigate, Guns at another.  Surprisingly, both British Frigates were sunk!  The British were so shocked that the survivors failed their Break Test!
 

The British Battleship turned to aim their Torpedo Tubes at one of the Russian Cruisers, then fired, first turrets, the torpedoes.  The Russian Cruiser lost its Ablative Armor to the turrets, but the torpedoes were only able to remove a single Hull Point!  Russian Frigates in the middle move forward, between the Cruisers, and fired guns and mortars on the British Battleship, causing another HP loss.  The Broken Frigate squadron on the right moved into formation and fired separately on the Russian Frigates, sinking 2!  The Russians passed their Break Test.
 

Russian Medium Skyships advanced on the left, fired on the British Frigates nearby, but failed to damage them!  Concerned with the pressure on his Frigates, the British Cruisers continued their turn and fired their broadsides and turrets at both Medium Russian Skyships, damaging 1.
 

Russian Frigates on the left advanced on their British Counterparts, firing mortars and guns at separate targets.  This time, 1 British Frigate was sunk and another was damaged, and this time the British pass their Break Test.


The British Carrier launched a Recon flight, turned their Torpedo Tubes towards the Russian Gunship but failed to damage it.  The Russian Dreadnought, making a turn in narrow space, focused its 3 main hull-mounted turrets on the British Battleship and caused another Crit (Systems Offline) on the hapless vessel.
 

Seeking revenge for their lost comrades, British Frigates on the left turned and focused their turrets and torpedoes on the Russian Frigates, sinking 2.  The British AA was unable to damage the Russian Skyships.


The surviving Russian Fighters moved towards the Dreadnought and Skyship due to the threat of the British Dive Bombers.  British Fighters “bounced” the Russians enroute, but the British lost 2 tokens plus an extra fuel (3 left) for no damage to the Russian Fighters.  The last Russian Activation was the Large Skyship.  The Skyship moved forward, firing 2 turrets at the British Carrier, 1 turret and the Broadsides at the remaining British Frigates.  When the smoke cleared, the remaining Frigates were sunk and the Carrier suffered Crit (Weapons Damaged).


With no further Russian Activations, the British finished their attacks without worry of counter-attacks.  The Dreadnought advanced and turned its turrets onto both of the Medium Skyships, damaging both with long range fire.
 

The British Dive bombers advanced at ½ speed toward the gap on the right.  Finally, the British War Rotor dropped from obscured, moved and turned broadsides to the Cruisers, dropped 2 mines, then sank the damaged Cruiser with a crit.  The survivors passed their Break Test.
 

In the end phase, the British successfully repaired all their outstanding damage.


British Losses:   252 PointsRussian Losses: 165 Points


Turn 3:

British won the Initiative.  (British rolled a 3 vs the Russian Snake-Eyes!)
 

British Cruisers activated first, moving to the left and turning to expose all turrets towards the Russian Medium Skyships, causing a Double-Crit on one – blowing it from the sky.  The surviving Russian Skyship passed its Break Test.


Sacrificing the Medium Skyship, the Russians activated the Large Skyship, which advanced, firing weapons in all directions.  The British Skyship took a Crit (Hard Pounding, 4AP left) and the Carrier took a Crit (Raging Fire – 4 AP left), though the Battleship escaped further damage.
 

The British Battleship turned away from the conflict in the right-side gap and turned its turrets on the Medium Russian Skyship and managed to Crit it (Hard Pounding – 0 AP & 2 HP left)!
 

Russian Fighters attacked the British War Rotor, but failed to damage it while the Fighters lost 2 tokens.  The British capitalized on the Russian mistake and activated the remaining Frigates on the left, turned and sank the last Russian Frigate on the left, then boarded the Medium Skyship and kept it as a Prize!


Russian Cruisers moved forward, Crit the British Carrier (Hard Pounding – 1AP left), and damaged the Battleship (3 HP left), while the AA failed to damage the British War Rotor.  The British Dive Bombers moved at Maximum Speed and attacked the Large Russian Skyship, but failed to damage it.  The Russian Dreadnought advanced between the Cruisers and inflicted a Double-Crit (Engine & Weapons Damage – 2HP left) on the British War Rotor.
 

The British War Rotor attempted to make a bombing run on the Russian Cruisers and Dreadnought, but didn’t have the movement to overfly the 1st ship (only just made it so the front ½” of the base rested on the 1st Cruiser).  Sensing an opportunity, the Russian Frigates from the Center Squadron came around the Dread and Cruisers to board and capture the British War Rotor!
 

The British Dreadnought advanced, turned its turrets and broadsides and removed the Ablative Armor and an extra Hull Point on the closest Cruiser.  The last Russian Activation was to hide the last Frigate behind the Cruisers and Dreadnaughts.  With immunity, the British Carrier moved forward and torpedoed the damaged cruiser, causing a Crit and sinking it.  This left just the Gunship from the Reinforced Cruiser Squadron (which passed its Break Test).  The British Fighters just flew forwards into the Russian Deployment Zone, just to waste an activation, and the Recon Flight just floated around.


In the End Phase, the British put out the fire on the Carrier and all the prizes all drifted forward.


British Loses:    570
Russian Loses: 465


Turn 4:

British won the Initiative.


The British Dreadnought moved forward and fired on the Russian Gunship.  Sadly the Broadsides failed to get through the Ablative Armor so the Turrets had to do the job – causing a single hit Point.  The Russian Gunship moved forward and turned, fired at the British Battleship and caused another Crit (Hard Pounding – 2 AP left). 


The British Carrier realized they were headed straight for the mines dropped by their own War Rotor.  Not having enough room to turn and avoid the mines, the Carrier declared “All Stop” and moved forward their minimum move.  In desperation, the Carrier fired their torpedoes at the Russian Dreadnought.  The Russian Dread used the Torpedo Breaker it Mimicked (Waaay back in Turn 1) and redirected 2 torpedoes on to a Frigate (causing no damage), then used its Concussion Charges to stop 6 torpedoes, saving the Dread’s Ablative Armor.


The Russian Large Skyship advanced at full speed.  To avoid taking AA from the British Dreadnought, the Skyship fired its turrets on the British Battleship further away.  Surprisingly, the Battleship was sunk (I really didn’t expect it or count on do it).  The Russian Skyship then successfully boarded and captured the British Carrier (getting enough points to win the game).


At this point, the British just conceded defeat.


British Loses: 892
Russian Loses: 465


Crushing Triumph for the Russian Coalition.


Well, that was brutal!

Let’s look at the Russian side first.  While the Russian flank collapsed on the left, the Russians were overwhelming on the right.  I think moving the Medium Skyships to the left probably was a major factor to the win.  Though the Skyships were destroyed, the British devoted SIGNIFICANT resources on the left to destroy them.  As a result, the British Cruisers were out of position and couldn’t redeploy to the right fast enough and a lot of fire was redirected to the left rather than the right (where most the Russian Fleet was).


The Russian Large Skyship was a significant threat and the Ablative Armor saved it from damage.  I’m very tempted to get a second one!  While it captured the Carrier and sank a Battleship, they were really only targets of opportunity for the Skyship.  It was the continuous pressure that the Skyship applied on the British that was its greatest strength.  It was in the fight from turn 2 onwards.
 

It was the first time for the Russian Dreadnought, but in all honesty, a Battleship would have been just as fine.  I never did use the Beam Turrets.  While I used the Mimic Generator, I could have done the same with the Battleship OR used the Torpedo Breaker (3) – better than what I copied from the Gunship.  On the other hand – the Dreadnaught did do damage and survived the game intact.  I’ll reserve judgment for a while


The Reinforced Cruiser squadron did quite well.  Putting the Gunship in between the other Cruisers protected the Gunship (and its turrets).  I didn’t need to worry about broadsides on the Gunship either!


Unsung heroes of the Russians have to be the Frigates.  They actually are responsible for taking out most of their counterparts, not to mention capturing the Large War Rotor and shaving off a point or two off the Battleship.


Graham went after the Russian Fighters with a vengeance.  I can’t say I blame him.  Last game I ambushed him badly with a Hard Shell Attack using the fighters.  There was no way Graham wanted to go through that again.  I can’t blame him.


On the British side, there were a lot of problems.  There were the usual complaints about Russian Ablative Armor and I understand some of it, but I don’t think I agree with most of it. 


Part of the problem was terrain (I have to agree with it after the fact).  It limited targeting for both sides but the Russians were able to deal with it better than the British could as Russians are mostly forward firing whereas the British really do need Line Of Battle to be most effective and they just couldn’t maintain the formations properly with that small gap.  It also forced the British into formations getting in the way of each other.


Probably the best thing for the British to try on this table would have been to force both gaps at the same time at near-equal strength – we saw the Russian flank fold on the Left Gap.  The question is, would the British have been able to join forces fast enough to win or would the Russians have wiped out one side as the British came at them in piecemeal.  I probably should have just left the center island off completely.  That would have probably been enough to make it a fair fight as the British would have had the room to “Cross the T” while the Russians approached “Head On”.  It would then have been up to the dice and maneuvering to decide the game.


So – I acknowledge it was an unfair table for the British.  I was just too stubborn to see it at the time.


The only other real issue I saw on the British Side was target selection.  The British were unable to shave away the Ablative Armor fast enough to make an impact on the game.  Part of that was focusing too much effort on the Medium Russian Skyships on the left.  Part of it was terrain – there wasn’t enough room for all the ships to draw line of sight to the main Russian Fleet.  There were some bad rolls as well.  Quite a few shots failed to pierce the Ablative Armor so the “follow-up” shots had to be redirected and used as Ablative Shavers.  The British Dreadnaught had to waste all their Turret Shots at least once to get 1HP of damage because the Broadsides just couldn't get the points required to remove Ablative.  By rights, the one ship should have had at least a triple crit, but instead got a single HP.  I can see why other players get frustrated with incidents like that, but I don't have another solution without giving the Russians Shield or Guardian Generators.  We'll have to see what future changes there are to the Ablative Armor rules.
 

Sunday, August 18, 2013

BatRep: 800 points Covenant of Antarctica vs Russian Coalition


Admiral Dimitry Orlov was relaxing in his cabin on the Russian Batttleship Georgy Pobedonosets ("St George the Victorious" in English).  The communications from Headquarters had finally caught up with him and he was digging his way through the required reports and forms required to run a fleet.  To make matters worse, they were on their way to attach themselves to a convoy enroute from the Aleutians.  If only something would happen to break the monotony…

“Battle Stations!  Battle Stations!  Admiral to the Bridge!”

I’ve really got to learn to be careful what I wish for…
. . .
“Status Report!”

“Admiral, we’ve been challenged by the Antarcticans.  They want to inspect our ships for illegal technology!”

“What are they talking about?  What on earth is illegal technology in a time of war?”

“What shall we do, Admiral?”

“What we always do when someone threatens the Mother Russia!  We protect her as best we can.  In this case, I think we’ll use a good defensive tactic: Prepare to ATTACK!!!”


So Graham and I decided to do an 800 point battle this last weekend.  After making me roll a dice, he decided that it meant I had to play against his Antarctic Fleet (the first time he ever played it).  As we added up the points, I realized I had too many points, but he said that was ok, he’d throw another Frigate into his fleet.  Except he had only 1.  I told him to go ahead and attach it to his destroyer squadron as a “reinforcement” for this game.

 
Deployment

Russian Coalition (RC), top to bottom:
  • 3 X Novgorod Frigates
  • 2 X Saransk Medium Skyships
  • Borodino Battleship
  • 1 Squadron of Fighters
  • 1 Squadron of Dive Bombers
  • Tunguska Large Skyship
  • 3 X Novgorod Frigates
  • 2 X Suvorov Cruisers


Covenant of Antarctica (CoA), top to bottom:
  • Aronax Submersible (The “Worm”)
  • 1 Squadron of Dive Bombers
  • 3 X Plutarch Destroyers (+1 Diogenes Frigate)
  • Callimachus Time Dilation Orb – MK II
  • Aristotle Battleship
  • 3 X Zeno Armored Cruisers
  • 1 Squadron of Fighters
  

Russians rolled for 50% of the fleet value captured or destroyed, plus all small vessels.

Antarctica rolled for capture the Flagship, but opted for 70% of the fleet’s value


Turn 1

Russians won initiative!

Russian fighters started things off, moving maximum speed straight forward.  CoA Fighters moved towards table center at ½ speed.  Killing another activation, Russian Dive bombers also moved forward maximum speed. The Aronax sub submerged and moved around the right of the island, but was out of range of any targets.  The Medium Skyships moved to the right, to intercept the “Worm”, but were just out of range.


On the other side of the table, the CoA Cruisers moved forward, one ship angling for a shot at the Russian Battleship hidden behind one of the islands, but the Particle Accelerator failed to do any damage.
 

Back on the right, Russian Frigates move to hide behind the island on the right.  CoA Dive Bombers moved towards the Russian Skyships on the right. 


Back to the left, Russian frigates moved to the right of the leftmost island, hugging the coast to make room for the Russian Cruisers later.  CoA Destroyers moved forward at ½ speed.  Russian Cruisers moved forward around the islands and frigates, but were out of range to any targets.  The CoA Time Dilation Orb attempted to teleport the Battleship, but rolled two 1’s with Inventive Scientists – causing the Battleship to be frozen partway between time and space.  This left the CoA out of any further activations.  The Russian Large Skyship and Battleship moved forward at their maximum speeds.


So at the end of turn 1 – no damage to either side.


Turn 2:
Russians won initiative again.


The Russians decided the “Worm” was a threat that had to be dealt with first, so activated the Medium Skyships.  The Skyships turned and dropped mines as a blockade to the Worm, then fired their guns at the sub, Using Water Hunter to hit on a 5+, and caused a Crit on the Worm (Hard Pounding, maxed the AP damage, +1 for Concussive Barrage)  this left the sub with only 3 AP left (photo showed error – corrected later)!  Good way to start the turn!


Like a living Sandworm, looking for revenge, the Aronax Sub surfaced, closed and fired both the Maw Gun and Particle Accelerator at a Skyship, causing triple –crit and destroying 1 skyship.  First Blood to the CoA!  The Surviving Skyship passed its Break Test.


Russian Frigates on the right moved out from behind the island and fired on the surfaced “Worm”, causing another HP damage.


CoA Dive Bombers attacked the surviving Medium Skyship, but only caused 1 HP of damage while they lost 3 tokens to AA.


To test the new fleet list and rules, the Russians moved their Fighter Squadron full speed to do a Hard Shell Attack on the Time Orb.  AA failed to take out any tokens before their suicidal charge, so the Orb suffered a Crit (Engine Damage). 

 
CoA Fighter Drones intercepted the Russian Dive Bombers, and shot down 2 bombers and forced them to use up an extra 2 fuel, but lost their entire flight of 5 tokens in the attack!  Russian Frigates on the left moved from behind the island and managed to damage 1 of the CoA Cruisers.  The CoA Armored Cruisers moved forward next and fired their Particle Accelerators, but only succeeded in sinking 1 Frigate, failed to damage the Russian Cruiser behind it!  (Gotta love that Ablative Armor!)  The Russian Cruisers moved out from behind the island and demonstrated to the CoA then fired on 1 CoA Cruiser– causing a crit (Navigation Lock).


The CoA Orb attempted to teleport the Battleship again and failed their test to do so.  The Russian Battleship passed its Sturginium Test, so moved straight forward the full 7”, just getting all turrets into Range Band 2 for 1 Cruiser.  The Cruiser’s Shields prevented a Crit, but it still suffered an HP of damage.  The Battleship’s Broadsides damaged one of the CoA Destroyers from RB 3.  The CoA Battleship came to surface and moved to fire its Particle Accelerator and Turrets against its Russian Counterpart.  The PA failed to damage but the Turrets succeeded in removing the Ablative Armor and causing an HP of damage!  The Large Russian Skyship moved and turned towards the table center, firing in all directions.  When the dust settled, the Frigate and a Destroyer were sunk while Broadsides did another HP damage on one of the CoA Cruisers.


CoA Destroyers moved to the left, firing broadsides at the Russian Battleship (causing 1 HP) and sinking a Russian Frigate with forward guns.  The Frigates passed their Break Test. Finally, the Russian Dive Bombers attacked one of the Destroyers, sinking it for the cost of 1 Token, leaving the remaining 2 tokens with a single fuel pip.


In the End Phase, the CoA repaired the Engine Damage on the Time Orb, but failed to repair the Nav Lock on the Cruiser.


Turn 3:
Russians won Initiative AGAIN! 
(3 times in a row!  This has never happened before that I can remember!)

 
Knowing that it was probably going to get blasted by the CoA Battleship’s Particle Accelerator as soon as possible, the Russians activated the Battleship first.  It successfully passed the test for Sturginium Boost, so the Battleship moved forward maximum speed, and brought all turrets to bear on the undamaged CoA Cruiser – and successfully did a Double Crit (Guns Damaged plus Chaos & Disarray), then sank the last Destroyer with its broadsides (completing ½ the Russian Mission Objective)!


The CoA activated the “Worm”, turned towards the Medium Skyship and did a double Crit with its weapons – destroying the Skyship!  As a defensive measure, the “Worm” then deployed its cloud for some additional protection.


Russian Cruisers moved towards the enemy Cruisers, sank 1 and damaged another.  The CoA Cruisers passed their Break Test.


The CoA Battleship again lined up the Particle Accelerator and let loose on the Russian Battleship, but in a display of bad rolling, the PA only caused a single HP of damage and the Turrets a second (4HP damage total on the Battleship)!  The Large Russian Skyship turned and moved towards the CoA Battleship, but instead targeted the Orb farther away with the Main Turret and a Beam Turret, causing a Crit (Engine Damage).  The Skyship’s other Beam Turret and Broadsides targeted the two surviving CoA Cruisers, and successfully sank 1.


The CoA Cruiser attempted to win the game by itself.  It moved forward, it dropped a mine, targeted a Russian Cruiser with its Particle Accelerator, the Broadsides at the Russian Battleship, and then attempted to Board the other Russian Cruiser!  Busy little boat!  While they successfully did another Crit on the Battleship (Hard Pounding – 10AP left), the PA failed to damage the Cruiser and the CoA Cruiser lost ALL their AP attempting to board the Russian Cruiser while the Russian Cruiser lost none!  Truly a dismal effort on the dice!  Adding insult to injury, the last surviving Russian Frigate on that side moved up, boarded and successfully took the CoA Cruiser as a Prize!  OUCH!!!


The CoA Orb finally successfully teleported the CoA Battleship into the rear arc of the Russian Battleship, but as the Battleship had already been activated this turn, it was unable to take advantage of it this turn.


As the turn wound down, the Russian Frigates on the right side fired at the “Worm”, but the Cloud Generator threw their targeting off and no damage was caused.  The remaining CoA Drones attacked the last of the Russian Dive Bombers (the only target they could hurt), but failed to do any damage.  The Russian Dive Bombers crashed into the sea as they used up the last of their fuel trying to defend themselves.


In the End Phase, the Prized Cruiser drifted forward another 2”, the CoA repaired the Engine Damage on the Orb and the CoA Mine moved towards the Battleship, though not close enough to trigger it.


Checking the points,
The Russians suffered only 280 points lost!

The CoA suffered 560 points lost (over 50%) AND all smalls were destroyed, completing the Russian Mission Objectives!
 
 
Russians Won the Game!


Wow!  That was quite the battle!


In Graham’s defence, it was the first time he had played the Antarcticans AND he had some pretty dismal rolls.  I mean, he had a LOT of DISMAL rolls.  Usually I can expect winning initiative once a game.  Graham rolled low twice and when he finally had a good roll, I had an excellent roll.  Same thing with shooting.  He was rolling 7 dice on those Cruiser’s Particle Accelerators and failed to damage a FRIGATE twice in their first attempt!  And to roll double 1’s when trying to activate the Transporter function and “loosing” his Battleship for a turn as a result?  What can you say about luck like that?!?!?


This was the first time I got to use the Russian Coalition with the new PDF rules.  From what I’ve seen so far, I can’t really complain.
 

I’m starting to feel guilty using the Tunguska Large Skyship.  It has just enough speed to be able to get into range when it wants and with Ablative Armor included now – what’s not to like?  I can’t decide whether to put it away for a while or get another one…

The Saransk Medium Skyships died quickly to the CoA Worm, but they did their job.  With Water Hunter and Concussive Barrage, they reduced the Worm’s Assault potential by over ½ in one volley.  Unfortunately, I didn’t realize the Worm could shoot air targets within 8” and the worm got its revenge faster than I expected…


The Fighters being able to make a Hard Shell attack now caught Graham off guard (as I had intended).  Unfortunately, it’s not a trick you can repeat too often.  I foresee these attacks as being used against targets of opportunity or “using up” the last couple of tokens against a small ship or flier.  The look on Graham’s face was priceless though.  ;)
 

The Battleship was slower but at least it comes with the Sturginium Boost now.  Overall, it continued to perform as expected – Super Fire-Magnet Extraordinaire!  This allowed the rest of the fleet to do their jobs.


On Graham’s side, I think he was a little overwhelmed with bad dice rolls rather than a bad fleet composition or tactics.  The only flaw in tactics I saw was when he had was deploying the Battleship in the Russian Deployment Zone AFTER it had already activated in turn 3, and that was a judgement call.  However, the CoA Battleship had a perfect opportunity earlier and I don’t blame Graham for taking the shot he did.  He just rolled really, really badly!  If the game had gone on 1 more turn, that Battleship would have been a major pain in the behind!  Literally!
 
================================
UPDATE
 
So, after a few comments on the Spartan Forums, I have to acknowledge a couple of errors we made in this game:
  • Particle Accelerators have to target their "1st" target within 12".  The "long shot" against the RC Battleship in turn 1 shouldn't have happened.  It caused no damage, but it was an oversight.
  • The "Worm" should NOT have fired its Particle Accelerator at the Skyship.  While the model had the "High Angle" MAR, the PA rules themselves specify that their attacks MUST be on the same level as the model shooting the PA.
  • When the Orb failed the teleport of the Battleship in turn 1, the Battleship SHOULD have been teleported in Turn 2, after the Orb had activated in turn 2.  I shudder to think what would have happened if either of us had caught THAT error!  It would probably have swung the battle in the opposite way.
The moral of this story?

Don't be afraid to double-check your rules during a game!!!

Thanks, everyone!