Monday, August 18, 2014

BatRep: DW2 – Using TACs & Secondary Objectives! (1000pt Kingdom of Britannia vs Prussian Empire)

So, another report with the Prussians vs their standard enemy, the Brits!

But something different this time.  This time, we had 2 sets of official Tactical Action Cards (TACs) AND, I had the Secondary Objectives set, ready to use.  While Graham and I were both experienced in using TACs (from Beta Testing), we had never tried the Secondary Objectives.

TACs:
So what are Tactical Action Cards?  In a nutshell, they are “extra” capabilities that are used one time only.  Little elements of surprise that can make your life wonderful or heck!  They can grant you a bonus to your initiative rolls, repair damaged ships or make an attack stronger – all dependent on the card.

When using TACs, each player starts off with a Deck of 16 cards.  In the future, using special commanders or formations will let you swap cards out, but players are always limited to 16 cards in the player’s deck and each swapped card must replace a card of equal value.  Yes, TACs have value!  Just before a game starts, both players select a number of cards (chosen, not randomly drawn).  Players get 2 cards to start, plus 1 card for every full 250 Points of fleet value, up to a maximum of 10 cards each.  These cards are chosen, per the rules, after deployment and drawing of the fleet’s mission objective.  So cards can be selected to help for or against a specific foe or mission.

During the game, a player can attempt to play a TAC at certain times (usually defined on the TAC itself).  The Official TAC phase is just before the roll for Initiative (giving players a chance to modify their Initiative Roll), but some cards will tell the player to use them during movement or firing phases.  When played, the opponent gets a bonus number of Victory Points that the card was worth as the player gains the abilities of the card!  However, sometimes you do NOT want a card to work.  To stop a card, the opponent can “cancel” the effect by playing an equal or higher equivalent value of VPs in cards (yes, more than 1 is an option).  The opponent has stopped the cards effect, but now the player that played the original card gains the VPs used to block their card!  Note: Only 1 TAC can be played at each phase or activation (with the exception of cancelling cards).  If a player plays a TAC during the TAC phase and his opponent also plays a TAC, the first player cannot cancel it as he's already played a TAC.

Secondary Objectives:
Really, these are intended for multi-player games, but I had them and wanted to try them, so we did.

Secondary Objectives are just small counters, deployed after the terrain has been deployed but before the fleets deploy.  When a unit gets within 2” of one, the unit can attempt to capture the Objective.  This is done by rolling 3 D6 and if successful at getting 2 hits (4+ are hits, 6’s count as 2 hits), an event card is drawn.  Like TACs, there are descriptions as to what happens.  Cards have either Immediate effects or can be “banked” and used later.  They work just like TACs, except they usually include actions that are not available to TACs (such as granting immediate Victory Points).  These can be anything, including a booby-trap.  You never know until you draw the card…

On to the game…

Terrain was rolled for, and we had 4 islands, one in each of the w Northern Sectors and one in the South West, as well as one sand bar in the South East sector.  Britannia was deployed on the Northern edge, Prussians on the Southern edge.  Neither side had Flankers, Reserves or Advance Deployment.

The British deployment (North-West to North-East):

  • 3 Attacker Frigates
  • Commodore’s Ruler Battleship with Guardian Generator
  • 5-Strong SAS Fighters
  • 5-Strong SAS Fighters
  • a 2nd Ruler Battleship with Guardian Generator
  • Lord Hood Battle Cruiser
  • Lord Hood Battle Cruiser
  • 4 Attacker Frigates
  • 4 Attacker Frigates


The Prussian deployment (South-West to South-East)

  • 4 Arminius Frigates
  • 5-Strong SAS Fighters
  • Commodore’s Elbe Fleet Carrier with:
  •     5-Strong SAS Fighters
  •     4-Strong SAS Dive Bombers
  • Kaiser Karl Heavy Battleship with Elite Crew
  • 3 Uhlan Cruisers
  • 3 Saxony Corvettes
  • Konigsberg Battle Cruiser
  • 5-Strong SAS Fighters
  • 3 Saxony Corvettes

View from North (British) to South (Prussians)

Turn 1:
In the TAC phase, British played “Radio Intercept”, gaining +1 to their Initiative Roll.  The Prussians played “Lost Orders” and randomly pulled the TAC “Battlefield Repairs” (worth 60 points and allowed a player to repair random # of Hull Points).  As both TACs were worth 20VPs, each player started with 20VPs (the discarded Battlefield Repairs doesn’t count in this case as it was not “played”.)

British won the Initiative by 1…

On the west table side, the British Frigates advanced forward at full speed, but were out-of-range from any targets.  Prussians wasted an activation by advancing a Fighter squadron forward just a bit.

Seeing that the Prussians weren’t being baited by the Frigates on the west, a Lord Hood Battlecruiser advanced forward and targeted the Prussian Battle Cruiser.  The British played the TAC “Devastating Barrage” which the Prussians cancelled with the same card, giving the British another 40 points.  After firing with “regular” weapons, we originally thought the Prussian Battle Cruiser had been critted, but realized that the wrong range band stats had been read, and were forced to re-rolled the results (though this was after the Prussian Battle Cruiser had been activated).  The Prussia Battle Cruiser was damaged. 
The Prussian Battle Cruiser activated (as it was thought to be critted) and moved forward at amx speed with an extra 2” move due to the Tesla Generators and returned fire to the Battle Cruiser, but failed to damage the British ship.  However, the Prussian vessel was close enough attempt to capture and successfully captured the closest Secondary Objective – drawing the card “Dispatches”.

Capturing Secondary Objective 1!

The 2nd British Battle Cruiser advanced past the 1sr, lining up all guns on the damaged Prussian Battle Cruiser, causing a Double-Crit.  First Crit was Raging Fires, but the Second was a “Magazine Explosion”, sinking the Prussian vessel with all hands!  I thought that was supposed to happen to the Hood!!!

First Blood: A Magazine Explosion!

Things were not going well for the Prussians.  The Prussian Cruisers advanced straight forward at full speed and managed to crit one of the Battle Cruisers (Hard Pounding, -1AP) and damaged a Frigate to the West.  The British retaliated by advancing a Battleship then critting a Cruiser (Engine Damage). 

Prussian Fighters stalled again by moving fighters from the East of their line towards the table center.  British Frigates on the East moved forward, turning to port to line-up torpedoes, but failed to damage the Cruisers.  The Prussian Battleship moved out from behind the island (and the Carrier) but was still too far away to damage a Battle Cruiser.  The British Commander’s Battleship slowly advanced from around the island, brought 2 turrets to bear on the Prussian Cruisers and, disgustingly, sank it with a 2nd Magazine Explosion!  This time, the explosion was sufficient to damage one other Cruiser and crit the last Cruiser (Engine Damage).  This was getting ridiculous…

ANOTHER Magazine Explosion?!?!?

Finally, the Prussian Frigates activated, moving forward at maximum speed and sank 2 British Frigates on the west table side.  Finally – Points for the Prussians!
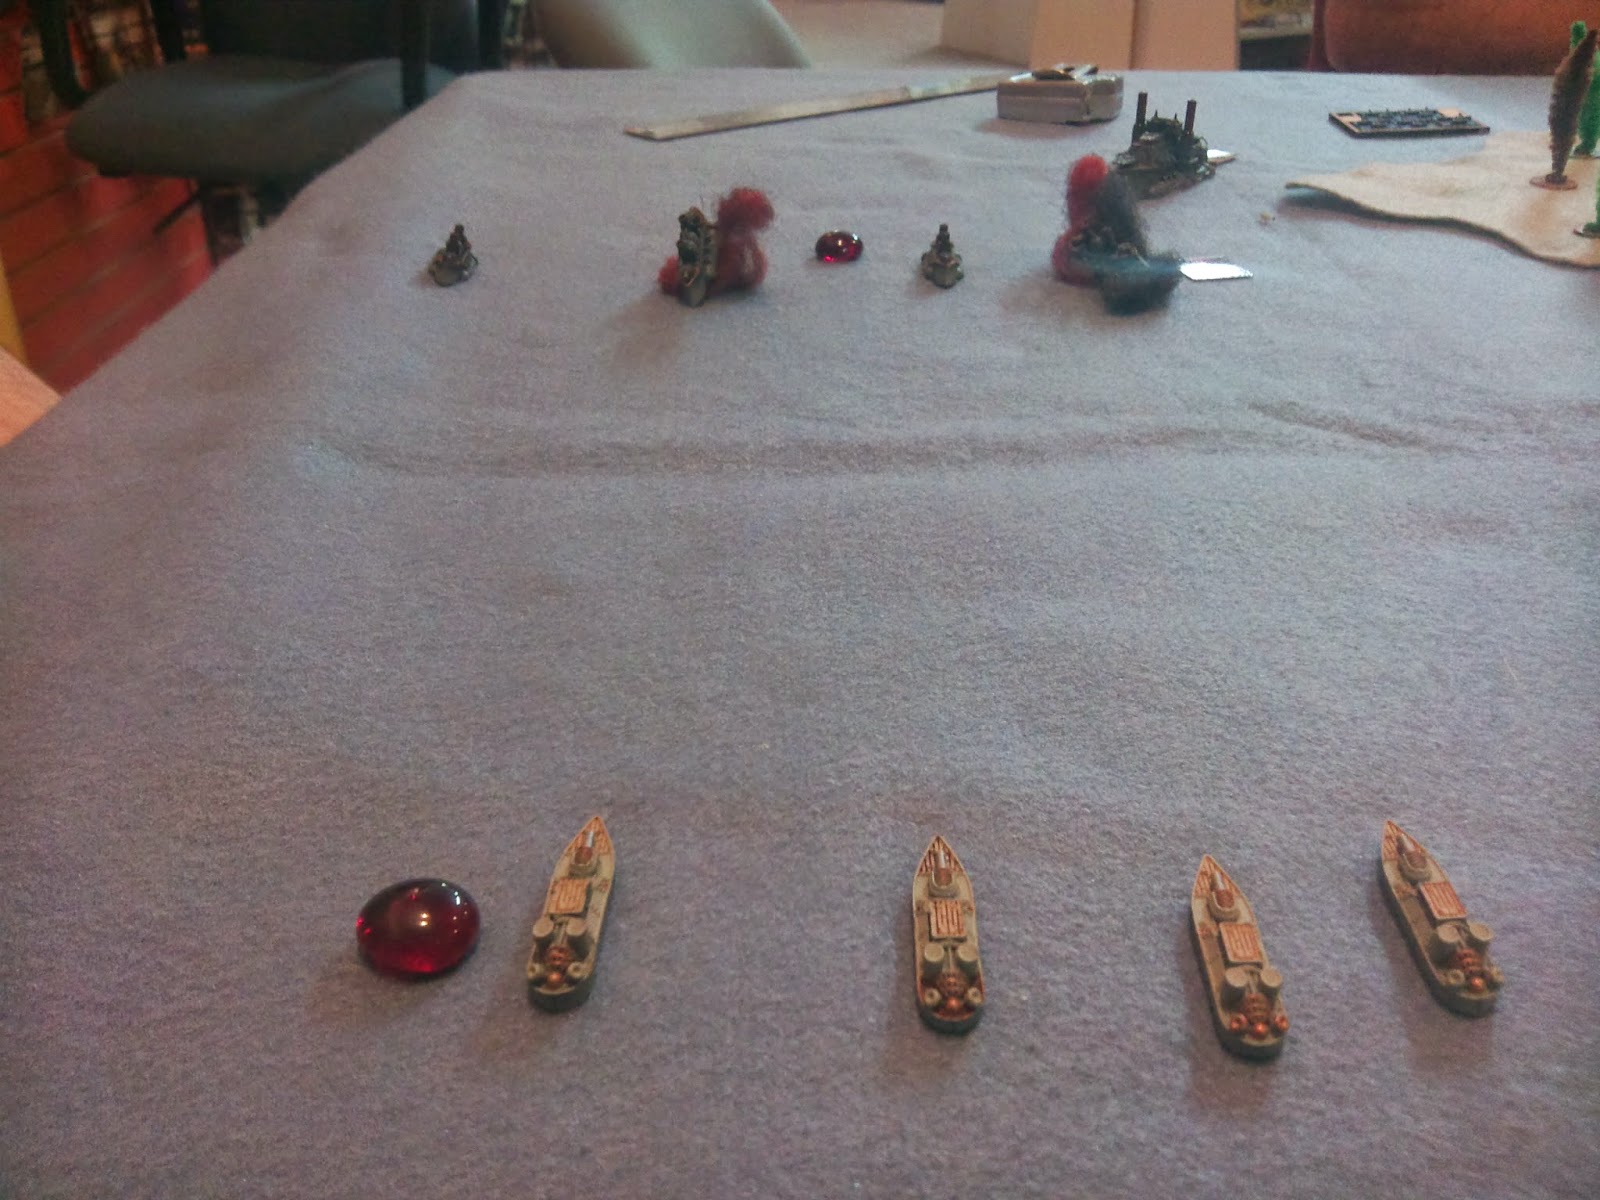
First Blood for the Prussians!

The Last British Frigates on the East side formed a Line-Of-Battle and started out from behind the other squadron of Frigates.  The Prussian Carrier re-purposed a squadron of Fighters as Dive Bombers, then moved forward max speed.  Unfortunately, it wasn’t enough to clear line-of-sight to any targets.  British Fighters moved forward, over the islands.  Prussian Dive Bombers moved forward. Behind the Prussian Fighters.  The 2nd squadron of British Fighters moved forward, beside the 1st squadron over the island.  This was the last British Activation of the turn.

Unopposed, the 4-strong Dive Bombers advanced forward, then both squadrons of Corvettes advanced.  The first squadron sank 2 Frigates, the other squadron captured the 2nd Secondary Objective and received “Sturgigite Fuel”, allowing the squadron an extra 5” movement when they chose to activate it in any of their activations.  Sadly, it was not transferable.  (I really could have used it on the Battleship about now…)
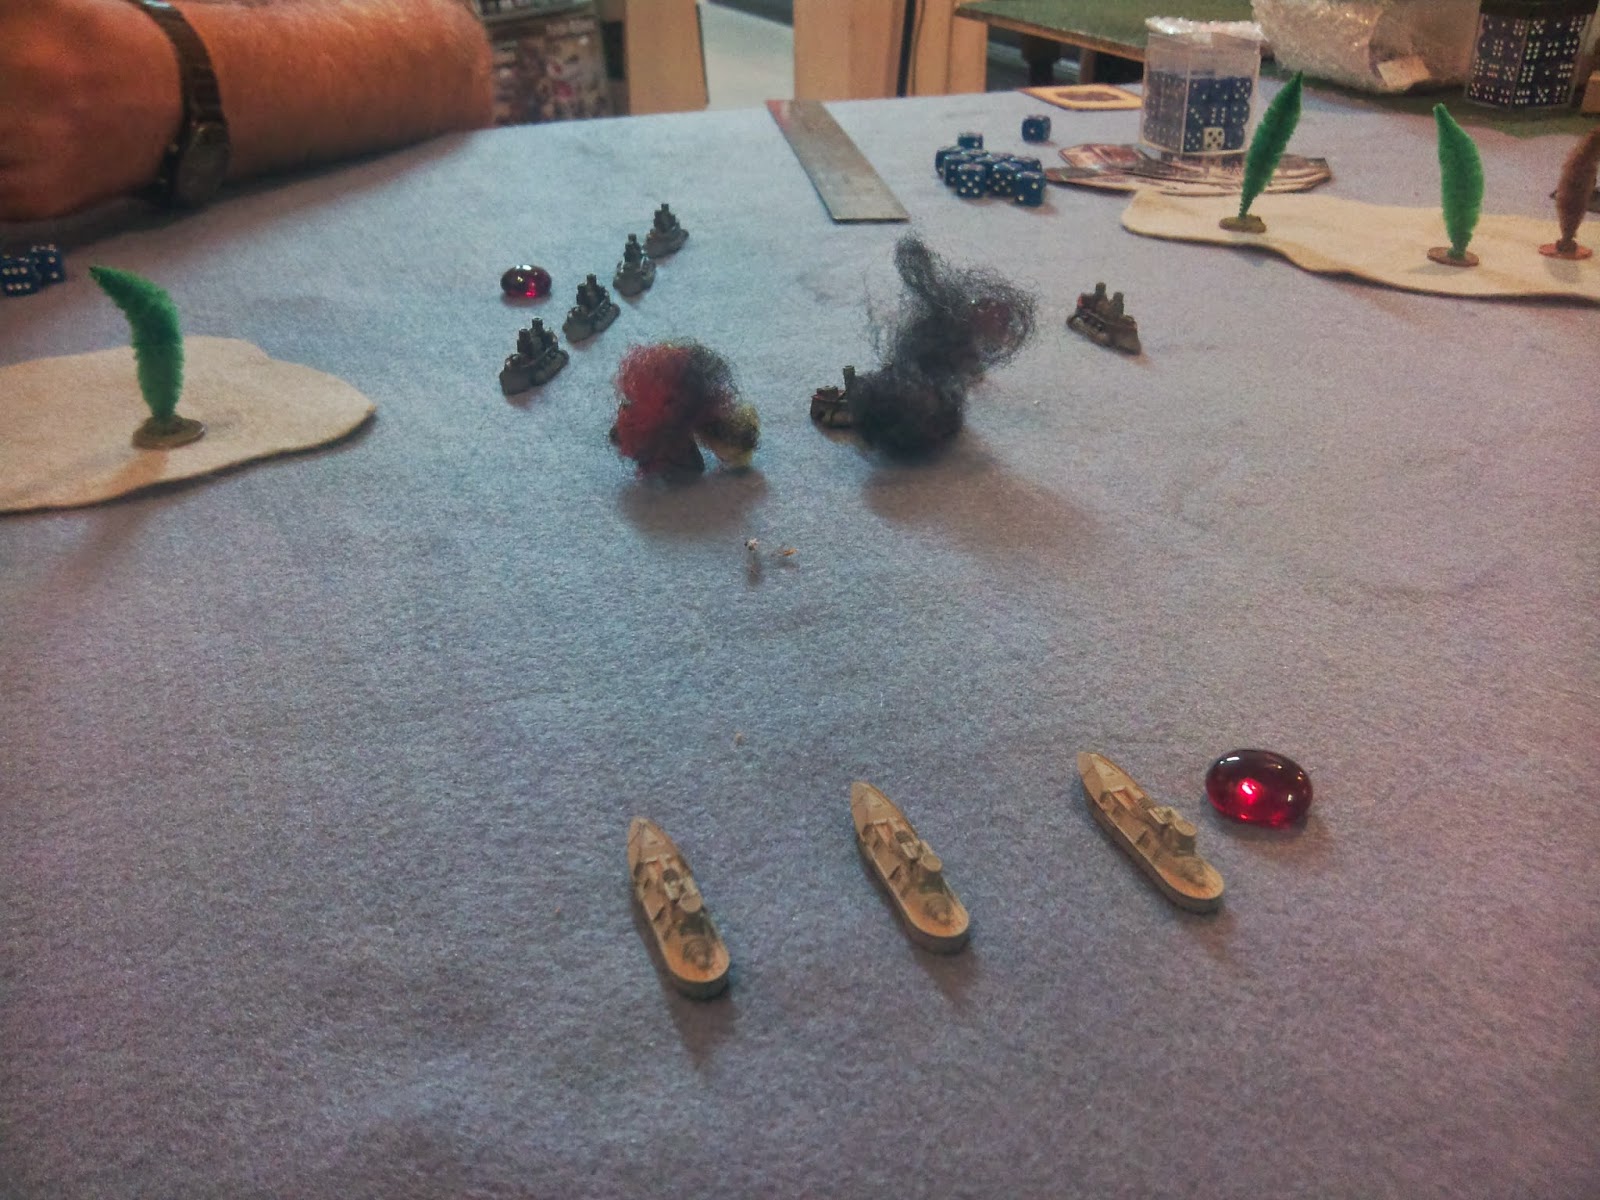
First Corvette Squadron Attacks While...

Second Squadron Captured Another Secondary Objective for the Prussians!

In the End Phase, the Prussian Cruiser’s damaged engine was repaired, the only thing that needed to be repaired.

VPs:
KoB:       260
PE:          140

End of Turn 1

Turn 2:

Knowing I was going to be pounded on badly this turn, the Prussians played the “Dispatches” event card that captured last turn.  This would give us +1 Bonus on all Disorder tests.  The British played no cards this turn.

Prussians won the initiative for the turn.

Looking at the situation, it was apparent the Prussian Cruisers were going to get plastered, so it was a case of “Use-‘em-or-Lose-‘em”.  Off they went forward, then turned to port, dropping mines as they turned.  I REALLY didn’t want to drop the mines, but then again, I didn’t expect the Cruisers to survive.  At Point-Blank range with Close Gunnery ability (ignores the -1 for firing Primary Weapons at RB1), I blasted both the Battle Cruisers.  Unfortunately, BOTH Battle Cruisers made EXCELLENT shield saves.  Neither was damaged.  Just to throw salt on the wound, the Cruisers were unable to capture the last objective!  ARGHHHH!!

The British Battleship sailed forward, turning 2 turrets on each cruiser and proceeded to sink 1, crit the other (Weapons Damaged).  The surviving Cruiser failed its Disorder Test.  Then, the great brute fired torpedoes in contempt at one of the Prussian Frigates and sank it.  Nope.  This turn wasn’t going any better for the Prussians than the last turn…
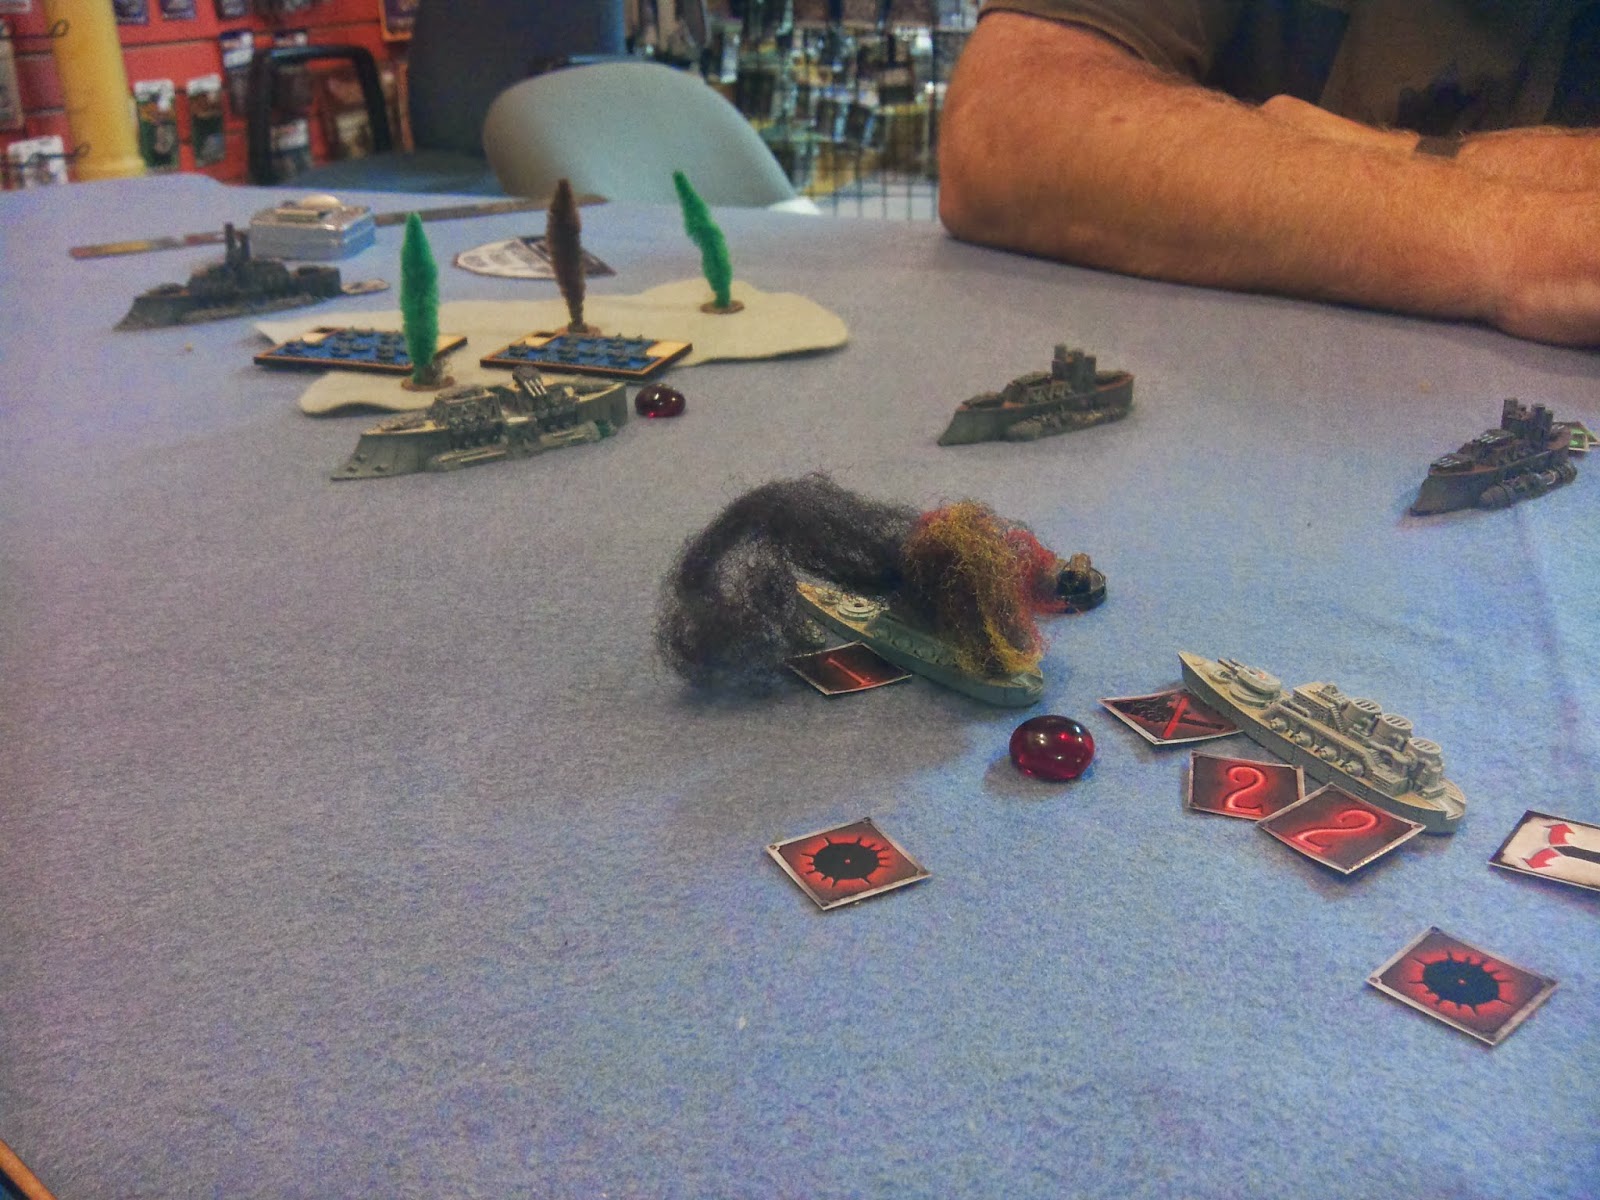
Lost: 1 Brave Cruiser...

Ah well, the Prussian Corvettes moved forward and sank 1 of the 3 British Frigates they targeted.  

Outnumbered Corvettes Fight On!

The British Battle Cruiser sailed forward and finally sank the last Prussian Cruiser, then proceeded to capture the last Objective: Emergency Repair: the Battle Cruiser was able to repair one of its lost Hull Point.

The Last Prussian Cruiser, Sunk!

Prussian Frigates rushed forward and from point-blank range sank the last 2 Frigates on the West side of the Table.

Prussian Frigates Counter-Attack!

The Commodore’s Battleship played the TAC “Stoke the Engine” (gained an additional 2” move), turned to port around the island and headed towards the table center.  Firing turrets in each direction, the Battleship sank 2 Frigates (the last failed its Disorder Test) and a Corvette.  The only good news for the Prussian was that we got 40 Points for the TAC that was played.
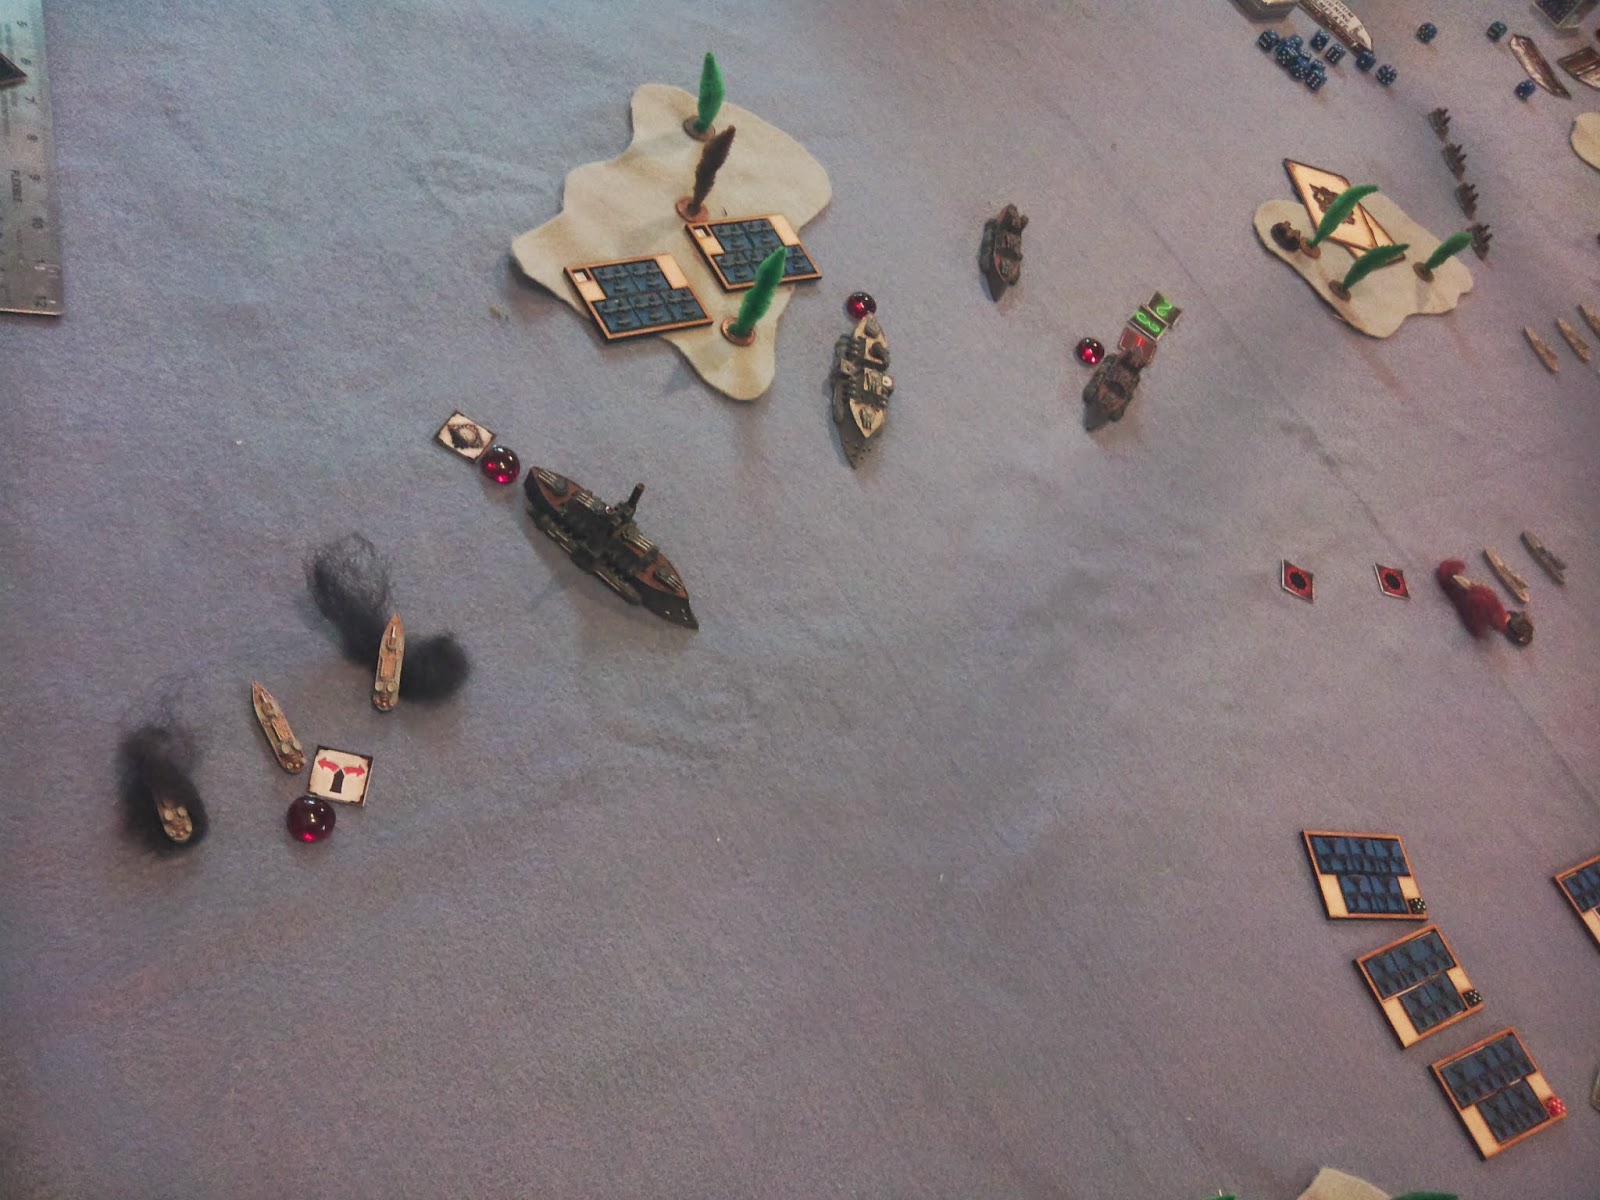
The British Commodore Speaks!

The Prussian Battleship turned towards the table center.  Firing all weapons, the great ship crit the Battle Cruiser (Engine Damage) and managed to damage and stick a Lightning Rod in the side of a Battleship!  A British Battle Cruiser moved forward at maximum speed and targeted the Prussian Battleship.  When the smoke cleared – no damage was to the Kaiser Karl!  The combination of Rugged Construction and a Shield Generator was too much for the Cruiser to overcome.

The Prussian Corvettes used up their Sturginium Fuel they had captured and zipped behind the damaged battlecruiser and raked her stern, causing a crit (Shredded Defenses).  Meanwhile the British Frigates to the East sank a Corvette.  The Survivors failed their Disorder Test.

Prussian Corvettes Taking Fire!

I needed to use the Dive Bombers, but those British Fighters were too close.  Prussian Fighters attacked the British Fighters and shot down 2 tokens for the loss of 2.  British Frigates then moved between the island and Prussian Corvettes, formed a curved Line-Of-Battle and blasted the Corvettes, but when the smoke cleared, neither Corvette had been damaged! 

Maybe there was too much smoke in their eyes?

The second squadron of Prussian Fighters attacked the undamaged British Fighter Squadron, and shot down 3 tokens for the loss of 1.  The larger British Fighters attacked the smaller Prussians Fighters, but were completely destroyed, taking 2 Prussians with them.  Prussian Dive Bombers prepared to attack the Battle Cruiser, but found they were 2” short!  They moved forward, preparing to attack next turn (I hoped!).  Of course, the remaining British Fighters “Bounced” the Dive Bombers.  Unfortunately (for the British), the Fighters were unable to shot down any of the Dive Bombers while they lost 1 of their own.  That ended the British Activations for the turn.

The Second Dive Bomber squadron went forward, again out-of-range of the British ships.  Finally, the Prussian Carrier turned around the island and fired everything it could bring to bear.  The undamaged Battle Cruiser escaped damage, but the Damaged Battle Cruiser was sunk with a Crit from a combined Forward Tesla & Speerschleuder attack, finally sinking the stubborn Battle Cruiser.

The Battle Cruiser is Finally Sunk!

In the End Phase, all damage was repaired and no ships were lost due to Rallying from being Disordered.

VPs:
KoB:       520 Points           Mission: 50% + all Mediums – Both Completed
PE:          410 Points           Mission: 50% + all Mediums – Neither Completed

British Victory!
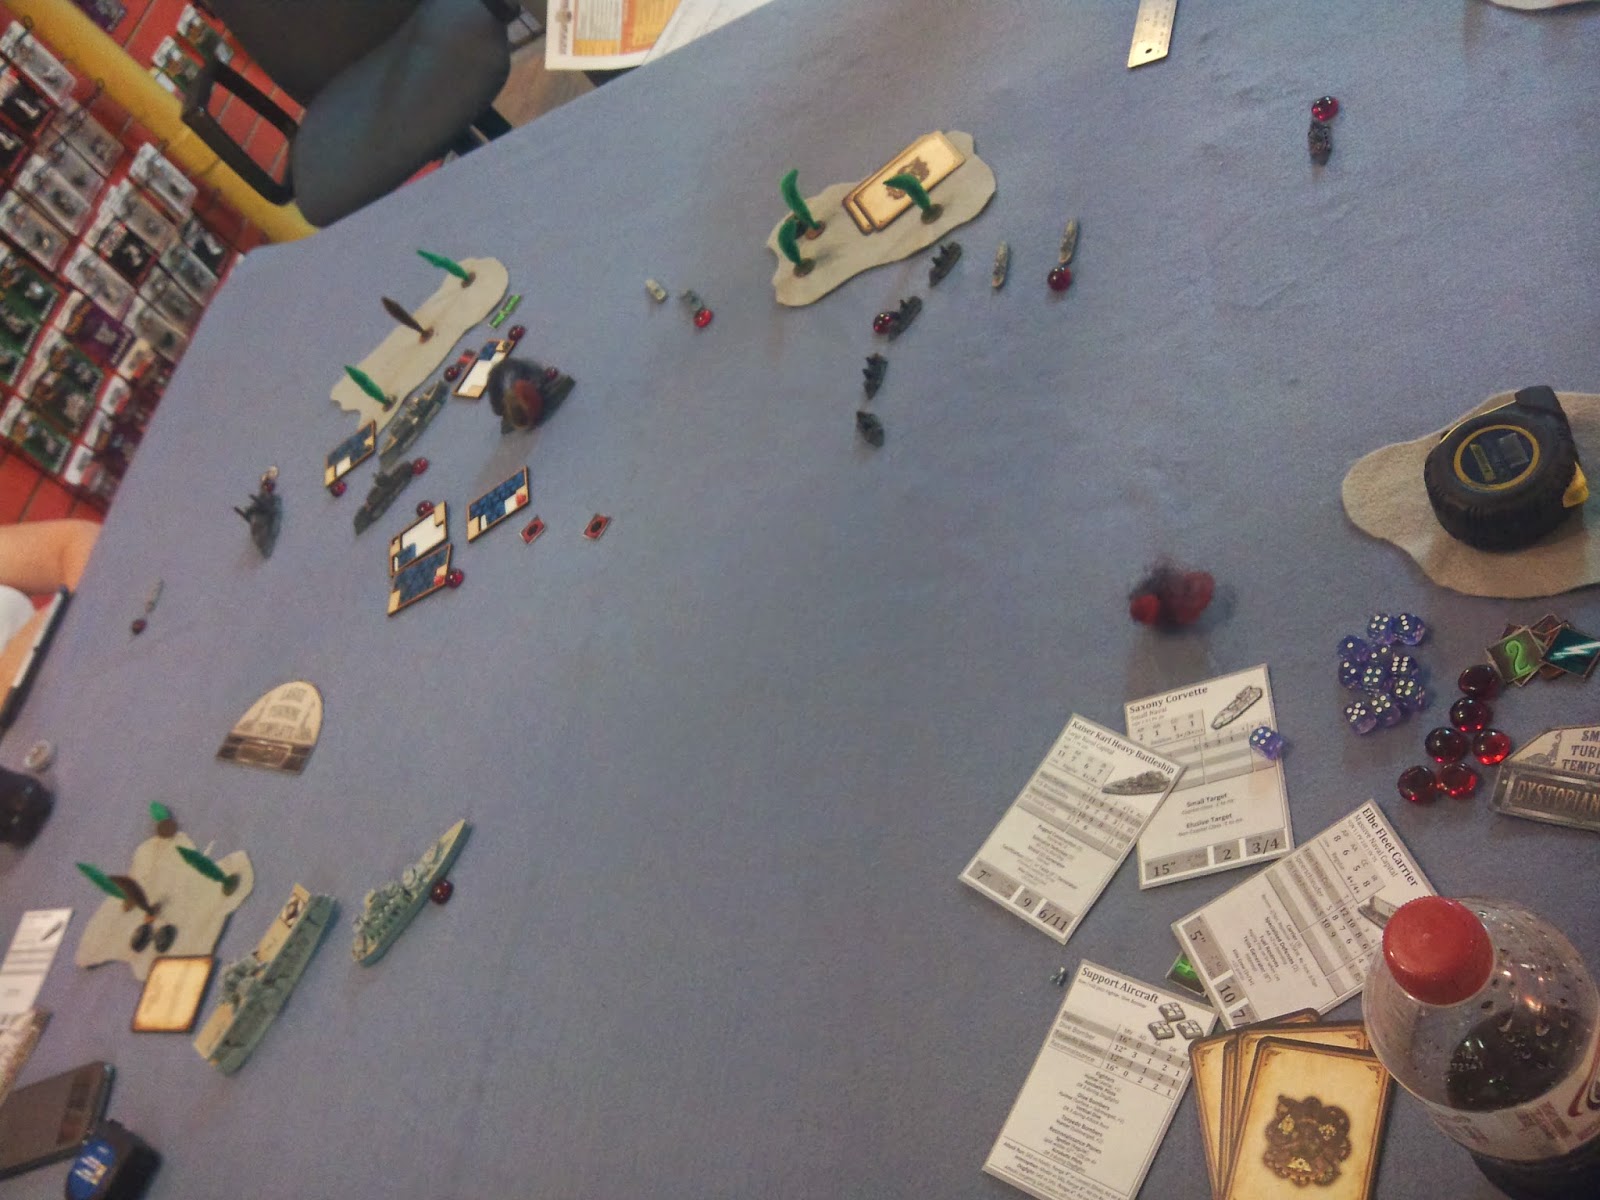

End of Turn 2 & Game!
British Victory!!!

======================================================================

So, let's talk about the TACs:
If you were keeping track, both the Prussians and the British were granted Victory Points due to the use of TACs.  In fact, both players "earned" an extra 60VPs.

If the Prussians had not cancelled that Devastating Barrage in Turn 1, the British would have had 40 less VPs - leaving them a total of 480VPs - LESS THAN the 50% they needed to win!

Hind sight being 20/20 - if the Prussians had let the Devastating Barrage TAC play, I probably would still have lost all my mediums by the end of turn 2, but I potentially could have drawn the game an extra turn and forced a draw as my Dive Bombers, Battleship and Carrier would all have had a chance to sink the last Battle Cruiser, earning me the required 50% & all Mediums..

And that is the key to TACs.  Depending on how they are played, you can "force" your opponent to "give" you extra Victory Points or risk the potentially horrific outcome of letting it play out.  You can hoard your cards and play them when your opponent has none, or draw out their cards while saving an "ubber-card" to play (hopefully) unopposed.

Secondary Objectives: Well, we only had 3.  None of them were outstanding or affected the "Primary Missions" but they were a fun add-on.  For the record, the wording on some of these cards is pre-Version 2 so I'll be waiting for some updates and clarifications, but they can be used as an extra add-on, for a change of pace.

Now about the game play...

------------------------------------------------------------

DEPLOYMENT! DEPLOYMENT! DEPLOYMENT!!!
Followed closely by:
ORDER OF ACTIVATION! ORDER OF ACTIVATION! ORDER OF ACTIVATION!!!

I blew this game so badly before the first activation, it was not funny.

First Problem: Prussian Deployment.  While there is alternating deployments, there is the handicap of having to deploy your largest units to smallest.  Not having used these ships since Beta Testing and I forgot how “robust” the Battleship & Carrier were.  So I hid them.  While this protected the Battleship and Carrier from Enemy fire, it also limited my ability to damage his fleet as my 2 strongest units were unable to direct their fire where it was needed most.  Not to mention, it kept my Medium choices in the open as there was insufficient room to hide my entire fleet behind 1 small island.  As a result, my Medium choices were under fire from the beginning of turn 1 when they should have been the ones hiding behind the island or the larger ships.

Second Problem: Order off Activation.  While I can blame the British for “falsely” critting the Battle Cruiser and my resultant attempt to use the Battle Cruiser before it was destroyed, that doesn’t justify activating the Prussian Cruisers so early, making them that much more easily damaged and eventually sunk.  If I had been smarter, I would have waited a bit before charging forward, into the guns of 2 Battle Cruisers and a Battleship.  The only saving grace was that the 2nd British Battleship was on the other side of the island and couldn’t bring her guns to bear right away.

I held back the Dive Bombers too long, my major Carrier Weapon.  As a result, I was in great position for Turn 3, but the game didn’t last that long!!!  I could/should have been more aggressive with my SAS.

Finally, as the Prussians, I didn’t have a plan.  Other than to grab the Secondary Objectives.  But I really hadn’t thought it through beyond that.  The British, on the other hand, obviously had a plan and played it through to the end.  I didn’t start to form a plan until the 2nd turn.  By then, it was too late.

I won't comment on the fleet composition too much as I think I made my point when I said I didn't have a plan.  It wasn't the fleet's fault the Prussians lost, it was my failure as a commander.  So I won't critique the various fleet components.  I will say that the Kaiser Karl was a GREAT ship.  Rugged Construction (2) AND Shields (2) made this one tough ship.  I did miss the extra speed from the Tesla Generator, but it’s available as an option.

I did waste a number of points upgrading the crews of both the Battleship and the Carrier.  Hind-sight being 20/20, I should have bought another Corvette and added it to one of the Corvette squadrons.

-----------------------------------------------------------

On the British side, I also have to comment on the toughness of the fleet.  Not only were the Primary Weapons redoubtable, Graham was making some incredible shield saves!  He was averaging 3 shield saves which made it incredibly tough to even get Damage, let alone Crits.  However, it was his not getting distracted that let him win handily this game.

By taking a 2nd Battleship instead of a Carrier, the British were forced to charge forward and blast away immediately.  He couldn't wait for me to start rearming and replenishing my SAS.  It was a gamble, but in this case, it worked well for him.

One thing Graham thought that won him the game was the 2 instances of Magazine Explosions in the first turn.  I will admit it was depressing and slowed me down.  I was starting to gain momentum though by the end of Turn 2.  Again, if the game had lasted 1 more turn, my Battleship and Carrier were in great position to do lots of damage in turn 3.  We just didn't get that far...

Sunday, July 20, 2014

BatRep: Dystopian Wars v2 Kingdom of Britannia vs Russian Coalition (1,000pts)

Admiral Dimitry Orlov was lucky.  No other word for it.

One moment he was on the flying bridge of the Carrier Kiev, the next he was in the water.

Of the Kiev, ther was no sign.

The crew of the Battleship, Georgy Pobedonosets II ("St George the Victorious II" in English) was sailing alongside when it happened.  An observer saw him fall off the bridge when the superstructure was hit by a salvo, moments before the great carrier sank.  Due to his quick warning, rescue crews saved him before he drowned.  There was a reason why he love the Georgy Pobedonosets II!

The Czar’s staff figured he needed a break so he was sailing back to the Atlantic to participate in war games against the Kingdom off Britannia.  Part of this was to improve relations with the British, the other to evaluate whether Orlov was fit to command.

I’ll just have to show them what I can do…

===============================================
Due to some mis-communications, Graham and I out-guessed each other.  I had told him my new Prussian Naval Battle Group box had arrived (which he thought I meant to bring) and he laughed about his last win, so I complained I needed a rematch (and thought he was bringing his Empire of the Blazing Sun).  Both of us were surprised and ended up with an “Allied Training Mission”.  Oh well, I can still sink him…

To speed up the game (due to limited time), we decided to play on a 4’ X 4’ rather than the standard 4’ X 6’.  British rolled Strategic Advantage, Russians got Operational Advantage. 

We had 3 islands on the western side of the map, clear open spaces on the east.  Russians setup in the South, British took the North.

Russian Deployment (Left to Right):
  • Tunguska Large Skyship with SAS Fighter (5) Support & Glacier Generator (Obscured)
  • 2 Suvorov Cruisers
  • 2 Saransk Medium Skyships (Obscured)
  • SAS Fighter (5)
  • 3 Novgorod Frigates
  • 4 Rostov Destroyers
  • Borodino Battleship with Rocket & Torpedo Jammer (Commodore’s Vessel)
  • 3 Novgorod Frigates


British Deployment (Russian Left to Right)
Advance Deployment:
  • 2 Hawk Scout Rotor (Obscured)

Main Deployment:
  • Eagle War Rotor (Obscured)
  • SAS Fighter (5)
  • 2 Orion Destroyers
  • 2 Vanguard Submarines (Submerged)
  • SAS Fighters (5)
  • Ruler Battleship w/ Guardian Generator (Commodore’s Vessel)
  • 3 Attacker Frigates
  • Ruler Battleship (No Options)


Start of Game Deployment!


We selected orders, but the British drew a 6 – allowing Graham to pick any mission (secretly) he wanted.

Turn 1:
British won Initiative.

The Eagle stayed obscured, moved slowly behind the islands, and missed its shots at the Saransk Skyships.  The Tunguska also stayed obscured, moved forward and turned to expose its beam turrets to multiple targets, but failed to damage any of its targets.  British Hawks moved forward and each dropped a mine, then targeted a different Saransk.  The Saransk Skyships moved forward and in another display of bad rolls, did nothing.  Things weren’t happening too quickly.

The British Commodore’s Battleship moved forward and turned to port, and damaged 1 Frigate and 1 Saransk Skyship.  As the turrets are piercing weapons, the Frigate was down to 2AP from Hard Pounding and the Saransk suffered Nav Lock.  Finally, Russian Fighters attacked and shot down one of the British Hawk Scout Rotors with a Triple Crit!  First blood for the Russians!

Russian Fighters Draw 1st Blood!

The British subs surfaced and turned to each fire at a different Cruiser, but failed to damage either.  ! Sub failed its dive roll so was stuck on the surface.  The Russian Cruisers hugged their closest island as they advanced, then managed to Double Crit the Surviving Hawk Rotor (2 Shredded Defences).  British Destroyers advanced and damaged one of the Cruisers.  Finally, a second squadron of Fighters attacked and shot down the last British Hawk Rotor!

Second Hawk Shot Down By Fighters!

The second British Battleship moved forward, turning slightly to present all weapons on the Russian Battleship, and managed to damage it, in spite the range and Ablative Armor.  Russian Frigates went around the left side of an island to hide behind the Russian Cruisers.  British Frigates came out of their deployment zone but were unable to damage anything.  The second Russian Frigate squadron went out at maximum speed towards their British counterparts, but were still out of range.  British Fighters came out and shot down 4 Russian Fighters for no loss, leaving 1 lone fighter token in the squadron!  The Russian Battleship came out from behind the islands and though the turrets failed to cause any damage, the broadsides crit the Vanguard sub still on the surface (Fusion Leak – 3 Counters)!  The final British move of the turn was the second fighter squadron moving towards the British Eagle War Rotor.  The Russians then moved their last Fighter squadron towards the air war on the western table edge while Russian Destroyers finally moved forward.

In the End Phase, the British managed to repair all the Corrosive Counters on the Sub, while the Russians fixed the Nav Lock on the Saransk Skyship.

VPs:
KoB        0
RC           160


Turn 2:
Russians won Initiative.

Almost Start of Turn
Russian and British Battleship on the left already activated in turn 2!

Knowing the British Battleships were going to double-team the Russian, the Commodore moved his Battleship first, getting into RB 2 to the British Commodore’s Battleship!  When all the smoke cleared, the Great Russian ship had caused NO damage anywhere!  Laughing, one of the British Battleships turned to starboard and blasted the Russian, but only the turrets caused a crit (Hard Pounding: 9AP left).  The Russian Saransk Skyships moved forward and turned to starboard, dropped mines and targeted the Eagle Rotor with their turrets, critting the Eagle (Hard Pounding + Concussive = 5AP left).  The Eagle Rotor, moved and turned to port, shot down the lone Fighter with AA and damaged one of the Saransk Skyships.

The Russian Cruisers turned to fire on the surfaced sub before it could dive again, but missed!  The British subs then (both surfaced) turned their prows and torpedoes towards the Russian Battleship, but caused no damage thanks to a combination of the Torpedo Jammer and Concussion Charges.  This time, the other sub was left stuck on the surface while the other submerged successfully.  Russian Fighters moved forward and attacked the Eagle Rotor and crit it (Shredded Defences) for a loss of 1 token.  The British Commodore’s ship then turned to blast the Russian Battleship and Crit it: Sturginium Flair!  The Russian Commander’s ship suddenly teleported forward, between both British Battleships!!!

"How'd I end up HERE?!?!?"

Russian Frigates on the right moved forward and sank 2 British Frigates!  The survivor failed its Disorder Test.

Russian Frigates At Work!

The surviving British Frigate darted between the British & Russian Battleships, attempting to hide from the Destroyers.  The Russian Destroyers finally pounced, attacking the British Commodore’s Battleship.  Though they failed to crit the Battleship, the guns’ Piercing rule caused the Guns Damaged Crit Effect.  British destroyers moved next, but in attempting to maneuver avoiding mines, 1 Destroyer clipped the stern of the surfaced sub, damaging both.  Afterward resolving the collision, the Destroyers failed to cause and damage.  Another Russian Fighter Squadron attacked and Crit the Eagle War Rotor again (Guns Damaged) for no loss.  British Fighters attacked and crit a Saransk Skyship (Hard Pounding – 5Ap left) for no loss. 

That was the last British Activation for the turn.  Russian Frigates on the left moved forward and damaged the surfaced Sub, then sank the damaged Destroyer.  The surviving Destroyer passed the Disorder Test.  Finally, the Tunguska Skyship moved forward, two turrets failing to damage the Eagle Rotor, but the other Beam Turret, not wanting to waste any opportunity, took a shot at the surfaced sub, and caused a crit.  Magazine Explosion!!!  The blast took out both subs and a Destroyer!  The closest Saransk Skyship was spared any damage only because its Ablative Armor was still intact!

 Magazine Explosion!


In the End Phase, the last British Frigate lost its last AP, then rallied.  The war Eagle repaired its Shredded Defences, but failed to repair its Guns Damaged, as did the Commodore’s Battleship!  By this time, there were no Effects for the Russian to repair (mostly Hard Poundings – unrepairable).

VPs:
KoB:       0!
RC:         420


End of Turn 2


Turn 3:
British won initiative!

The British Strike Back!  The British Battleship mad a minimum move and turn to present full broadsides on its Russian counterpart.  The good news for the Russian ship was it was too close for a torpedo attack and Primary Guns suffered a -1 penalty to hit, but it really didn’t matter.  With 23 dice requiring 5+ to hit, the British inflicted 12 hits, a CRIT!  The Russian’s Battleship sank quickly, the Commodore’s presence was unknown, causing panic among both the Frigate squadrons, the Cruisers and the Saransk Skyship!  Only the Destroyers and Tunkuska managed to keep order!


Death of a Battleship!

The Tunguska, now within 8” of the British Eagle War Rotor, used its Mimic generator to copy the Eagle’s Guardian Generator (Yeah!  The 1st time EVER I actually got the Mimic to copy am enemy’s generator!).  The Tunguska’s commander thought briefly of trying to prize the Eagle, but only had a 2AP more than the eagle, so instead turned 2 turrets on the Rotor.  Ducking back in the clouds, the War Rotor managed to avoid taking any damage.  The British Commodore’s Battleship then moved forward, firing weapons everywhere.  When the smoke cleared, the Russians had suffered a Destroyer and Frigate damaged and another Frigate sunk.

Russian Fighters attacked the Eagle War Rotor, but failed to damage the large air vessel.  The British Fighters attacked and shot down the most damaged Saransk Skyship for no loss!  The British were finally making up for lost time: 300 points destroyed in 3 ACTIVATIONS!!!

British Fighters Seek Revenge

Another Russian Fighter squadron attacked the Eagle War Rotor, and AGAIN, the wiley British commander avoided taking damage!!!  Surely there was only bubble gum and string holding the hull together now!?!?!  The Eagle finally activated, but was so heavily damaged, was unable to damage the Frigates it fired on.

Back on the other side of the table, the Russian Destroyers, angered by the loss of their Commodore, made their attack run on the British Commodore’s Battleship, critting it (Generators Offline).  As the last British activation, the lone Frigate managed to break through the Russian’s front line, but was unable to damage a Frigate it fired on.

Moving with impunity, the Russian frigates on the right sank the last British Frigate, in spite not being able to link their fire.  The last Saransk Skyship turned to port, attacked the Eagle War Rotor, but its attack was blocked by the War Rotor’s Guardian Generator!  Russian Cruisers made a minimum move and fired their turrets and broadsides at the War Rotor as well, still unable to damage the British Rotor!  All this shooting and no one could damage the War Rotor, to the Russian’s shame!  Finally, the Russian Frigates on the left move towards the table center.

Last British Frigate Sunk After Flanking The Russian Line

In the End Phase, the British failed to repair the guns on both the Commodore’s Battleship and the War Rotor!  On the Russian side, all those disordered squadrons rolled their damages.  After we completed it, the Saransk Skyship lost 3AP, one Cruiser lost 1 AP, and between the 2 squadrons, 3 Frigates lost 1 AP each.

VPs:
KOB:      300
RC:         450


Turn 4:
The Russians won the Initiative.

While the British had made great inroads this last turn, things were still grim.  Only 3 units still existed.  While 1 Battleship was undamaged, the Commodore’s Battleship was badly hurt and the Eagle War Rotor was down to 1HP left!

The Russian Tunguska activated first and turned to port, targeting the War Rotor with 2 turrets.  Once again, the War rotor avoided taking damage!  The British fighters, trying to protect the War Rotor, attacked the Saransk Skyship, hoping to shoot it down before it activated, but only damaged it.  The British Fighters’ effort was in vain as Russian Fighters finally shot down the War Rotor.  Only the 2 British Battleships left!

Death Of The Eagle!

The British Commodore, realizing that 1) he was the closest target and 2) the most damaged and easily sunk, turned his great Battleship around and headed for his deployment zone.  This was a bad idea as it gave the Russian Destroyers the opportunity to do a minimal move forward and still keeping the Battleship in optimum RB 2 range.  The Destroyers managed another Crit on the Commodore’s Battleship, taking out the Guardian Generator!  No more shields for the Commodore!

The last British activation was to have the other Battleship to try and damage those units that hadn’t activated yet, prolonging the life of the British Commodore’s ship.  When the smoke cleared, the Russians had lost the last 2 Frigates from 1 squadron, a Destroyer damaged, and a Cruiser Crit (Generator Offline).  

Trying to protect the Admiral!

It didn’t matter.  The last Russian Frigate Squadron made their maximum move from the left, JUST made it into RB2 and sank the Commodore’s Battleship with linked guns and mortars.

Avenging the Russian Admiral!


The Russians didn’t bother activating anything else – the British only had 1 Battleship left.  The game was over.

VPs:
KoB:       390         50% of the fleet value & all smalls – NEITHER accomplished.
RC:         800         70% of the Fleet value – Mission Accomplished!

Russian Victory!

===============================================

Admiral Dimitry Orlov turned to the Referees of the war game, a smile tugging at the corners of his mouth.

“I assume we all agree that the Russians have won this particular exercise?”

“Most definitely, Admiral Orlov.  I am concerned though that you lost your command once again.”

“Bah!!!  What did you expect when you ruled my ship suffered from that Sturginium Flair and moved out of formation and into Prime Targeting Range of TWO British Battleships???  I think I and my commanders did quite well under those circumstances.”

“Perhaps, Admiral.  Perhaps…”

===============================================
Well, that was quit a nasty fight!  While the Russians and the British are “supposed to be” allies, it’s always fun to see what could happen when neither opponent’s weapons are “optimized” for that particular foe.

So, the Tunguska.  What can I say?  While it did get that incredible Magazine Explosion on the British sub, it was an incredibly lucky shot – I had no expectations of doing any damage that time.  Beyond that, the most useful thing I got from the Tunguska was the extra Fighter SAS!  I did hold it back, but probably too long.  I got so fixated on “stealing” the Guardian Generator from the Eagle War Rotor that when I did, it didn’t do me any good!  The Tunguska was too far out of position to do anything but shoot at the War Rotor which kept hidden in the clouds all game.  (Actually, ALL the fliers stayed obscured the entire game!).  While the Saransk had Air Hunter, the Tunguska did not, so it was always rolling 5+ to hit and when it DID hit, the War Rotor’s Guardian Generator kept saving it from damage!  I should have started moving the Tunguska to help / avenge the Borodino.

Speaking of the Borodno Battleship, it was well supported with a squadron of Frigates and Destroyers, Cruisers not far behind, but I couldn’t have anticipated that Sturginium Flare moving me so close to the enemy Battleships and away from the support I had provided!  I only had 1 really good salvo from the Main Turrets and I bombed the roll!  I never got a second chance after that.  I think I played the Battleship correctly, I just had bad luck this time around.

The Saransk Skyships performed well as anti-aircraft platforms, but the real workload against enemy fliers were the Russian Fighter SAS!  WOW!  They rocked this game!  Usually, I’m lucky if they can damage another SAS, but they are responsible for taking out all the British War Rotors!  Don’t leave home without them!  As I didn’t have a carrier in this force, there wasn’t any real reason to take anything other than Fighters as I couldn’t rearm Dive or Torpedo Bombers.

The other heavy hitters this game were once more, the Novgorod Frigates!  Once more, they were hitting well above their weight class.  The Destroyers are nice and fast, but expensive and I had to hide the Destroyers until they had a chance to run out and do something.  The Frigates, while slower, were shooting and damaging almost every time they fired.

On the British side, well, he had some pretty bad luck!

We never did get to see what the Vanguard subs were capable of, both being taken out with a magazine explosion.  I think Graham took a chance coming to the surface to get better odds firing his torpedoes.  I think he may have been better off staying submerged and firing submerged.  Yes, it would require 5+ to hit, but I think it would have been a good trade-off to keep the subs safe(er) as they made an approach to ram.  We really didn’t have a chance to see what else they could do.

Again, with his Airships, the British had bad luck.  By both sides deploying their aircraft in the clouds, which made all To Hit rolls base 5+.  While he had better range (in theory), he couldn’t’ capitalize on it before the Russian Fighters drove them from the skies.  I think they were good choices, I just think the sequence of activation and pure bad dice rolls rendered them more ineffective than they have should been.

While having 3 Large choices made it tough to get my 70% of the fleet value, it also hampered the British fleet, restricting the size and numbers of his Medium & Small choices.  He had 2 Medium and 2 Small squadrons, but all were undersized and he was outnumbered by activations simply by my having an extra Small choice and the extra SAS from the Tunguska.  Those lack of activations really hurt the British fleet, letting the Russians play the waiting game more effectively.  On the other hand, he was able to overwhelm the Russian Borodino Battleship very quickly with 2 Battleships ganging up on the Russian 1!  The Russians made a few activation sequence errors as well, but the British weren’t really able to capitalize on it.

Over all, a very good game!  Good thing it was a training mission or I don’t know how I would justify saving Orlov again! 


Hope you enjoyed the battle report!  Hopefully I can get another report sometime soon!

Sunday, July 6, 2014

BatRep: Dystopian Wars 2 – 1000pt Empire of the Blazing Sun vs Russian Coalition

Admiral Dimitry Orlov was leaning over the railing of the Russian Fleet Carrier Russian Kiev.  His Battleship, Georgy Pobedonosets II ("St George the Victorious II" in English) was sailing alongside.  Why he was on a carrier instead of his beloved Georgy Pobedonosets II was an interesting story, probably.  Orlov had been ordered to.  Why?  No one thought to tell him why…

Oh well, just for this mission, Orlov hoped.

The sun was rising and in the distance he could see a squadron of Saransk Skyships peeping through the clouds.  It was always a welcome sight to see the skyships, but worrysome that they were short 1 ship.  Hopefully it wouldn’t be an issue.

In the meantime, Orlov had been ordered to look for the remnants of an Empire of the Blazing Sun’s task force.  It was supposed to have a Battleship in need of urgent repair and a couple of escorts, so Orlov felt at ease.  He had a small task force, but it was still more than a match for a bruised Battleship.

“Admiral to the Bridge!  Admiral to the Bridge!  All hands to Battlestations!”

With a heavy sigh, Orlov headed for the bridge, casting one last glance at Georgy Pobedonosets II.

“Well, Captain, have we spotted the enemy task force yet?”

Orlov grew concerned as the ship’s Captain turned to him, pale as a ghost, voice trembling.  “Sir!  Our reconnaissance flight just spotted the enemy task force!  We were misinformed as to the nature of the task force.  Not only is the fleet roughly the same size as our own…”

“Well?  Out with it man!”

“They don’t seem to be escorting a damaged Battleship!  They have what appears to be a fully functional Dreadnought!”

========================================================
So off we went!  Another game!  This time only 1000 points and Graham made sure he had a legal Naval list before we even started!  ;)

We were lazy.  The table was still set up from our last game, so we went with it.  Empire of the Blazing Sun won Strategic Advantage and Russians won the Operational Advantage.  So from the Russian’s point of view, We were on the south edge (again) with 2 islands in the North East corner and the South West corner.  Technically, the table size was 4’ X 6’, but in reality, we played the mission mostly in 4’ X 4’!

Neither side used Advance, Flanking or Reserve forces (the game’s too small for that).

Russian Coalition (RC) deployment – Left to Right:
  • 3 Suvorov Cruisers on the far side of the islands
  • 3 Novgorod Frigates
  • A Kostroma Fleet Carrier with Torpedo & Rocket Jammers, 5 SAS Fighters and 4 SAS Dive Bombers and the Commodore
  • A Borodino Battleship with Stoic Crew and Torpedo & Rocket Jammers
  • 5 SAS fighters
  • 3 Novgorod Frigates
  • 2 Saransk Skyships (Obscured)
  • 4 Suyetka Interceptors (Obscured)
  • 5 SAS Fighters


Empire of the Blazing Sun (EotBS) (also known as the “Japanese”) deployment – Russian Left to Right:
  • 3 Tetsubo Small Interceptors (Obscured)
  • 3 Tanuki Armored Cruisers
  • A Hachiman Dreadnought with Shield & Tesla Generators and the Commodore
  • 4 Yurgi Destroyers
  • 2 SAS of 5 Fighter Tokens, each
  • 2 Inari Scout Gyros (Obscured)


We both drew our orders, but the Japanese decided to drop his secret mission (50% + the Commodore) to do just the 70% of the forces.  I kept the Russian Orders.

Initial Deployment!


Turn 1:
Russians won Initiative!

Russian Frigates on the left started to move around the leftmost island – staying under cover from everything it could hide from.  The Japanese Gyros climbed to the Stratosphere, but found they were out of weapons ranges and unable to spot the Russian Battleship for the rest of the fleet.  Russian Dive Bombers moved forward, over the islands, killing an activation.

The Japanese Destroyers moved forward maximum speed and fired on both the Skyships, damaging 1 and Crit the other (Nav Lock)!  Russian Frigates retaliated, coming around the right side of the southern islands and sank 2 Destroyers and damaged a 3rd!  First blood to the Russians!  The Destroyer passed its Disorder test.

Russian Frigates get 1st Kills!

Japanese Cruisers advanced next, sank a Frigate, but the survivors passed their Disorder test.

Russian Skyships, already damaged, moved forward.  Though they failed to cause any damage, they DID spot a Cruiser for the rest of the fleet.  The Japanese Dreadnought moved next, roughly a 45 degree angle towards table center from the left (gaining 2” movement from the Tesla Generator).  Rockets crit 1 Skyship (Nav Lock + 1 fire due to Incendiary Weapons) while the turrets damaged the Russian Battleship (placing 1 Fire token there as well).

Russian Interceptors climbed to the Stratosphere and moved forward maximum speed.  Japanese Interceptors moved forward and shot down 1 damaged Skyship with a Crit.  The other Skyship failed its Disorder test!

Woe for the Russian Skyships!

The Russian Battleship turned and advanced between the two Southern islands, and failed to hit the “Spotted” Cruiser.  (Turned out that was a good thing!  The Russian Primary Guns can only do Indirect Fire at Range Band 3 & 4 – I forgot and was in Range Band 2!)

Japanese fighters moved to protect the Dreadnought and the Cruisers while the Russian Cruisers advanced beside the islands and failed to damage an Interceptor, the Carrier moved between the islands – right beside the Battleship and the Russian Fighters advanced forwards.

End Phase: The Japanese had nothing to repair.  Russians repaired all damage and put out all fires EXCEPT on the Skyship!  It lost 1 AP to the fire and another AP to the Disorder – leaving it with 4AP left!

Victory Points:
EotBS:   105
RC:         80


Turn 2:
EotBS won Initiative!

Note: For some reason, I didn't take any pictures of the 2nd turn.  I think this was because we were too caught up in the game.

Japanese Fighters attacked Russian Dive Bombers, shooting down 3 for the loss of 2 tokens!  The Russian Dive Bombers fled back to the Carrier (and out of range from a 2nd attack).  Japanese Interceptors attacked the Skyship, but failed to damage it.  Russian Fighters attack an interceptor, damaging it for no loss to themselves!  The Japanese Destroyer made its Minimum move forward, sank 1 Frigate and damaged another!  The Frigates passed their Disorder Test.

Russian Fighters attacked the under-strength Fighter SAS, downing 2 (1 left) for the loss of 2 tokens.  Japanese Fighters attack the Russian Skyship and crit it (Guns) for no loss!  Things were looking bad for the Russian Skyship!  Finally, a Russian SAS fighter squadron attacked another Japanese Fighter Squadron – both squadrons destroying each other!

Japanese Gyros moved forward, forming a Line Of battle, their rockets finally destroying the Russian Skyship with another Crit while the Gyros’ guns shot down a Russian Interceptor!

Russian Cruisers passed their Sturginium Boost, gaining an extra 2” speed, successfully came around the southern islands and damaged 1 Cruiser from long range.  The Japanese Cruisers, simply moved forward, sank a Frigate with Torpedoes and damaged 2 Interceptors!

The Carrier Activated, replenished the missing Dive Bombers back to 4 tokens, passed its Sturginium Boost and managed to peak around the island enough to crit a Cruiser (Hard Pounding, -2AP).  The Japanes Dreadnought made a turn to Port with a minimal move where its turrets and rockets each caused a Crit on a Cruiser (Sturginium Flair – Cruiser teleported 11” to the upper Left – JUST in squadron Coherency!) and a Crit on the Carrier (Generator Offline).  Both ships gained a Fire Token as well!

That was the last activation for the Japanese.  Russian Interceptors dove down to Obscured, but failed to damage a Gyro.  The Russian battleship moved forward between the islands and using 2 turrets and broadsides, shot down 2 Interceptors and damaged the 3rd!  The last Russian Fighter SAS moved to the left of the islands – within 4” of the Carrier.

End Phase: Once more the Japanese had nothing to repair.  For the Russians, the Generator was repaired on the Carrier and the Cruiser put out the fire, but both the Carrier and 1 interceptor still had a Raging Fire Token and lost an AP.

Victory Points:
EotBS:   260
RC:         140

End of Turn 2, Begining of Turn 3!


Turn 3:
EotBS won Initiative!

At this point, I must apologize.  My computer notes for the next turn were LOST!

(As an IT guy, I’m embarrassed and can only use this as an object lesson: SAVE & SAVE OFTEN!!!)

So, working from memory and pictures:
  • A Japanese (SINGLE) fighter attacked my Dive Bombers (AGAIN?!?!?) and shot one or two down for their complete destruction.
  • Russian Cruisers turn to present broadsides and turrets to a Cruiser – sinking it!
  • Japanese Cruisers do a hard turn to Starboard and torpedo 1 Cruiser, turrets on another and rockets on a 3rd, sinking 2 and damaging 1 (which passed its Disorder test).
  • The Russian Carrier activated, replenished the Dive Bombers back to full strength, REPURPOSED a Fighter Squadron as Dive Bombers, advanced forward and crit a cruiser (Nav Lock) with its broadsides!
  • I THINK the Japanese Dreadnought attacked the Carrier and Crit it twice with guns and rockets (Lotsa Fire and an Engine Damage).  Carrier was sitting with 1HP left around this point.
  • Russian Dive Bombers fly over the island to the south, ready for next turn.
  • Japanese Destroyers move and do something (can’t remember what).
  • Russian Frigates race to front of Carrier and sink damaged Cruiser!  Survivor passed its Disorder test.
  • The Japanese Gyros sink the Carrier with long ranged rocket fire (BARELY got the DR point they required)!  Whole fleet takes Disorder Tests – Frigates and Battleship FAIL!!!
  • Battleship comes around island, but cannot Link its weapons so fires a turret at each Gyro, an undamaged Destroyer and broadsides at the Cruiser.  Damaged both Gyros and the Cruiser, but failed to damage the Destroyer.
  • At some point, the Japanese Interceptor moved within 4" of a fighter squadron and declared AA against the fighters and rockets against a Cruiser.  As they were in Counter Attack range, the Fighters shot down the Interceptor before it could launch rockets at the Cruiser!
  • Lots more of minor moves but nothing to note.

End of turn – the burning Russian Interceptor failed to put out the fire and crashed.

Russian Cruisers Sink a Japanese Cruiser

The Carrier in Flames!  The Cruisers all gone but 1!

Another Japanese Cruiser is sunk!

Thar She Blows!  The Russian Carrier slips beneath the waves!

The End of the Game!


Victory Points:
EotBS:   Close enough to 70% I conceded the match (<50 points)
RC: Nowhere near enough: Mission was to destroy all Mediums and 50% of the fleet value.

We rolled for the next turn and Japanese would have had initiative.  First activation, the Dread would either sink the Cruiser (giving him the required points) or damaged the Battleship enough that it would have been useless for the rest of the game.

===================================================================

NASTY game!  I lost that one quite badly!

So what happened?

First, I need to remember that Graham loves his Dreadnoughts.  I prefer to have more activations (and I did have more than he had throughout the game) but in this game, the Japanese Dread had good mix of weapons and range.  The Dreadnought used its weapons to near maximum effect the entire game.  That scared me and I hid my Battleship AND Carrier behind the islands as a result – cutting down my own firepower significantly.  I may have been better off with my own Dreadnought in this case, though I would probably have hid behind the island still, waiting to jump out at Range Band 2 (Maximum Effect Range).

Second, I broke my own rule about ALWAYS taking the Saransk Skyships in squadrons of 3!  As usual (and expected), the Skyships drew an incredible amount of fire until they were destroyed.  By taking the 3rd Skyship, I could have either kept the enemy fire distracted a bit longer or kept enough flying longer so they could have done something useful in turn 2 (at least dropping mines and being a nuisance).  By not taking 3, I would have been better off picking something else.

I tried to use the Russian Suyetka Interceptors as Anti-Air and they are NOT!  Though they have Pack Hunter, Suyetka do not have Air Hunter so there’s no bonus for attacking other aircraft.  Though fast for a Russian Small, they’re really pretty slow compared to other nations (only a 12” move per turn).  Suyetka really are best used to drop from the clouds and strafe surface targets, then head back into the clouds again. 

The Fleet Carrier was doing ok until I forgot it was my Commodore’s ship and I acted like it was a Battleship.  My intent was to move the Carrier first, firing its secondary broadsides, then screen the Carrier with the Battleship in the next activation.  The problem with that was the Carrier got its Sturginium Boosts and the Battleship didn’t, so the Battleship got left behind!  The Carrier DID restock and repurpose Fighters and Dive Bombers which was a constant threat to the Japanese, but I held them back too long.

You will note I haven’t been bemoaning the changes to Ablative Armour.  I won’t, either.  As good as they were in Ver 1.1, I felt “dirty” using Ablative in its previous incarnation.  My opponents always complained about it and I didn’t like using Russians against rookies as a result.  It really was too powerful and needed to be downgraded somehow.  The fact that we now have SOME Range Band 3 capability I think helps make up for the downgrade and makes it more important for Russian Players to plan ahead.

Looking at the Empire of the Blazing Sun, it’s hard to find fault.  The Dreadnought was a nasty surprise (though it shouldn’t have been) and very effective.  It was never under any real threat throughout the game.  The Scout Gyros are a pain to deal with, firing rockets and turrets every turn, especially targeting my own Skyships.  If I had any complaint about the Japanese forces, it was the very limited number of activations he had, simply because of the points cost tied up in the Dreadnought.  Not something I like, but it worked for Graham.

The other pain to me was the number of Incendiary Weapons the Japanese had.  The Rockets are especially bad due to their high numbers of attacks and superior range to the Russian’s weapons.  Though there were a large number of fires burning each turn, most were caused by Turrets, not Rockets.  Having Jammers on just about everything really seemed to hamper the Japanese dependency on rockets, especially when you followed up with AA as well!  I find having Jammers as a preferred generator really does help the Russians survive longer against most opponents, especially if they are notoriously dependent on either Torpedoes or Rockets.

Anyway, it was a good game, in spite of the thrashing my poor Russians received!  I’ll have to come up with something new for the Russians, soon!


Good Luck!