Monday, September 23, 2013

BatRep: 800pt KoB vs PE (Experimentals!)


Admiral Von Shtupp looked around the bridge of his command.  Everyone was at their station, working hard (or at least appearing to be).  Rumor had it that the British were up to something and Von Shtupp’s mission was to investigate.

At least they’ve given me a new toy to play with, thought the Admiral.

Included for the first time in his fleet was one of the dreaded, upgraded Metzger B.  While Von Shtupp was curious to see what it was really capable of, the presence of anyone with Teutonic order always made everyone uncomfortable…

“Admiral!  Ships on the horizon!”

“Is it the British?”

“Yes Sir!”

“Message to the fleet – Battle Stations.  Please make sure the Knights have been informed.  Let’s see what their robots can do…”


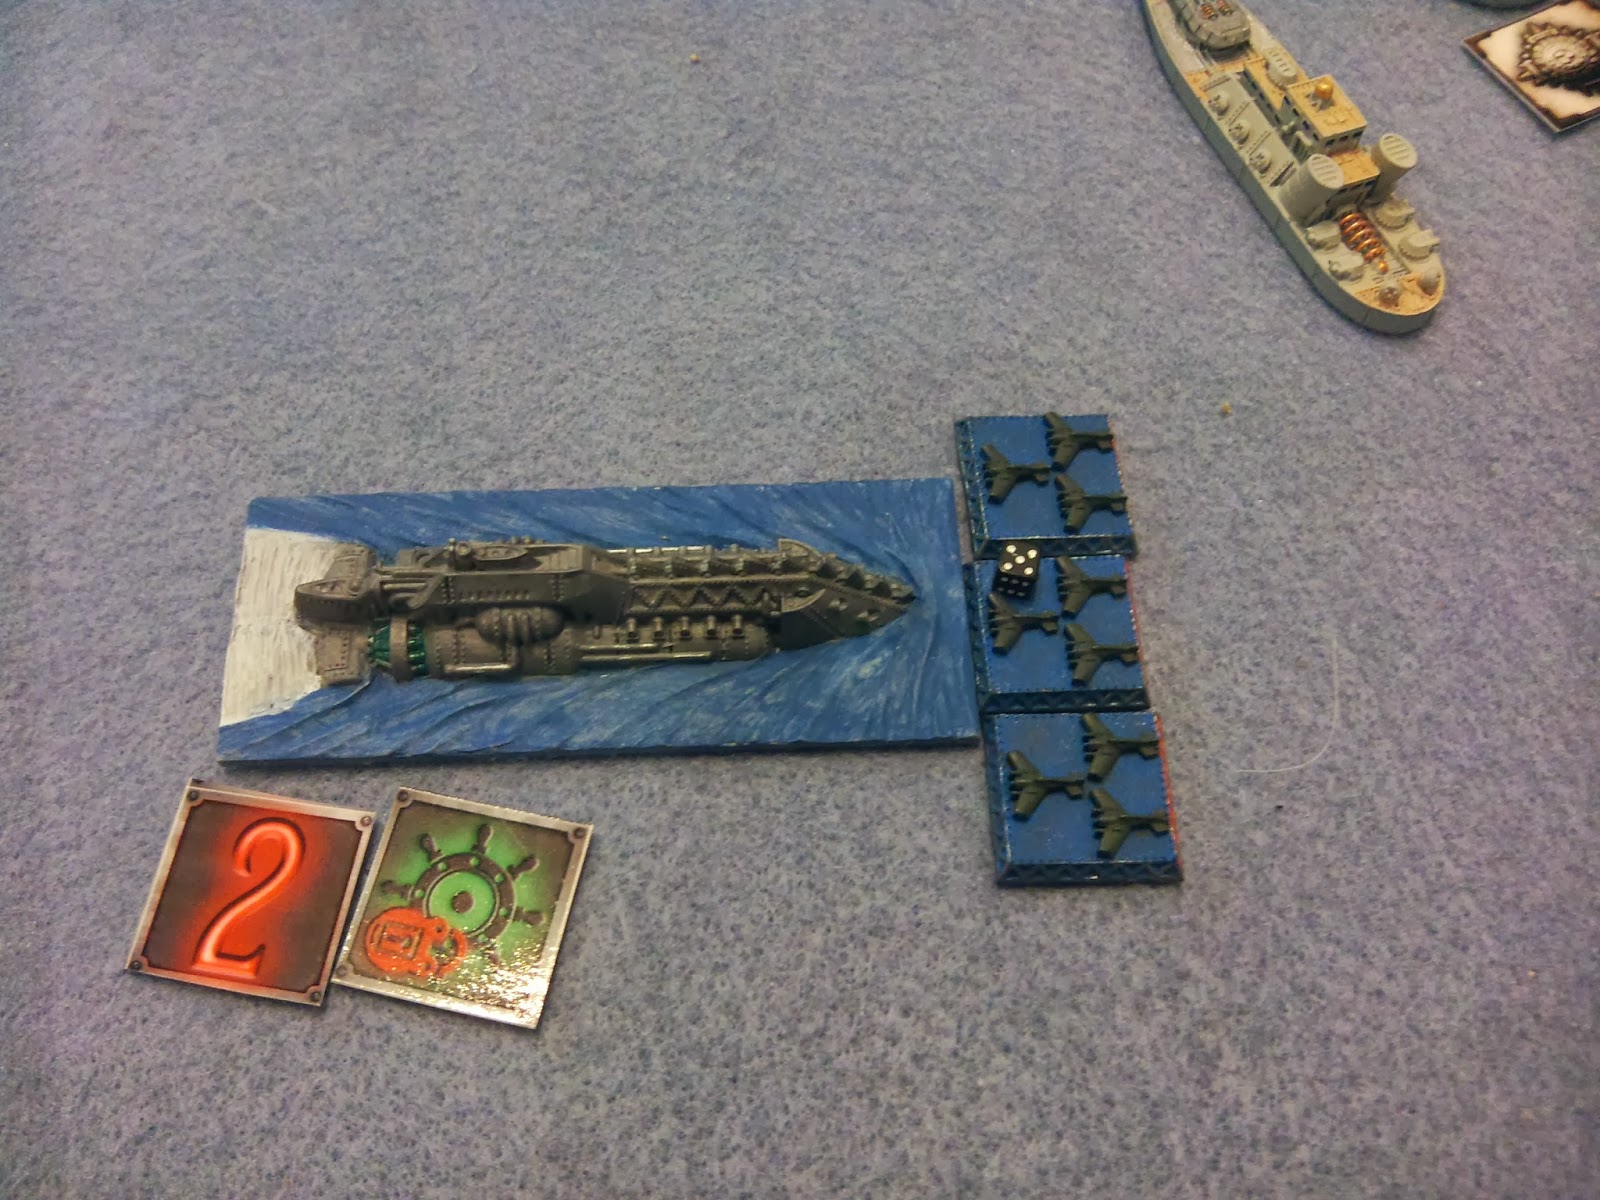
The title might be a bit of a misleader – The fleets are “experimental” because both fleets were using new vessels we hadn’t used before.  In the case of the British, they were using both the Hood Battle Cruisers and the new Vanguard MkII submarines.  The Prussians were using the update Metzger Ausf B Robots for the first time.


Deployment:
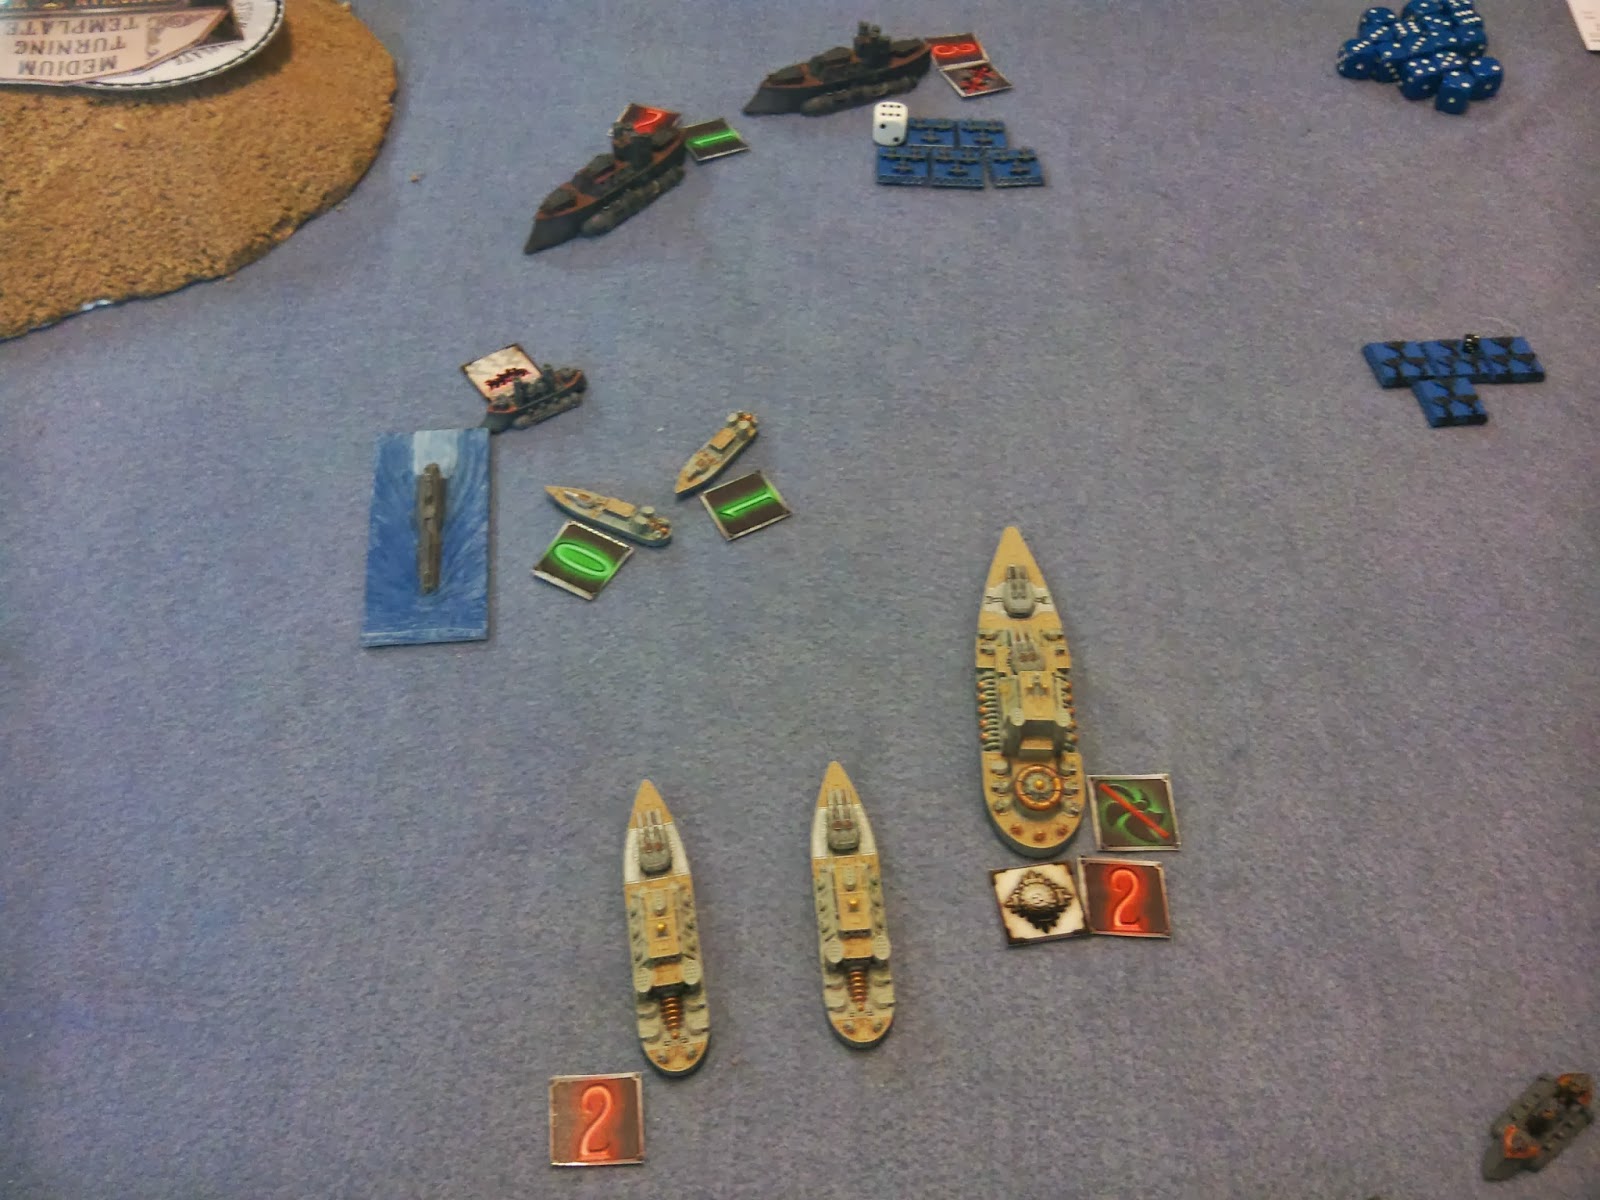
For the Prussian Empire (PE) (Top to Bottom)

3 X Frigates
2 X Cruisers
Metzger B
4 X Frigates with a Battleship (Using a Tesla Generator in the rear turret location)
2 Flights of Fighters
Carrier with a Squadron of Torpedo Bombers deployed
3 X Frigate


For the Kingdom of Britannia (KoB) (Top to Bottom)

3 X Frigates with a Vanguard MkII Sub
Battleship hiding behind the island
Vanguard MkII sub
3 X Frigates with Wing of Fighters
2 X Hood Battle Cruisers to the back edge
4 X Frigates with Wing of Fighters


After deployment, we both elected to just go for the 70% of the Fleet values.  (560 points)

(Actually, we forgot until after turn 1 and ended up there as a default!  Oops!)


Turn 1
British won initiative for the first turn.

The British started things off moving Frigates forward on the Right of the map.  The Prussians were quite happy to move their Frigates opposite forward at maximum speed and sank a British Frigate!  First Blood to the Prussians!  The British squadron passed their Break test.

 
The British sub on the left side of the islands moved forward, submerged.  Torpedoes were launched but no damage was caused to the Prussian Frigate opposite of the sub.  One of the Prussian Fighter wings moved forward at ½ speed.  The second British Sub moved forward on the other side of the island, also submerged, firing torpedoes at the Prussian Robot.  Sadly, the torpedoes again failed to damage.  The Prussian Torpedo Bombers moved forward at maximum speed (5 fuel left), while a wing of British fighters advanced at ½ speed.  Finally, the Prussian Cruisers moved forward from behind the island and managed to sink a Frigate with a long-ranged shot.  The Prussians are ahead 2 Frigates to nothing!
 

British Frigates in the center advanced, then turned to the left, exposing all turrets to the Prussian Cruisers.  Linking fire, the Frigates succeeded in damaging one of the Cruisers!
 

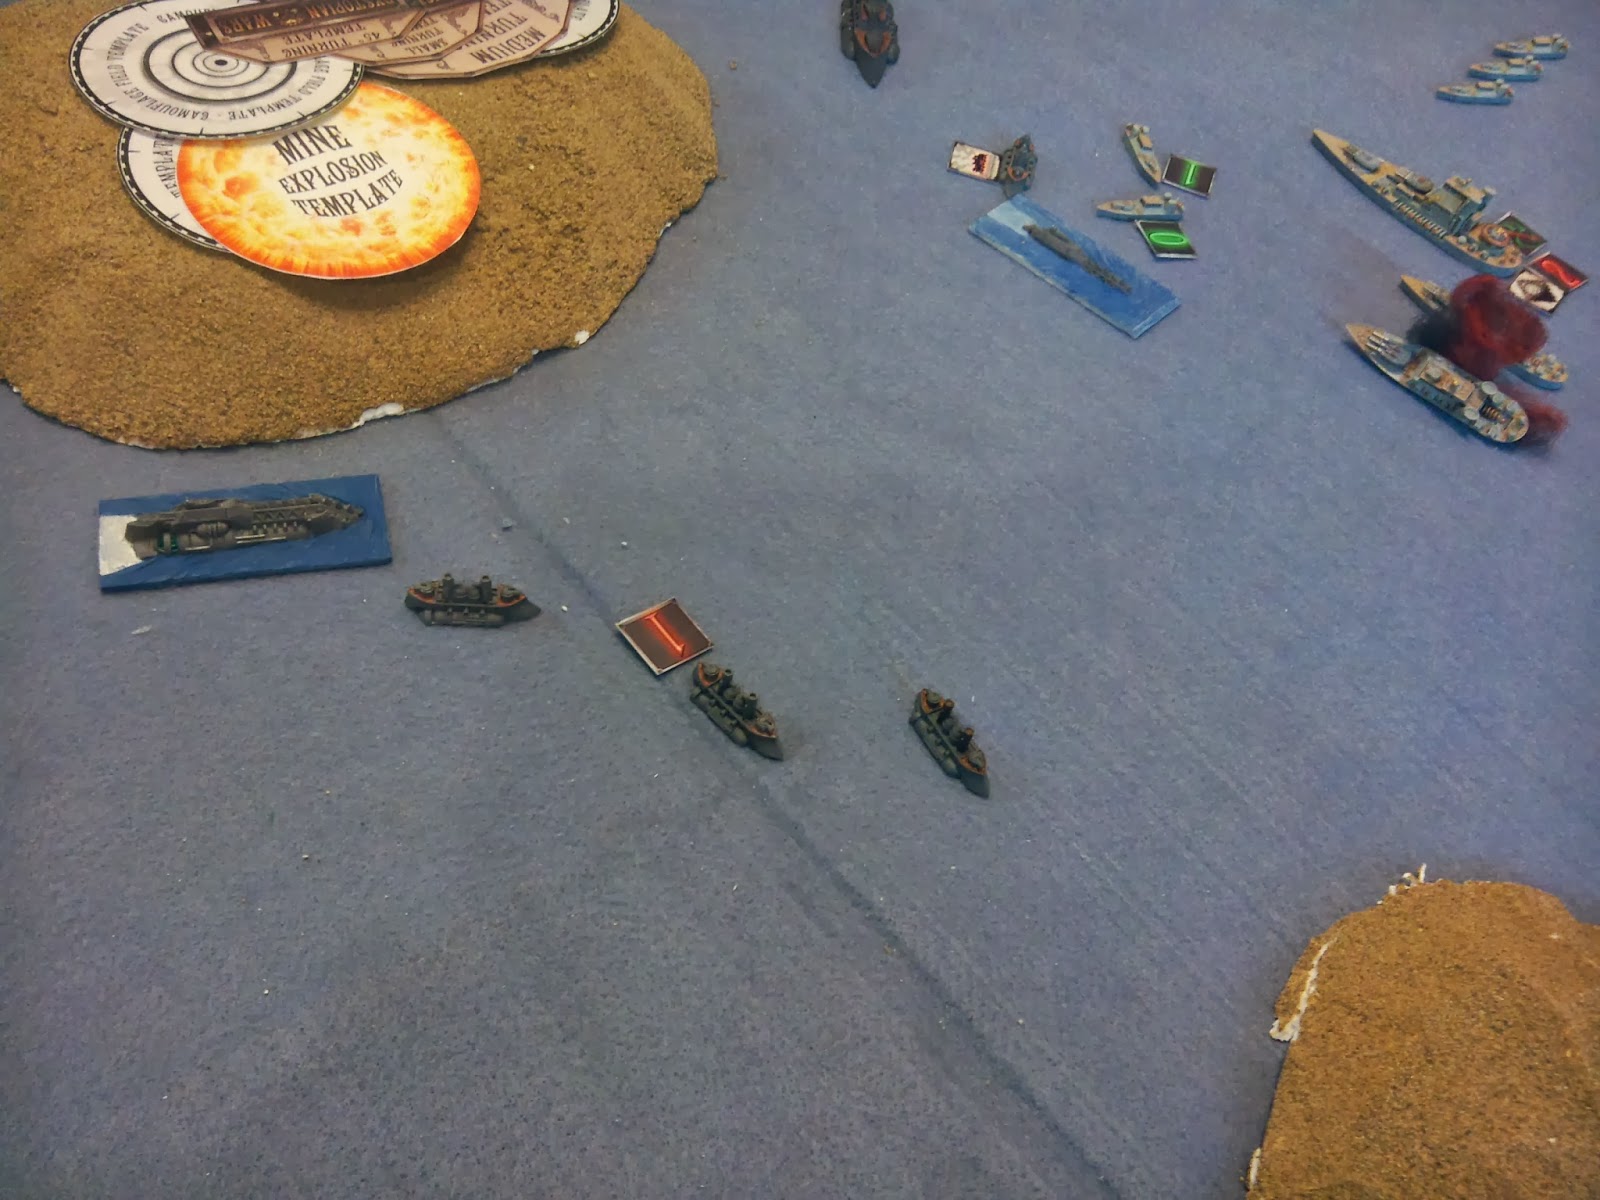
The Prussians got a little greedy.  The Frigates in the center sallied forward to attack the British Frigates that had damaged the Cruiser.  The Prussian Frigates split their fire and only managed to damage 1 British Frigate.  The British made them pay for it.  Both British Battle Cruisers came forward and turned to fire all turrets down range.  When the smoke cleared, they had damaged the damaged Cruiser (down 2 HP) and sank 2 of the 4 Frigates in the Center squadron!  The frigates passed their Break Test.
 

The Prussian Carrier moved forward at maximum speed, and turned to fire its Bombard at one of the Battle Cruisers, damaging it.  The British Battleship turned to the right from behind the island, but found itself without Line of Sight or Out-Of-Range to anything it could see.  The Prussian Battleship activated its Tesla Generator, maximizing their speed to 10” and fired on a Battle Cruiser, but failed to damage anything.  The second British Fighter wing moved forward at ½ speed.  The Prussian Robot moved forward, following the Prussian Battleship.  The British Frigates on the left of the island finally moved forward and turned to the right.  Long range fire resulted in a Prussian Frigate taking damage.  This was the last of the British Activations for the turn.  The Prussian Frigates on the left charged forward and returned fire onto the British Frigates that had fired on them, damaging 1.  Finally, the last Prussian Fighter wing landed on the Carrier to re-arm.


Losses:
KoB:       74 points
PE:          94 Points


Turn 2:
PE won Initiative!

Worried that the Battleship would be hammered by the Battle Cruisers, the Prussian Battleship again activated the Tesla Generator, maxed their move to 10” again, and fired their turrets at a Battle Cruiser, critting it (Hard Pounding: 1 AP left!).  Broadsides and Teslas fired at Frigates on both sides, but only managed to damage 1.
 

The British, fearing the potential of the Torpedo Bombers, attacked with a Fighter Wing, causing the Prussians to use up an extra fuel (3 left) for the loss of 1 Fighter Token.  The Prussian Center Frigates maneuvered around the Prussian Battleship, firing rear Teslas and guns at 2 Frigates, sinking 2, and capturing a third!  Unfortunately, we used up most our AP capturing the Frigate, so we abandoned it as a Derelict, leaving 1 Frigate with 1 AP and the other 0!
 

The British attempted to sneak a Frigate Squadron between the Prussian Carrier and the Battleship, but failed to do any damage to the Carrier.
 

The PE Torpedo Bombers attacked one of the Battle Cruisers, but failed to damage it and lost a token to AA, leaving the rest with 2 fuel.  The British Submarine on the right stayed submerged and fired another torpedo salvo, but again failed to damage anything.  The Prussian Carrier launched a wing of Dive Bombers and moved forward.  The British Battle Cruisers turned and linked their turret fire at the Prussian Battleship causing a Crit (Engine Damage).  Prussian Cruisers moved forward and Critted one of the Battle Cruisers (Systems Offline).  At this point, Graham remembered that the ships had Shield Generators, but a quick roll revealed no change in the outcome (this time).
 

British Frigates from the left of the table split their fire.  They sank 1 Prussian Frigate, failed to damage a second and failed to damage a Cruiser with torpedoes.  The Prussian Frigates passed their Break Test.
 

Prussian fighters engaged their British counterparts, shot down 3 tokens (1 token left with 2 fuel) for no losses, then landed on the Carrier to re-arm.  The British Battleship finally cleared the island and fired on the Prussian Battleship, but failed to damage it.  Prussian Frigates on the right turned and attacked the British Battle Cruisers causing no damage after all their dice missed!  British Fighters attacked the Torpedo Bombers and finally shot them all down for the loss of 1 Fighter Token (5 fuel left).  The Prussian Robot turned to engage the Frigates near the Prussian Carrier and successfully sank both, finishing off one squadron.
 

The British Sub on the left came to the Surface, completed its turn around the island and torpedoed one of the Prussian Cruisers with a Double-Crit!  The Survivor passed its break test.
 

As the final activation, the Prussian Frigates on the left attacked the surfaced British Sub and inflicted 1 HP damage to the Sub.


In the End Turn, the Derelict British Frigate collided with the sub, causing 1 HP damage to the Frigate but no damage to the Sub.  The British repaired the System Failure on the Battle Cruiser while the Prussian Commodore used his re-roll to repair the Engine Damage to the Battleship.


Losses:
KoB:       247
PE:          152


Turn 3:
KoB won Initiative.

The British started things off by bringing a sub to the surface and attempted to torpedo the Prussian Carrier, but the Robot was in the way, blocking Line of Sight to the Carrier’s center, reducing the torpedo salvo in half!  The reduced salvo failed to damage the Carrier and then the sub failed to make its Panic Dive.  Prussian Frigates from the right charged at the British Battle Cruisers, firing on one, but failing to damage it, then boarding the one that was reduced to 1AP, successfully taking the Battle Cruiser as a Prize for the Prussians!
 

The second British Sub moved forward on the surface to torpedo the Prussian Battleship, causing another HP damage.  Sadly, this sub also failed to make a Panic Dive.  Prussian Dive Bombers that had launched last turn, attacked the sub that had attacked the carrier, causing a Crit (Nav Lock) for the cost of 2 Tokens.
 

The last British Battle Cruiser maneuvered around its prized compatriot without causing a collision, caused another HP damage on the Prussian Battleship (crippling it!) and then captured a Frigate that had 0AP left.  Afraid of being boarded, the Battle Cruiser called back all their boarding parties and left the Frigate a derelict.
 

The Prussian Battleship, crippled but not out of the fight, advanced and fired on the British Battleship, but failed to cause any damage.  However, in spite of being crippled, the Prussian Battleship was able to board and prize the 2nd British Battle Cruiser!
 

Annoyed, the British Battleship came forward and brought all turrets and torpedoes to bear on the Prussian Battleship, sinking it with 2 separate critting attacks!  Revenge for the British!
 

The Prussian Cruiser turned and presented its broadsides and turret to the closest British Sub and sank it with combined weapons fire!
 

The British Frigates from the left of the table caused a Crit (Engine Damage), then an extra HP damage on the Prussian Cruiser, crippling it in one activation!  Prussian Frigates failed to damage the last British Sub.  British Fighters attacked and shot down 2 dive bombers for the cost of 1 token.  The Prussian Robot, lacking anything else to do, turned and shot at the last sub and managed to damage it with a Lightning rod.  Unfortunately, I had no more Tesla weapons in my fleet to take advantage of it!  For their last activation, the British single fighter decided to attack the squadron still on the carrier, but the carrier’s AA shot it down!  Finally, the last activation, the Prussian Carrier held the last squadron of Tiny Fliers on board, turned towards the British Sub and managed to Crit it!  The Sub teleported backwards, narrowly missing the Prussian Frigates chasing it, then sank under the waves…


We didn’t need to count up the points to see that the Prussians made their objective, but…
 

Losses:
KoB:       797pts
PE:          379pts

Crushing Triumph for the Prussians!


Wow!  That last turn was incredible for the Prussians!  I did NOT expect everything to go my way.  I was incredibly lucky.

Graham had a rough time with his dice.  I wish I could convey that properly.  He missed causing double-crits by 2-4 hits multiple times and as a result, critical ships were able to complete their moves and cause more damage than they should have.  When he did roll well, it was against Frigates – not worth the points that the rolls were wasted on.

If I had to critique anything on the British side, the first was Graham’s use of his subs in the first turn.  By keeping them submerged and firing torpedoes, the penalty to hit made them useless.  He wasn’t able to cause damage when he needed to.  His subs were far enough away that I really couldn’t damage them.

The Second problem on the British side was the placement of the Battleship.  While deploying it behind the island kept it safe, it did nothing for the first turn and in the second turn, it was only able to bring ½ its turrets to bear.  Third turn it finished off the Prussian Battleship, but it was too little too late to save the British cause.  Everything else in the British fleet was able to do something every turn – whether they were successful or not.

The Prussians were not faultless either.  I brought the Metzger B to see what it could do.  And I hid it behind everything.  I wanted to try some Boarding and never got close enough to try it.  Though it did do some damage, it didn’t make up its points value.  The Battleship did capture a Battle Cruiser and inflicted damage, but in the end, I still lost it.  Finally, how did those British Frigates get passed my pickets to fire on the Carrier?  That should never have happened!
 
On the other hand, I think the Carrier did sterling service – allowing me to re-arm the one Fighter wing as Dive Bombers and if I had needed another turn, I was prepared to re-launch the 2nd fighter wing as either Torpedo or Dive Bombers.  As it was, the Bombard turned out to be an excellent weapon on its own!

Overall, it was a fun game.  We'll just have to play again so I can try boarding with a  Metzger...

Until Next Time!

Friday, September 20, 2013

BatRep: Road to Rabaul Campaign Book, 1st Mission: Air Raid @ Darwin


First of all, I apologize.  This is my 2nd attempt at this battle report.  Sadly, I lost most my notes due to a computer failure and am working off the Maneuver Sheets (which I hadn’t cleared off yet)!  Fortunately, the pictures survived!

This is the first mission of the Road to Rabaul Campaign book.  Graham and I played the first mission a week or two ago.  Once again, Graham decided to play the Allied Air Forces while I played the Japanese.


Mission Description:

The Japanese attacked Darwin in hopes of forcing the Allies to defend Australia, rather than try to retake the islands that the Japanese had just secured.  The Australians were unable to re-allocate resources fast enough so the Americans moved a force to protect Darwin while the Australians re-organized.  The Japanese, expecting light to no resistance were caught by surprise…
 

The Japanese launched 3 flights of 3 Val Dive Bombers to attack shipping in Darwin Harbor.  (My Dystopian War Fleets provided the convenient targets!)  Escorting the Vals are two flights of 3 Zeros.  The Americans had a flight of 5 P40 Warhawks providing CAP over the Harbor.  Another flight of 3 P40’s were quickly climbing to the Combat Altitude Level the Japanese were flying.  They would arrive Turn 2.

The P40s would make quick work of the Vals unless the Zeros could stop them.  Unfortunately, the mission begins with the Zeros all to the west of the Vals and the P40s more or less straight ahead.  The P40s would decimate the Vals in a head-on pass with their 6 Heavy Machine Guns.  Fortunately, a Japanese ace was just flying back home and was in the same area as the American CAP, so he would be able to “distract” the Americans (I hoped!).  While the American Cap was set up pointing more or less at the Japanese bombers, the Ace Zero setup flanking the American formation!


Mission Objectives:

Standard CY6! – earn more Victory Points than your opponent! 

Damaged fighters and bombers were worth 1 point each, destroyed were worth 4.  Extra 2 VP for a veteran shot down or +3 for an ace shot down.  Finally, the Japanese would get 1 VP for every point of bomb damage to a ship, 6VP if they sank a ship (each ship would take 3 hits to sink).  The Bombers would be carrying a Medium Bomb load and would make a Dive Bombing attack – flying out of the combat zone after the dropped their bombs (and dropped below TAL1).  The ships would get 2 “free” Light AA attacks on each bomber as it made its bombing attack below TAL1.

 
The Game:


Initial Game Setup
Counters were used for the P40s and Val Bombers.
Two-sided tape kept the counters attached to the flight stands.

Japanese Ace "bouncing" the Allied CAP

After Turn 2: Ace forgot to drop altitude so couldn't shoot!
Two fighters from the CAP break off  the formation

Japanese Ace gets his first kill!

Japanese Ace failed to damage CAP as they do Airframe Damage to a Val

Japanese ace causes Engine Damage while another VAL takes Airframe Damage!

Japanese escorts engage the Reinforcements, causing Engine Damage to one!

The P40s with Engine damage disengaged by diving,
The Japanese Ace failed to shoot down the damaged P40
while a Val is shot down in another formation!

Another P40 shot down while a Val takes Airframe Damage

Vals sink a ship!

The Furball fully developed!

P40s get another VAL
A number of damaged fighters and fighters without ammo have disengaged

The P40s attack the Vals while the remaining Zeros are out of position
 
 At the end of the game, 1 ship was sunk and 2 were damaged.  The last few dive bombing attacks missed completely!  The American fighters all disengaged when the last of the Vals completed their Dive Bombing. 
 
Three American fighters were shot down or crashed on landing.  Five Vals were Shot down or crashed but all the Zeros survived.  Sadly, I lost track of which aircraft were damaged...
 
The final score was a win for the Americans!  (Sorry, I lost the score sheet!)
 
It really was a close game.  The Japanese would have won if they had sunk another ship or even inflicted 4 more hits on the ships (which they missed in the last 2 turns of the game).  The Japanese Ace ran out of Ammo late in the game, but if he hadn't disrupted the CAP at the beginning, I'm pretty sure the Vals would have suffered more losses before they could have made their attack runs.

Product Review: CY6!’s Campaign Book “Road to Rabaul”


As those who have read this blog know, I enjoy the air combat game “Check Your 6!” and the Guadalcanal Campaign Book.  So it was with great eagerness I started to go through what I thought would be the follow-up: Road to Rabaul.

This review assumes you already know about the “Check your 6!” game and principles, so I will concentrate on my overall impressions of the book.


One of the unique features of the 1st book (Guadalcanal) was that it included a Narrative campaign.  There were decisions that were part of a story that would affect how the missions and the end result worked out.  Road to Rabaul is not written this way; it is simply a series of missions that when connected together form a “Grand Campaign”.  This campaign is split into 4 “Mini-Campaigns” of 5 to 7 missions each.  Each mission uses Victory Points to determine the winner of the mission.  Players get “Campaign Points” for each Mini-Campaign by winning more missions than their opponents and the person with the most Campaign Points wins the over-all Grand Campaign.  So those that wanted another narrative campaign may be disappointed; the structure is a more traditional “He who wins most, wins!” As such, it's not really the next chapter of the campaign, but an entirely new campaign, in structure and time frame.

Another difference in the books is the historical participation within.  While the Guadalcanal Campaign was predominately US Navy and Marines against Japanese Navy (with 4 American Army P400 thrown in once in a while for variety), Road to Rabal splits each campaign into a different chapter of the defense of Australia and the beginning of the Island-Hopping campaign.  The First mini-campaign is the US Army Air Force rushing to the defense of Darwin against the Japanese Navy as the Australians try to bring their own fighter groups online.  The Second mini-campaign is the Royal Australian Air Force defending Port Moresby, again, against the Japanese Navy.  Third Campaign is the US Army Air Force again – this time starting their offensive: Operation Cartwheel, fighting mostly against the Japanese Army!  Finally, the last campaign is the US Navy and Marines in their standoff against the Japanese Navy forces operating from Rabaul.

The book includes a brief historical overview of the time period, trying to compare the strategic plans of both the Japanese and Allied forces at the time.  This is followed by a brief description of the forces and tactics used in the campaign.  Then there are the general and specific campaign rules for the book.  Finally, the missions – all 26 of them!


So, what I liked about the book:

As a list of missions and a brief history – it seems quite complete.  There is a natural progression in the history of the campaign and while many of the missions appear repetitive (Fighters vs Bombers or Fighters vs Fighters), there is enough variety in the missions special rules and objectives that you aren’t constantly playing the same mission over and over.

Another thing I liked, was this is one of those Campaigns where the P40 Warhawk was a major combatant.  I know the P40 was obsolete and never the best at anything at the beginning of the war (other than controlled and uncontrolled “falling from the sky”), but the Tiger-Shark mouth of the Flying Tigers and the fact that the P40 fought throughout the war in multiple Air Forces in multiple theaters in multiple mission types, well, it makes me happy to see this proud warrior get some respect!  She’s always been one of my favorites! 

Finally, I was able to use most my aircraft from the Guadalcanal Campaign again – saving me a few bucks here and there.  I had the Zeros and Betties already.


What I didn’t like:

So, one of the things I liked about the Guadalcanal was that (in spite of the large numbers) there were not a lot of different “types” of aircraft.  You needed just Wildcats and Aircobras for the Americans, then Zeros, Betties and Sallies for the Japanese.  Sadly, this is not the same in the New Book.  It’s probably the only thing I DON’T like about the new book.  Too many different Fighter types for both sides in large quantities.

Road to Rabaul uses P40 Warhawks, P38 Lightnings, F4U Corsairs, SBD-3 Dauntless (8 of EACH!), as well as B25C/D Mitchells and B24D Liberators (6 each!).  The Japanese are worse!  A6M2 Zeros (9), A6M3 Hamps (8), Ki-43 Oscars (12!), Ki-61 Tonies (9), A6M5 Zeros (9), D3A1 Vals (9) and G4M1 Betties (9)!  That’s a total of 109 planes if my math is right!

My advice if you want to buy models yet save money: Buy regular A6M2 or A6M5 Zeroes for all the Japanese fighters.  There’s only a single mission that uses 2 types of Japanese fighters in a single mission.  In fact, only 1 mission uses 12 fighters.  The rest use 9 Japanese fighters or less. 

Better still – just make/get/buy some counters for some of the less used aircraft.  For example, the Dauntless is used in only 2 missions in the entire book’s 26 missions: I wouldn’t waste the money buying 8 for two missions unless I had a use for them somewhere else.  Similar to the Dauntless, the Mitchells and Liberators are only used in 4 missions or less.  Same with the Japanese Army Fighters – they’re all used for less than 4 missions of the 26: use counters instead!  I would buy 9 Zeros (or less), make counters for the rest and use those for all the Japanese fighters.  If you want to save a lot of money, I made counters for the P40s, and the Vals for the first mission and intend to use them for the rest of the campaign.  Search Google for some over-head pictures and copy / paste into any word processor program.  Then print out as many counters as you require.  You could make counters for all the aircraft this way and not need to buy a single model.


Overall, I like the book as a collection of missions and may end up running the Mini Campaigns as individual, unrelated campaigns over time.  It is also a good collection of individual missions that you can pick and choose from as needed. 

Watch out for the 1st Mission Report!  Good Flying!

Tuesday, September 3, 2013

BatRep: Covenant of Antarctica vs Prussian Empire (1000pts - played Length-wise)


Admiral Von Shtupp had a smile on his face.  At Last!  Back at sea again.  And once more, back on the latest Dreadnought SMS Knesebeck.  Von Shtupp had reason to be happy using this famed ship once again as his flag.  The Emperor didn’t normally allow such a large task force this far out of the Baltic, let alone a Dreadnought.

The mission was simple: the government was fed up with the Covenant of Antarctica’s meddling.  Intelligence reports indicated that the CoA had a task force in the area (doing what was not so important).  Von Shtupp was to “interfere” and cause as much “confusion and destruction” as possible.

Now if only we can find those pesky tin heads…

“Admiral!  Large Antarctica Task force spotted by the Pflicht Scouts!  They’ve spotted us and have turned to intercept!”

“Battle Stations!  All ships turn to engage.  Have the carrier launch Dive Bombers and Recon Flights as soon as possible!”

Too bad it’s so late in the afternoon.  I hope the light lasts long enough…


So, in an attempt to catch Graham off-guard, I brought the Prussian Fleet instead of my Russians.  Unfortunately, Graham had the same idea and brought the CoA instead of his British fleet.  Dang!  Hate it when a plan back-fires like that!

For a change of pace, we decided to play length-wise on a 6’ X 4’ table and randomly rolled terrain.  Once again, we got more terrain than we expected…


Prussian Empire (PE) Deployment: (Top to bottom)


Squadron of 4 Stolz Destroyers
Squadron of 4 Arminius Frigates
Recon Flight from Carrier
A Rhine Carrier
Flight of Dive Bombers
Squadron of 4 Arminius Frigates
Squadron of 2 Reiver  Cruisers
Flight of Fighters
Squadron of 2 Pflicht Scout ships (Obscured)
Flight of Fighters
Blűcher Dreadnought (1 Tesla & 1 Shield Generator)


Covenant of Antarctica (CoA) Deployment:


Squadron of 4 Diogenes Frigates, with a 2nd Squadron of 5 Diogenes Frigates behind
Squadron of 2 Ptolemy Bombers
Flight of Fighter Drones
Squadron of 2 Plato Cruisers with a 2nd Flight of Fighter Drones
Epicurus Sky Fortress (drones still on board)
Daedalus Large Skyship
Prometheus Dreadnought


Both sides rolled a ‘1’ for the mission objective – both sides were forced to take the 70% casualties or captured!

Long stretch of open water in the middle...
 

Turn 1:
CoA won initiative for the first turn.

As we were playing length-wise, First turn was pretty much juggling for position and moving forward.

Things of note:
  • 1 Squadron of CoA Frigates went over the sand bar at ½ speed
  • 2nd Squadron of CoA Frigates went the wide way around – towards the board center.
  • PE Recon flight moved forward at maximum speed (hoping to be able to spot for Turn 2)
  • All other PE tiny Flyer (TF) Tokens flew at ½ speed to conserve fuel
  • PE Pflicht Zeppelins moved forward while still at Obscured level
  • CoA Skyfortress launched a squadron of Dive Bombers  before moving.

 
The distance is getting smaller...


 Turn 2:
PE won the initiative for Turn 2

Second turn was mostly jockeying for position, though there were some shots fired…

  • CoA Frigate Squadron was stuck moving forward at ½ speed as they were still in the Sand Bar
  • CoA Fighters shot down the PE Recon Token when it strayed a little too far forward, for the loss of 1
  • CoA Large Skyship managed to damage one of the PE Pflicht Zeps
  • Both PE & CoA Dreadnoughts move passed their respective islands and started turning towards the center
  • PE Frigates managed to shoot down 1 TF Token and damaged 1 CoA Bomber
  • CoA Cruisers managed to move and turn to the left, damaging 2 frigates as Turrets & Broadsides came to bear
  • CoA Frigates torpedoed a PE Frigate Squadron, sank 1 and damaged another – the PE Squadron Broke!
  • PE Carrier managed to use its Bombard to damage a CoA Cruiser after moving into range – Direct Line of Sight


First Blood to the CoA!
 

In the End Phase, the PE Frigates rallied successfully.

Losses:
PE:          61
CoA:      0


Turn 3:
PE won the Initiative for Turn 3!

Now things started to get really nasty!

Prussian Cruisers started things off.  Moving forward at Maximum speed, they got in to range of the CoA Skyfortress and Crit it (Hard Pounding – 3 AP left) with turrets which caused the Fuel Stores to catch fire.  The PE cruisers then shot down 2 Dive Bomber tokens with AA, fired their Teslas independently at a bomber (2 AP and 2 HP left).  Good Shooting, Cruisers!

 
The CoA Bombers turned and retaliated by dropping their mines between the PE Cruisers and fired their guns at the Zeps – but both guns and mines failed to damage anything.  The PE Zeps turned and fired back at the bombers, but only managed to damage the previously damaged bomber.  CoA Dive Bombers attempted an attack run, but AA shot down all the tokens before they could drop their bombs!  The PE Dreadnought turned and brought all their turrets and Teslas to bear on the Large Skyship, getting a Crit (ANOTHER raging fire!) and then successfully captured a nearby CoA Bomber!

The Prussian Dread speaks out! 

The CoA Skyship turned to bring their turrets to bear on the PE Cruisers, dropped a mine and shot their turrets at a Cruiser, causing a Crit (Weapons Damaged)!

CoA Skyship attacks the Prussians!
 
The PE Frigates on the right moved forward and shot a CoA Cruiser, causing a Crit (ANOTHER Weapons Damaged?!?), then did something DUMB!  After I had started to move the Frigates, I “saw” only 1 AP left (there was another 4AP counter on the other side that I missed), so I attempted to board the Large Skyship.  First, only 3 Frigates were close enough to attempt to board.  Second, the Skyship split its AA across all 3 Frigates and in a brilliant display of AA gunnery, shot down 7 of the 9 Boarding Parties.  Finally – with only 2 AP left in the attack, the remaining 5 CoA AP destroy all the remaining boarding parties!  The 3 Frigates are all out of AP!  :O

Now that wasn't supposed to happen!
 

The CoA Cruisers moved forward, fired on 1 frigate, damaging it, captured another frigate (3AP left on the Cruiser), then fired their broadsides at another frigate squadron (which failed to damage).  PE Fighters moved forward at full speed and managed to shoot down 3 CoA Fighter Drone Tokens for a loss of an extra fuel (3 fuel left).  The 5 ship CoA Frigate Squadron made a torpedo run on a Cruiser (1 had its Line Of Sight blocked by other members in front), causing 1HP of damage, then fired their broadsides out both sides – and sunk a frigate in both squadrons!  Both PE Frigate Squadrons passed their Break Test!

CoA Frigates doing what they do best! 

A PE Frigate Squadron moved forward and damaged a CoA Frigate with their return fire.  The CoA Dreadnought moved forward and right, sank 1 Cruiser (Double-Crit) and a Frigate.  Both PE Squadrons passed their Break Tests.


The CoA Dreadnought speaks!
 
PE Fighters moved at max speed to intercept the last CoA Bomber, but caused only a single HP of damage.  The CoA Skyfortress launched another flight of Dive Bombers, then turned towards their own Dreadnought.  The Skyfortress managed to damage a Cruiser and sink a Frigate.

 
The Skyfortress tries to hide...


PE Dive Bombers hit the gas and moved forward at maximum speed.  CoA Fighters managed to intercept the Dive Bombers and shot down 1 Bomber Token for no losses.  The PE Carrier turned and fired its Bombard at the Large Skyship, causing a Crit (Hard Pounding – 2AP left).  The CoA Frigate Squadron attempted to move and torpedo the PE Carrier, but found they were just out-of-range.  PE Destroyers came out from behind the island, formed a line between the CoA Frigates and the PE Carrier, successfully screening the Carrier.  That ended the last PE Activation.

The Final CoA Activations had the remaining Drone Fighter Wing attack and destroy 1 Dive Bomber Token for a loss of 1 of its own, while the CoA Recon Token moved on top of a hill.


In the End Phase, the CoA started another fire on the Large Skyship (1AP left) and failed to repair the damaged Cruiser.  The PE Cruiser successfully rallied.

End of Turn 3!
 

Losses:
PE:          219
CoA:      219


Turn 4:
CoA Won Initiative!

The first CoA Frigate squadron made a torpedo run on the destroyers, but caused only a single HP of damage.  The PE Dreadnought activated, moved forward, Crit the CoA Dread (Systems Offline) and left the last CoA Bomber a Derelict (only 2AP left on the PE Dread!)

The Dreads face-off!

The Second CoA Frigate Squadron made a torpedo run on the last PE Cruiser, and sank it with a Crit.  On a long-shot, they fired a single Frigate’s broadsides at the PE Carrier but surprisingly managed to cause an HP of damage!

The Last Prussian Cruiser Sinks! 

The PE Frigates moved towards and fired on the CoA Skyfortress, causing an HP of damage, sank a Frigate with their rear-facing Teslas and in a desperate Boarding Action with only 3AP, left the Large Skyship a Derelict!  Though both remaining Frigates now had 0AP left!

The PE Frigates Last Hurrah!
 
The CoA Cruisers, out of anger, sank 2 Destroyers forming the Carrier Screen, then captured a Frigate from another squadron.

CoA Cruisers smash up the Carrier Screen! 

The PE Dive Bombers moved forward and made a successful bombing run on one of the CoA Cruisers, having sank it with a Double-Crit for no losses (3 fuel left)!

PE Dive Bombers avenge the Destroyers!
 
The CoA Dreadnought turned and caused a Crit on the PE Dreadnought (Hard Pounding – 0AP left!), and sank the last PE Frigate on the right.

CoA Dread fires back! 

The remaining PE Destroyers moved forward just enough to block as many CoA Frigates as possible from torpedoing the Carrier, then sank the last CoA Cruiser with a Crit!

PE Destroyers finish off the last Cruiser! 

The CoA Skyfortress fired on the PE Pflicht Zep, Critting it (Fusion Leak – 1 HP left)!  The PE Carrier managed to damage one of the CoA Frigates with its Broadsides, but the Bombard failed to damage the CoA Dreadnought.  Finally, the CoA Frigate Squadron attempted to avoid the PE Destroyer screen, but 2 Frigates collided with the Destroyers, 1 CoA suffering an HP damage.  The remaining 2 Frigates successfully avoided the collision and made a torpedo run on the Carrier, but failed to cause any damage.

Collisions and Torpedoes! 

The PE Pflicht moved forward, crit the Skyfortress (Hard Pounding – 0AP left!), and damaged 1 Frigate.  The CoA Dive Bomber Drones attack the damaged Pflicht and sent it from the sky in flames with a Double Crit.

No, it's not called Hindenberg! 

In the final moves of the turn, one PE Fighter Wing declared CAP on the Dreadnought and the other landed on the Carrier.
 

In the End Phase, the fires were put out on the Derelict CoA Skyship and the CoA Dreadnought was repaired


Losses:
PE:          515
CoA:      566

As it was getting late, we ended the game: A Draw!
End of the game!


Well, Von Shtupp accomplished his mission – that was a Bloody Battle!  We actually checked points twice as neither of us could believe that we hadn’t both lost the required 700 points to win the game!

On my side, I had a bunch of Frigates running around, firing torpedoes everywhere and just being a general nuisance.  On the plus side – all my Large Vessels were still in decent shape (though damaged – nothing was crippled) and all my flight wings were (more or less) intact.

On the CoA side, he’d lost his large Skyship, the Carrier was crippled and the Dreadnought was damaged.  He’d lost most of his “free drones” and the Carrier was crippled – reducing his ability to relaunch his drones.  On the other hand – he still had most of his frigates and their dang torpedoes…

We both think that whomever would have gotten initiative next turn would probably have won this game.  Both sides were too close avoid taking fire from the other side and both had the weapons to win it!

With regards to playing length-wise, I had suggested we play using the Alternate Deployment rules from the Hurricane Season book, but Graham wanted to keep it simple.  In the end, the game felt more “realistic” (as much as a fantasy game with giant robots and lightning weapons can…) as both sides jockeyed for their positions for 2 turns before really “going for the throat”.  It made the game more suspenseful.  I really enjoyed it.

Now I need to get out my paints and finish a fleet before the next box sets arrive…

Happy Gaming!