Playing the 3rd mission in the “Road to Rabaul”
Campaign book, Graham was getting a little frustrated with Bomber Missions (and
I can’t say that I blamed him). However,
that’s exactly what the next mission was…
Historical Background:
April 25, 1942.
It’s ANZAC day and Allied Command believed the Japanese
would make an attempt to disrupt the National Celebrations. Fortunately, the Americans of the 49th
Pursuit Group were available and all 3 SQUADRONS were placed on alert. Sure enough, the Japanese tried to spoil the
party…
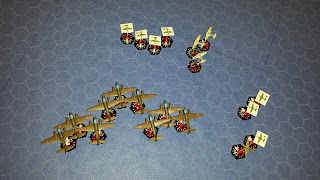
9 Betty medium bombers had just completed their bombing run
and were heading home off the North-West corner. A new wrinkle is that the Japanese bombers
were flying in a “V of V’s” formation; 3 planes in a V formation leading 2
other flights of 3 planes, also in V formation, off each “wing” of the leading “V”. This should allow the Japanese bombers to concentrate
their fire more effectively as the formation wasn’t as spread out as before. All the Bombers were crewed by Skilled crew
(+1 to crew checks, etc). The Japanese
escort consisted of 2 flights of 3 Zeroes, one flight to the west (Cover Flight
1), the other leading the Bomber formation to the North (Cover Flight 2). The leader of each flight was a Veteran (+2
for Crew Checks, etc), the rest were Skilled.
The American P40 Warhawks setup last. One formation of 4 P40s coming in head-to-head
from the north (Yellow Flight) and two 2 plane formations coming in from the
right (East) (Blue Flight). The Yellow formation
was led by a Veteran pilot (+2), the 2 Blue pairs were led by Skilled pilots
(+1). All the rest of the P40s were “Green”
(+0).
Start of Game - Initial Deployments
Rolling for the Variable Mission Rules, the Americans rolled
“Deadly Aim”; one of the Green crew of Yellow Flight was a crack shot and was treated
as a Vet (+3) for shooting purposes only.
The Japanese rolled “Rising Sun”; the lead bomber crew of each “V”
formation was increased to Veteran (+2) skill level.
The American’s mission was simple: Shoot down as many Aircraft
as possible for full victory points.
Bombers were worth 2 VP damaged, 8VP destroyed. Fighters were worth 1VP damaged and 4 VP
destroyed.
The Japanese mission was to get as many bombers off the
board as possible: each was worth 2VP. Damaged American fighters were worth 2 VP
instead of the normal 1VP, but 4 VP if destroyed.
So, the game began…
Turn 1:
The Bombers started things off, leisurely flying forward 2
hexes. The American Yellow Flight more
or less side-slipped and continued to close on the Bombes, Head-On. The Blue Flight gunned their engines to max
speed as they closed in on the right.
Japanese Cover Flight 1, way out of position on the left, turned sharply
and headed towards the bombers. Cover
Flight 2 anticipated the American Yellow flight and managed to pounce from the
side, only 2 hexes away from the closest fighter!
Ambushed!
Tracer fire flew everywhere, but the gun smoke must have
clouded everyone’s vision: No Damage anywhere!
End of Turn 1
Turn 2:
The Japanese Betty Bombers shuffled forward another 2 hexes
and waited for the shoe to drop. It didn’t
take long…
Two pilots from Yellow Flight narrowly avoided a collision
with each other as the entire Yellow Flight charged at the bombers head on,
guns blazing. Blue Flight also charged
forward from the right, attacking the right V formation. Japanese Cover Flight 2 came in behind Yellow
Flight, hoping to “dissuade” the Americans from the Betties, but Cover Flight 1
was still too far away to do anything.
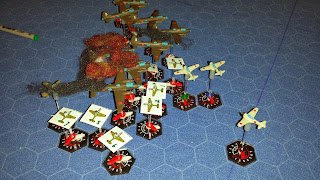
Once again, tracer fire flew everywhere. The Bombers and Cover Flight 2 got several
hits on the P 40s, but the rugged nature of the American Fighters prevented any
noticeable damage! Sadly, the same could
not be said of the American fire. All 3
bombers of the rightmost V formation were shot down and the bomber #3 of the
lead formation suffered serious engine damage!
However, the Americans now had 2 P40s out of ammo (# 5 & 6), meaning
they would be missing 2 sets of guns already!
Americans Engage!
End of Turn 2!
Turn 3:
The Japanese bombers continued forward again, with Bomber #3
falling out of formation due to Engine Damage.
American Fighters 1 & 2 from Yellow flight both performed Immelman
Turns, facing in different directions but still landing in the same hex! Again, they managed to avoid a
collision! Fighters 3 & 4 flew
through the bomber formation and made turns to Starboard, hoping to get good
shots on the left-most V formation of bombers.
Fighters 5 & 6 dove out of the engagement zone (they would be off
the table next turn), denying the Japanese their revenge (and any possible
Victory Points). Fighters 7 & 8
followed the damaged Betty, hoping to put it out of its misery soon…
Japanese Cover Flight 1 was still out of the way and unable
to help the bombers. Cover Flight 2
split up to try and tackle the two American Flights as best they could. Once more, too many targets to engage, not
enough fighters…
Tracer fire was stitching holes everywhere once again, but
the Americans were once more invulnerable in spite of multiple cannon hits from
Bombers and Fighters! (Graham was making
some INCREDIBLE Robustness saves this game!
Glad he doesn’t always roll this well for CY6! & Dystopian Wars!) To add insult to injury, One Zero ran out of all
ammo while another ran out of Cannon Ammo – leaving it with only 2 Light
Machine Guns operational!
Meanwhile, Betty #3, with smoke trailing from her engines
last turn, was too easy a target to miss and was shot down. Betty #1 was also hit but made its Robustness
Save (I think the only save I made all game), but rolled a Lucky Hit (doubles);
and caught Fire. If it wasn’t put out
during the Movement Phase of next turn, the bomber would be lost! During all this, Yellow Flight Leader ran out
of ammo as well.
End of Turn 3!
Turn 4:
The Betties slogged forward once again. Rolling its Crew Check, Bomber #1
successfully put out the fire and stayed in the game (for a few more seconds,
anyway). American Yellow flight Leader,
out of ammo, dove out of the engagement (it would be disengaged next
turn). His wingman (P40 #2) started the
long run back towards the Betties alone.
Meanwhile Blue Flight attacked bombers in pairs, hoping to take down at
least two more bomber this turn. The
Zero that was out of ammo climbed out of the combat zone and disengaged. Japanese Cover Flight #1 FINALLY turned and
engaged the fighters trailing Betty #8 while the rest of Cover Flight #2 continued
to try to protect the lead bombers.
American Fighters 7 & 8 from Blue flight engaged the
Lead Betty, blasting it out from the sky.
As the bomber started to fall, the Tail Gunner managed to hit and damage
the engine of P40 #7 – avenging itself! Elsewhere,
American P40s 3 & 4 shot down Betty #8 from the Left formation, but both
fighters succumbed to the combined fire of the bombers and Cover Flight #1.
The Japanese were down to just 3 Bombers out of 9 while the
Americans finally suffered their first losses of the game! 2 shot down, 1 damaged and 3 more without ammo - the Americans were down to only 2 undamaged, operational fighters!
End of Turn 4!
Turn 5:
Graham decided that he had done enough. He had suffered some losses and his remaining
fighters were outnumbered now that Cover Flight 1 had joined Cover Flight 2, so
all his planes dove for home, knowing the Zeroes wouldn’t be able to keep up
with him. Technically, his planes wouldn’t
be completely disengaged until turn 6, but this was the signal of the end of
the game.
End of Turn 5 & Game!
Graham had 1 damaged P40 to roll for. He failed his Crew Check and the hapless P40 crashed on
landing – counting as Destroyed.
Final Tally:
USAAF: 48VP (6 Betty Bombers)
JNAF: 18VP (3 Betty Bomber off the board = 6VP, 3 US fighters Destroyed=12VP)
USAAF: 48VP (6 Betty Bombers)
JNAF: 18VP (3 Betty Bomber off the board = 6VP, 3 US fighters Destroyed=12VP)
Overwhelming American
Victory!
OUCH!! That should
make Graham feel better about last game!
Going into this mission, I thought the Japanese had a slight
advantage over the Americans. My pilots
all had higher skill levels (on average) than their counterparts. The new V of V formation meant the bombers
could support each other more so than the single V formation. Those tail gun Cannons on the bombers should
have meant a difference . So what
happened?
First, credit must be given to Graham playing the
Americans. He knew his mission objective
was the bombers and he hung onto that like a dog with a bone, never allowing
himself to be distracted until he was about to be overwhelmed. At that point, he disengaged – just like the
Americans were learning to do at this time period in WWII. Second, he was rolling INCREADABLY well on
his armor or robustness rolls. He only
started to fail those in Turn 4, even though he was hit quite often throughout this game. The bomber formations allowed for more shots
and hits, though Graham took them all in stride and made his saves until the
end of the game.
On the Japanese side, one glaring weakness was the
deployment of Cover Flight #1 on the far west side. Normally, I wouldn’t have deployed them
there, knowing roughly where the Americans were to be deployed, but the mission
deployment instructions were insistent I had to deploy that force there. Next mistake was I didn’t increase their
speed to maximum right away and I should have, though I doubt they would have
been in range to engage any sooner.
Cover Flight #2 was left to defend the bombers for 3 turns before I could
have Flight #1 to be in a position to help.
Anyway, a well-earned victory for Graham and the Allies.
That’s 2 wins for the Allies and 1 win for the Japanese and
only 2 more missions to go in this phase!
Allies need 1 more win to earn a Minor Victory in the first phase. As the Japanese have already won a battle,
the Allies cannot win a Major Victory. That
would have required them to win all 5 missions.
On the other hand, maybe the Japanese can sneak out 2 more
wins…


No comments:
Post a Comment