Saturday, December 28, 2013

Product Review: Spartan Games “Battle for Valhalla” Set – Firestorm Armada – Part 1

My Wife Loves Me!  She Really Does!!!  She was really nice to me and I got a really nice Christmas Gift!  It’s nice to have a wife that supports my habits!  ;)


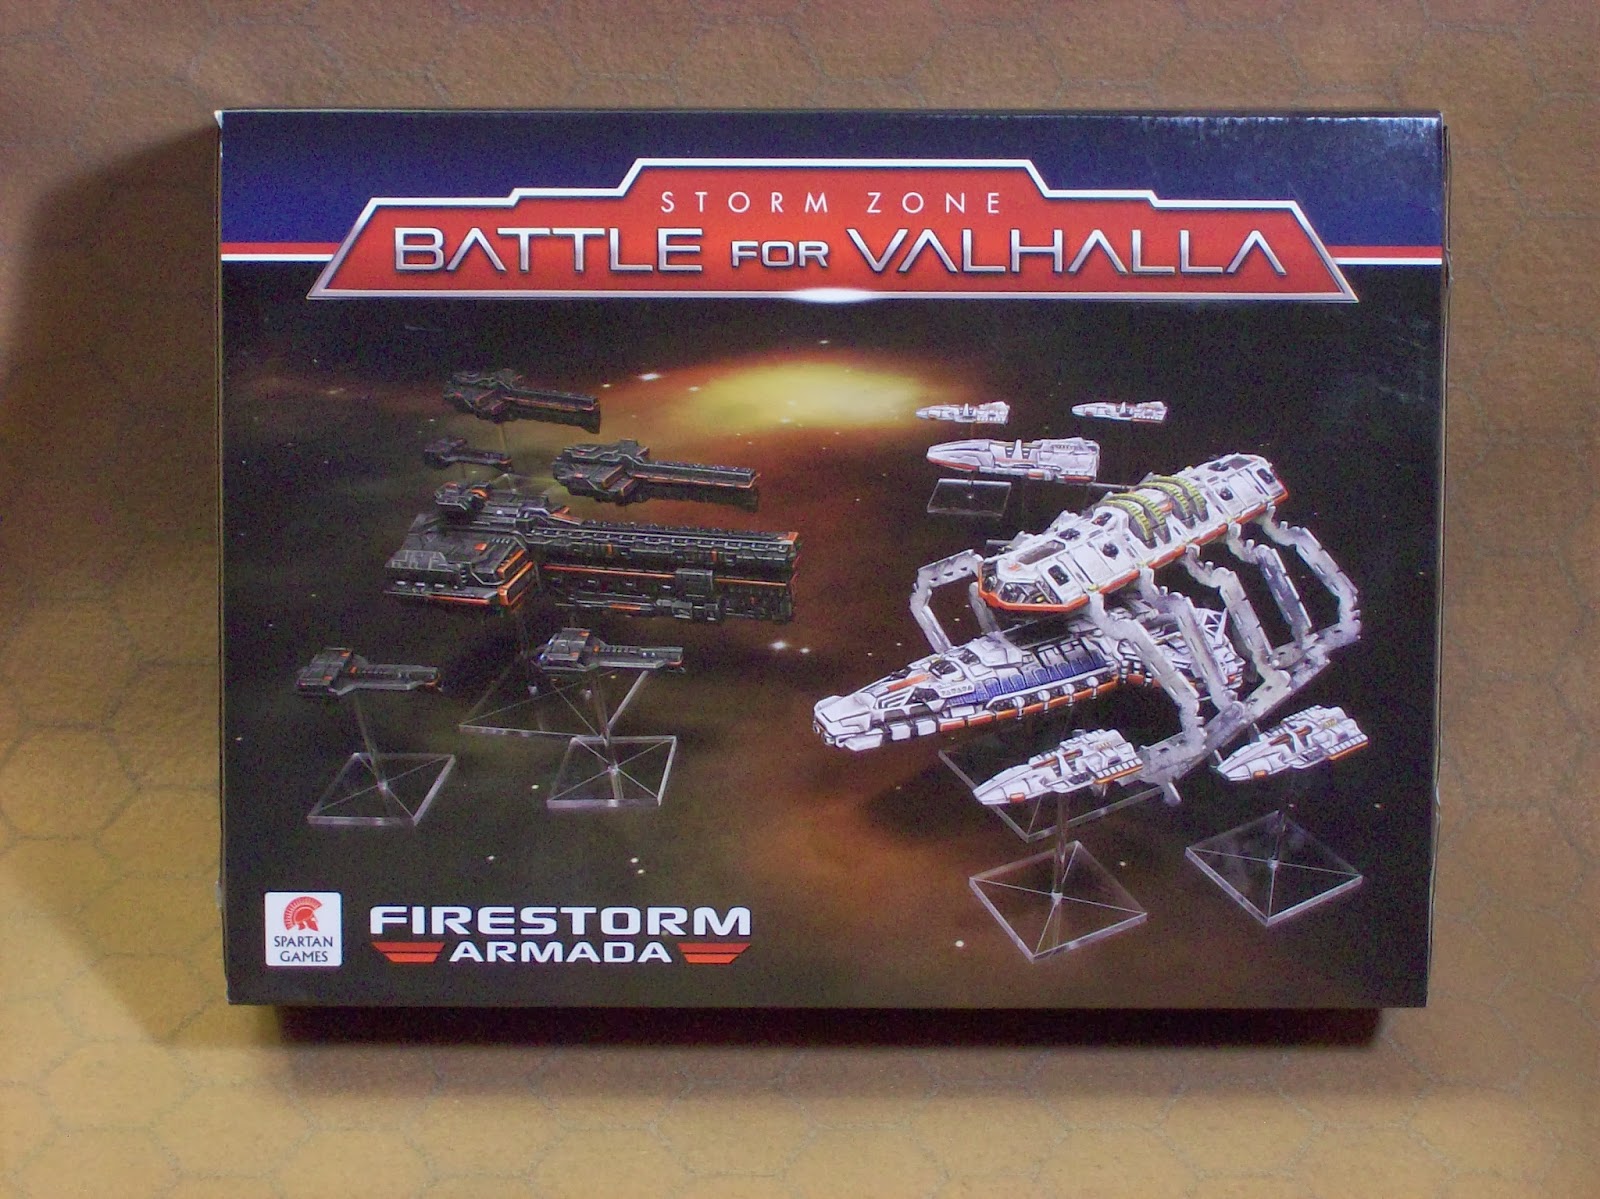
So, what’s in the box?  LOTS!!!
  • Hard Cover Copy of the Firestorm Armada Rules – Version 2
  • Soft Cover Scenario Book with escalating (training) missions using the models of the set
  • 6 full colour cardstock pages with counters, asteroids, turn templates and the new “Battle Logs”
  • 2 sets of dice – 1 normal, 1 smaller to fit into the new Short Range Spaceship (SRS) tokens
  • 2 Sets of Tactical Ability Cards (TAC) – 1 generic, 1 of race-specific cards
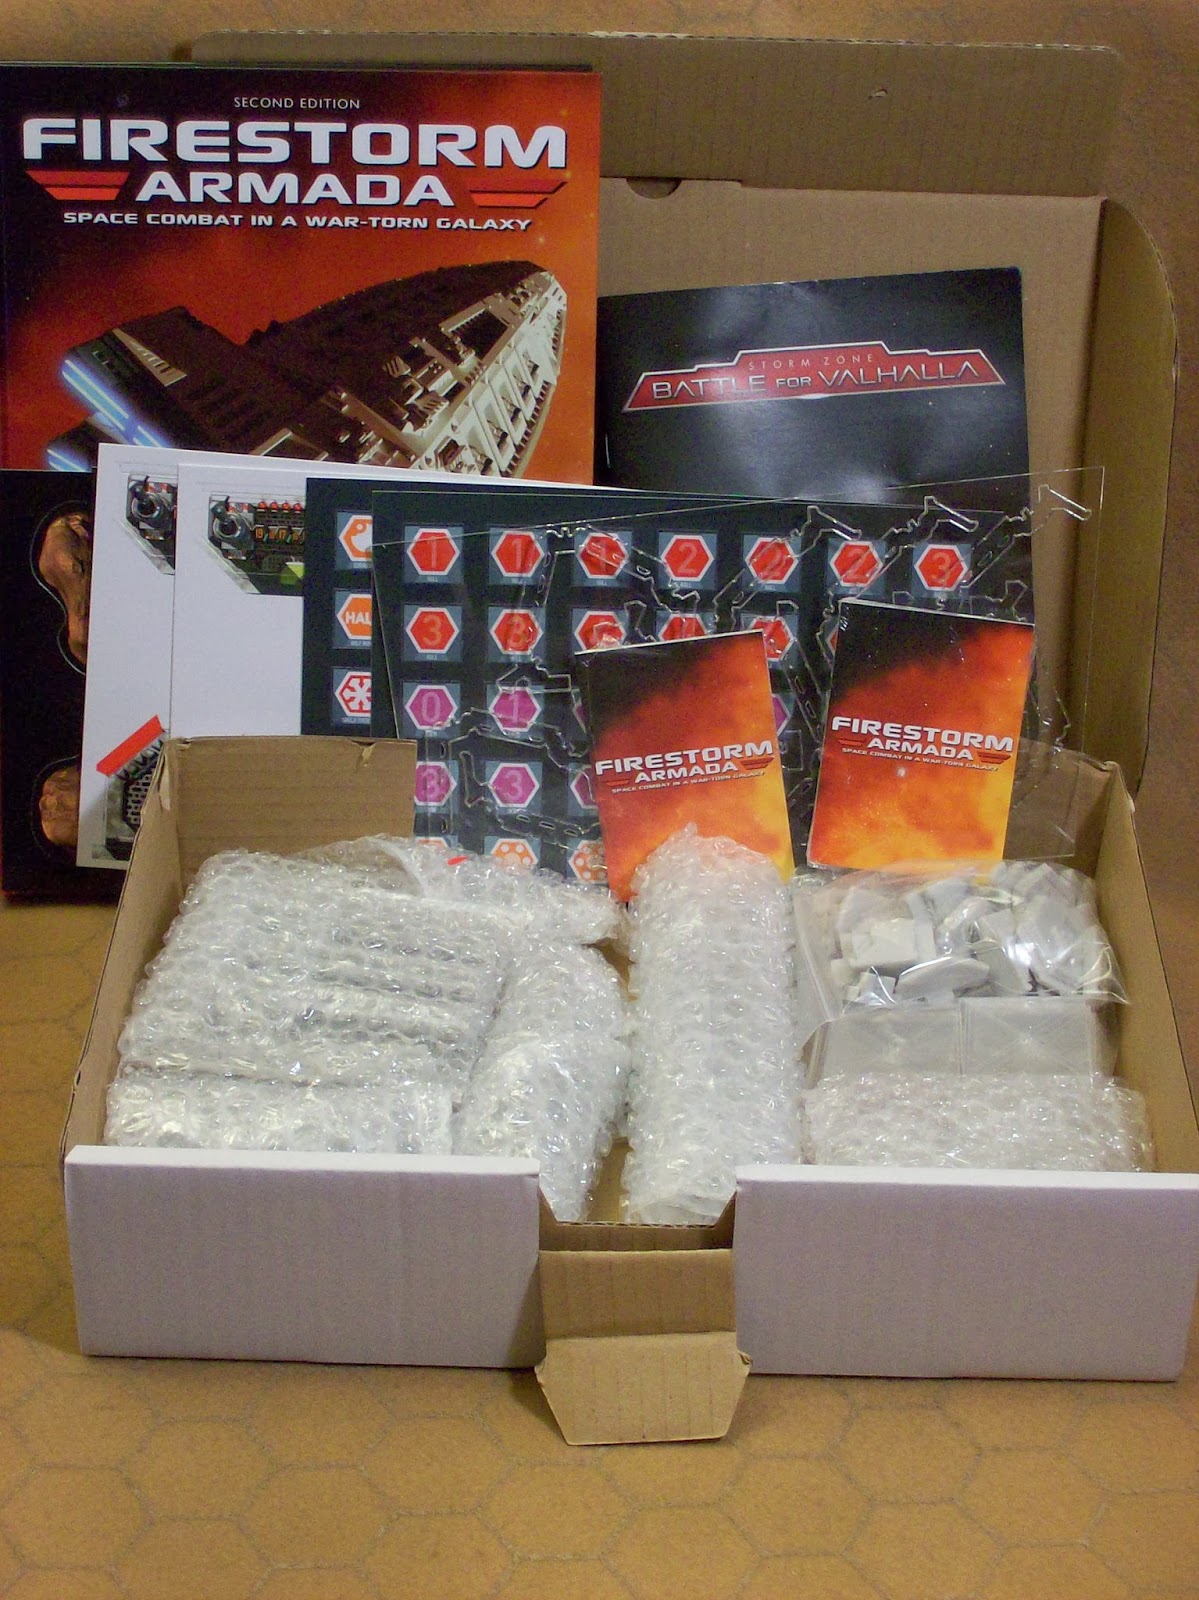

Opening the Box!

Lotsa Bubble Pack!


And 2 fleets:

Terran Alliance:
 1 Tyrant Battleship
·         3 Teuton Cruisers
·         4 Armsmen Frigates
·         4 Large SRS Tokens
·         4 Small SRS Tokens
·         The Valhalla Research Station
The Terran Fleet

Two-Piece Cruisers

Single-Piece Frigates

The Tyrant Battleship (with Frigates)

The Valhalla Station


Dindrenzi Federation:
·         1 Praetorian Battleship
·         3 Secutor Cruisers
·         3 Thaex Frigates
·         2 Large SRS Tokens
·         2 Small SRS Tokens

One-Piece Frigates

Three (Four?) Piece Cruisers

The Praetorian Battleship

Various SRS Tokens

And, of course, a ton of flight stands for everything (except the station – which is free-standing)

All the resin parts were nicely wrapped in bubble pack and the over-all impression I had when I first opened the box was “WOW!  Nicely packed and FULL!!!”

Something of special note: All the colour cardstock was die-cut!  I just had to punch out the various bits!  No cutting with scissors!  Bravo!  I hope Spartan continues to do this with all the box sets!

Impression of the Models:
As you can see in the photos, I haven’t yet started assembling anything (YET!).  Overall, the detail is excellent for all the ships.  Very little flash, though there will be some clean-up required to add the engines to the larger Battleships.  The worst of the flash seems to be on the SRS tokens, on the bottom edge, so I’m quite happy with the quality. 

If I do have a complaint, it’s that there are no instruction diagrams.  This is a common problem with several manufactures.  I suspect the issue here is that when the product is packaged as individual blisters or as the new Patrol Boxes that Spartan is pushing now, it’s obvious what goes where.  Unfortunately, here you have 2 different fleets and a lot of bits for both are jammed in with the SRS tokens in a single Ziploc bag, so you have to sort through the parts and guess where each bit goes.  In honesty, I’ve already figured out where most of the bits go, just by comparing photos on the box cover.  There is one small bit I haven’t figured out yet, but that’s not too bad…

I’ll try to let you know what I think as I assemble and paint the fleets.

Firestorm Armada V2 Book: First Impressions
First, a confession: I’ve never played a Firestorm Armada game before.  Like many people, I’ve downloaded the PDF file of Ver 1.1 directly from the Spartan Game’s site, so what you’ll see here is my first impression of the book and rules.

The quality of the book is excellent.  While only 120+ pages, the hard cover is excellent quality and the pages are all full colour and the text is easy to read.  Some gorgeous photos and some good example diagrams dot the test as you progress through the rules, though sometimes they don’t always seem to be where you’d thing find them.  The book does have an index (though I’m not sure how good it is; after playing a few games and having to reference things, I’m sure I’ll find out).

The sequencing of the book is very “British” in style.  The rules are not laid out in a point system for reference like some “American” games (such as the notorious Star Fleet Battles).  The sections of the book are laid out in a fairly logical, sequential order:
  • ·         The story behind the game (“Fluff”)
  • ·         Basic Game Concepts (where to measure from, dice rolling and modifiers, model stats and definitions, etc.)
  • ·         The Turn Sequence and brief explanations
  • ·         The Movement Phase
  • ·         Combat
  • ·         Weapons
  • ·         Firing Options
  • ·         Boarding
  • ·         End Phase
  • ·         Rules for Short Ranged Spacecraft (SRS)
  • ·         Model Assigned Rules (MAR)  (All the Special Rules that give the different fleets their flavor).
  • ·         Scenarios
  • ·         Generic Fleet Lists (Basic Battleship, Cruiser and Frigate for each race/fleet)


If you’ve experienced a Spartan Games rule set before, then you’ll be familiar with the layout of the rule set.  One of the things that has improved is that Spartan has added page references any time they reference a subject that’s covered in more detail elsewhere.  This makes cross referencing much faster as you don’t have to jump back to the index or the table of contents for everything.

The Rules:

Well, Firestorm Armada uses most of the same basic rule concepts as Dystopian Wars:
  • ·         Alternating activations between players
  • ·         Exploding 6’s: a natural 6 counts as 2 hits and gains another dice roll
  • ·         Roll to see how many hits and if you exceed the Damage Rating (DR) or Critical Rating (CR) you cause damage
  • ·         Weapons have Range Bands to determine how many dice you roll, depending on distance


So, what has changed between V1 and V2 of Firestorm and Dystopian Wars?

First, the fleet organization and “Battle Size” definitions have changed.  Instead of basing your fleet organization on the percentages of a battle size, now you “pick a Fleet type”: Patrol Fleets (800 pts. or less), Battle Fleets (801 – 1200 pts.) or Grand Fleets (1201 – 2000 pts.).  The various fleet lists (downloadable from the Spartan Website Download section) then define what you’re allowed to take in each of the 3 “Tier”.  Each Tier is approximately the same as the Large / Mediums / Smalls of the previous version (though some Tier 1 choices are composed of Medium ships)  For example, the Terran’s fleet list limits the player from taking more than 2 Tier 1 (Heavy) choices in a “Patrol Fleet”, and a further limitation says only 1 of those could be a Battleship.

A new feature is that most Medium and Large Vessels now have “Hardpoints” and “Upgrades” introduced in the fleet lists.  A Hardpoint allows the player to add capabilities to their ships, creating some (limited) customizations whereas Upgrades tend to be MAR changes to the ship.  Both features add cost to your basic ship.

The STAR cards are gone; replaced by the TAC cards.  And they aren’t random, they’re chosen in advance (though you are limited on how many cards and which cards you chose as some are race-specific).

There are two different “Weapon System” Fire Phases, one for Direct Fire and one for Indirect Fire.  Direct Fire weapons must all be fired and resolved before you can shoot the Indirect Weapons.  Both types of weapons are fairly well defined so there should be no confusion there.  Also, you still must declare ALL attacks before you fire your first weapons.

Another change is that there are different weapon “types” defined.  The significance of this is that different types have different Range Bands.  Instead of all Range Bands being multiples of 8, they are multiples of 8”, 10” or 12”!  As an extra; many weapon types have a bonus rule that grants an advantage for using that type of weapon by itself under certain conditions.

While Linked Fire and Combined Fire are still firing options, Split Fire was removed and instead given as a Model Assigned Rule: not everyone can split their weapons fire from a single mount anymore!

Another huge change is the handling of Short Range Spacecraft (SRS: fighters, bombers, etc.).  Besides the new tokens, SRS must stay within Command Range of their Carrier UNLESS they are making an attack run.  That attack run is limited to the distance that the SRS wing can go in a single movement phase!  No more launching bombers and sending them around the moon to ambush from the other side in 2-3 turns!

The final change I’ll talk about is the new preferred Victory System using the Battle Log.  The Battle Log is used to track each fleet’s progress as they destroy enemy vessels and squadrons, complete objectives or lose their own fleet’s vessels.  The first player to reach the designated winning point value wins the game.  Patrol Battles go until 10 pts., Battle Fleet Battles go until 15 pts. and Grand Fleet Battles go until 20 pts.  What is unique is you can “give up” points to gain advantages or re-gain the use of TAC cards, though you still need to re-gain those points to earn a Victory later.  The old “Victory Points” system based on vessel point costs is also shown in the book, but the new scenarios are based on the use of the Battle Log to determine Victory or level of victory.

Overall, I found the rules fairly straight forward to follow and understand, though there are a few points I needed to re-read and I’m looking forward to an FAQ for couple of issues.  The organization of the rules is sort of sequentially-based so there were a few places you need to jump to a different section to work out how things would work in a true battle situation.  The Quick Reference pages in the back of the book has all the tables listed in the book, but I’d like to see a quick weapons table listing the range band and “Coherence Effect” as some Upgrades will change the weapon types and a list of SRS capabilities included.  Someone will make up another reference chart, I’m sure!


Anyway, I’m looking forward to getting things assembled and testing out the new rule set soon.  I hope you’ve enjoyed this review and got something from it!

Good Luck with your dice!

Monday, December 23, 2013

BatRep: Covenant of Antarctica vs Prussian Empire "Highlander" List (800 pts)

Admiral Von Shtupp was in his bunk, reading a letter from his sister Lily.  Apparently her tour of America was going well.  Her show was reasonably successful and she was planning to head to the western states soon…

Not that it really interested Admiral Von Shtupp.  He was aboard one of the new Sturmbringer Submarines, the U-102, heading back to port after a training exercise.  While learning the new strategies and tactics using the new submersibles had been interesting, he was looking forward to returning to his Flag Ship…

“Battle Stations!  Battle Stations!  Admiral to the bridge!”

“Status Report!”

“Admiral, we had just met up with our escort when the recon flight spotted a naval force heading in our direction.  It’s the Antarcticans!”

“Have they responded to our hails?”

“Sir, they claim we’ve stolen State Secrets and are demanding we stand down and prepare to be boarded.”

“Well, that’s not going to happen…”

Doing another 800 point battle, I decided I wanted to do another “Highlander” list, but forgot to mention this restriction to my opponent.  Still, it would be a challenge for me and would test the list.

Deployment:
The Covenant of Antarctica (CoA) deployment (From Top to bottom):

3 Diogenes Frigates
Flight of Fighters
Flight of Dive Bombers
Aristotle Battleship with Energy Beams
3 Diogenes Frigates
2 Plato Cruisers
3 Diogenes Frigates
3 Fresnel Support Cruisers (1 X MK I, 2 X MK II)

The Prussian Empire (PE) Deployment (From Top to Bottom):

Flight of Fighters
Emperor Battleship with Tesla Generator
3 Donnerfaust Support Cruisers
4 Arminius Frigates with Sturmbringer Submarine and its Recon flight already launched
Flight of 4 Small Skyships (2 X Jaeger, 2 X Speerwurf)

After deployment, the CoA rolled “Destroy or Larges and Massives in the Enemy Fleet”.  PE Rolled “Destroy all Mediums and destroy / capture 50% of the fleet value” (400 pts).  Both of us decided to stick with what we rolled.

Start of the Battle!


Turn 1:
CoA won the Initiative.

The Fresnels started things off, moving forward and turning starboard.  The MK I failed its Amplification Generator roll, and the squadron was out of range to the Prussian Battleship.  The Prussian Spotter Plane from the sub killed an activation by flying over the island – prepared to spot for the rest of the fleet.

The CoA Battleship made a leisurely turn to starboard, sailing beside the island, then trained all their Energy Beams on one of the Support Cruisers, critting it (Engine Damage)!

The Prussian Skyships stayed obscured and moved forward at full speed, moving over the island.  Concerned, the CoA Fighter Drones moved at maximum speed towards the Skyships.

I was concerned about the CoA Fresnels.  If they had the opportunity to fire at full power at any target, it was going to be some serious damage.  I decided to take a chance and moved the Prussian Frigates forward at full speed and blasted the lead cruiser who was *just* in RB2, causing a crit (Hard Pounding – 1 AP left) and crippled the cruiser.  I found out later that by chance I had damaged the Mk I with the Energy Amplification Generator!

Angered, the CoA Plato Cruisers moved forward and turned to starboard, firing their turrets and broadsides at the Prussian Frigates, sinking half the squadron!  The Prussians passed their Break Test.

CoA Takes 1st Blood!


The Prussian Sub surfaced and moved forward, turned to port, then split its fire between the Plato and Fresnel cruisers.  The Fresnel was lucky and received no damage, but the Plato first took a hit from a Speerschleuder, received a Lightning Rod token, and then was hit by a separate salvo from the Tesla Bombard which critted the hapless ship (Shredded Defences).  The submarine then passed its test to Panic Dive and slipped below the waves before the enemy could retaliate, leaving the Plato with only a single hull point!

The Sturmbringer Submarine Attacks!


CoA Frigates on the right, in a brilliant show of maneuverability, snuck between the Fresnel Cruisers and managed to sink 1 Prussian Frigate, leaving just 1 lonely survivor in the squadron.

The Prussian Frigates Continue To Get Mauled

The Prussian Battleship advanced, its Tesla Generator gave it an extra inch of movement.  The CoA Battleship was directly ahead, but the mission was to deal with the Medium Craft of the fleet, so reluctantly, the Great Ship trained her guns on the lead Plato Cruiser and fired both turrets, critting it (Engine Damage).  The CoA Frigates on the far left used their Dolphin Dipper to gain maximum movement but were unable to damage the Prussian Battleship.

Prussian Cruisers moved forward and turned to starboard, firing weapons and damaging the lead Plato Cruiser, adding a Lightning Rod to the damage.  CoA Dive Bombers moved at maximum speed towards the Prussian Cruisers.  Fearing the potential danger the Dive Bombers posed to their sub, the Prussian Fighter Wing attacked the CoA Dive Bombers, and successfully shot down 1 bomber token for no losses.

In the last activations, the CoA Frigate Squadron in the center moved around the Plato Cruisers, but were too far away to do any damage.  The Prussian Dive Bombers moved forward at ½ speed – not wanting to get too close to the CoA Fighter Wing near the center of the table.

In the End Phase, the Prussians failed to repair the Engine Damage to their Cruiser while the CoA repaired the Shredded Defences on the Plato Cruiser but failed to remove any of the Lightning Rods that had impacted their ships.

End of Turn 1


Losses:
PE:         75 pts                    3 Sunk Frigates
CoA:      77 pts                    2 Crippled Plato and 1 Crippled Fresnel Cruisers


Turn 2:
CoA Won Initiative.

The CoA Battleship continued its course to the left of the table.  Once again, Energy Beams fired, this time targeting the Prussian Battleship, and causing a crit.  Without warning, the Prussian Battleship disappeared in a great cloud of flame and smoke: Magazine Explosion!  Fortunately, no other ships were close enough to be caught in the devastation, but the CoA had accomplished half of their objective!  If they could sink the Prussian Sub, the CoA would win!

Magazine Explosion!!!

Prussian Cruisers redoubled their efforts and sank both a Plato Cruiser and a Frigate.  Both squadrons passed their Break Tests.  The last Plato Cruiser, realizing the danger, steamed at full speed to hide behind an island, but sank the last Prussian Frigate with a last, vengeful parting shot.

Prussians Strike Back!

The Vengeful Plato runs away...


Realizing the CoA Dive Bombers were still a serious threat, the Prussian Fighter Wing attacked once more and successfully shot down all the remaining drones for no losses!

CoA Frigates on the right made a torpedo attack run on one of the Prussian Cruisers, but failed to damage it.  The Prussians, wanting to waste a turn, once more moved the Spotter Plane Token.  The CoA Frigates in the center made their attack on the Cruisers, a torpedo attack causing some damage to a cruiser while the broadsides failed to damage.

Hoping to bait the CoA Fighter Wing, the Prussian Skyships moved forward at the Obscured level – staying outside of RB1 of the Fresnel Cruisers.  The Fresnels moved forward and split their fire, critting the Center Prussian Cruiser (Engine Damage) and hitting the damaged Cruiser, reducing it to a single HP!

Desperate to stop the CoA Cruisers, the Prussian Sub surfaced and split its fire.  Although the Plato escaped unharmed, the MK I Fresnel with the Amplification Generator was sunk!  Unfortunately, the sub failed to make its Panic Dive and sat, exposed, on the surface!

The Fresnel Mk I is sunk!


Ignoring the sub, the CoA Fighter Wing moved in and attacked 3 of the 4 Skyships, damaging a Jaeger for no losses.  With the Fighters having made their move, the PE Dive Bombers crossed the table at full speed, heading between the Plato and Fresnel Cruisers.  Finally, the leftmost CoA Frigate Squadron turned and made a torpedo run on the Prussian Sub, but failed to damage the Admiral’s Flagship.

In the End Phase, the rearmost Prussian Cruiser repaired its Engines, but the other Cruiser failed in spite of the Commodore’s reroll.  The CoA managed to get rid of the last remaining Lightning Rod – the rest had gone down with the ships that had them.

End of Turn 2!


Losses:
PE:          324 pts                  4 Frigates and the Battleship sunk, 1 Cruiser & 1 Jaeger Crippled
CoA:      202 pts                  1 Plato, 1 Fesno & 1 Frigate sunk, 1 Plato Crippled


Turn 3:
CoA again won Initiative!

Things were not looking good for the Prussians.  All the CoA needed to do was sink the sub and they would have won.  Seeing the sub on the surface, the CoA Battleship activated, turned and trained all weapons on the helpless Prussian, but when the smoke cleared, the mighty ship had failed to damage the sub! 

The Prussian Sub had a difficult decision to make.  If he dove, he wouldn’t be able to shoot and the Plato would probably get away.  With 3 squadrons of CoA Frigates closing on his position, being on the surface wasn’t the best place to be, but suspected he would be within depth charge range anyway if he dove.  The Commodore took a chance: Staying on the surface, the sub moved forward and trained all weapons on the last Plato Cruiser – successfully sinking it before it could hide behind the island!  Sadly, the Prussian ship failed its Dive Test and remained on the surface – the crew held their breath…

The Fresnel Cruisers advanced and fired multiple volleys at the Prussian Sub.  When the smoke cleared, the sub had suffered 2HP damage.  With the CoA’s two power hitting units failing to do significant damage, things were looking good for the Sub!  Now it just had to survive 3 squadrons of Frigates…

Unable to help the Sub, the Skyships finally came out of the clouds and attacked the rearmost Fresnel.  Though the cruiser squadron did managed to shoot down the damaged Jaeger before it could attack, the 3 remaining air ships inflicted a Triple-Crit!  One of the crits caused the Sturginium Generator to overload and flair; teleporting and crashing the stricken Fresnel onto its squadron mate, inflicting an HP of damage on its squadron mate before sinking to the bottom!  With no hope of the last Prussian Large surviving the turn and with only a single damaged medium CoA Cruiser on the table, it appeared the Prussians might be able to complete their mission objectives and squeak out a tie!

The Sturginium Flair Crashes the 2 Fresnels Together!


The Prussian Sub braced for the first Frigate Squadron torpedo attack.  In a brilliant use of Concussion Charges, the sub managed to block 6 torpedoes from the salvo – resulting in no damage!

Could the Prussians pull off a win?

As it turned out, the CoA had made a serious miscalculation, though neither of us realized it at the time.  By becoming fixated on sinking the sub and completing their objectives, the CoA Fighter wing had failed an opportunity to stop the Prussian Dive Bombers, which activated next and attacked the last remaining Fresnel Cruiser with a full strength wing!  Going maximum speed, the Dive Bombers inflicted a Double-Crit on the hapless Cruiser, sinking it and completing the mission objectives for the Prussians! 

Prussian Dive Bombers Sink the Last Cruiser!


Could the Prussian Sub hold out the rest of the turn?

The next CoA Frigate squadron made their torpedo attack run, and also failed to damage the Prussian Sub!  That left just a single Frigate Squadron with only 2 Frigates to sink the sub!

The Prussian Cruisers, seeing the threat, manoeuvred to block Line Of Sight to the sub, attempted to trap the last Frigate Squadron and opened fire.  When the smoke had cleared, the last Frigate Squadron had lost 1 Frigate, reducing the squadron to a single ship!  Another squadron suffered a loss and 2 damaged Frigates.  Though the firing failed to destroy the last Frigate of the last squadron to activate, it had virtually assured the Prussians a Victory as the chances of a single Frigate sinking a large by itself were small!

The Prussian Cruisers Try To Save The Sub!


Yet it was possible…

The last Frigate Squadron, unable to get the Line Of Sight he wanted, attacked one of the damaged Cruisers instead, but failed to damage it.  The Prussian Spotter Flight moved and then the CoA Fighters, activating too late, attacked the Skyships once more, damaging 1 for the loss of 1 token.

End of Turn 3 & The Battle!

Losses:
PE:          354 pts                  4 Frigates, 1 Jaeger and the Battleship sunk, 1 Cruiser  and 1 Speerwurf Crippled
CoA:      489 pts                  All 5 Cruisers and 3 Frigates sunk, 2 Frigates Crippled  *Objectives Met*

Prussian Victory!

Wow!  What a Squeaker!

I thought for sure the CoA had won this Battle after my Battleship exploded in turn 2!  I continued to fight to make it interesting, hoping for a tie, never expecting to pull off a Victory!

I wish I could claim it was brilliant tactics and strategy on my part, but quite frankly, the CoA had terrible luck in that last turn.  The sub, trapped in the open on the surface, survived 2 Torpedo Attacks, a Battleship and 2 Cruisers firing, and only suffered 2 HP damage.  By rights, the sub should be on the bottom of the sea.  By luck, it stayed afloat with minimal damage.

Looking over the notes, I think what cost Graham the game was the amount of effort he devoted towards the Donnerfaust Cruisers.  While not attacking the Dive Bombers with his Fighter Drones allowed the Bombers to sink the last Cruiser, the Prussian Cruisers were close enough to do the job as well.  

So while devoting so much of his resorces on the Cruisers may have appeared to be an error on his part, the reality was that these Prussian Cruisers were screening the sub for the better part of 2 turns.  Also, the Cruisers were a major “firebase” of my fleet.  They had Rugged Construction and as the weapons were all Tesla-based, they only lost 1 AD strength for every 2 HP of damage per ship.  With 5 HP each, this made the Donnerfaust hard to hurt and harder to weaken!  They needed that amount of attention to make a noticeable impact on the squadron.  Overall, I was quite happy with how the Support Cruisers performed.

Speaking of performance, the Sturmbringer Submarine was great!  I first thought it was very strange to have a sub without torpedoes, but I can’t complain about the weapons it does have!  While it is tempting to add escorts to it, the sub does have Line Of Sight of a Medium ship so it’s not easy to screen the sub while keeping its own weapons clear to fire around the Escorts.  I would probably prefer to float an extra Frigate squadron to follow the sub the next turn…


 On the Covenant's side, I've heard how "terrible" the Energy Beam weapons are.  While the Battleship failed to damage the Sub on the last turn, overall the Energy Weapons in the Covenant Fleet were well used and did make their presence felt.  I think Graham played the fleet very well and proved that the weapons are fine.  

If I were to question anything Graham did, I think it would be moving his Battleship too far to the left.  This kept him from turning around and bringing the Particle Accelerator into play.  However, arming the Battleship with Energy Beams meant he wasn't going to get any benefit from his main guns getting closer so it's an argumentative view.  I prefer to get in closer with a higher number of Attack Dice, but that would leave the CoA Fleet vulnerable to Boarding.  Tough call - you would need to decide on your game style and arm the fleet accordingly.

Another Great Game!  Hope you enjoyed the report!

Wednesday, December 11, 2013

BatRep: Road to Rabaul Campaign Book, Fool Me Once

So it’s the 4th mission in the “Road to Rabaul” Campaign Book.  Graham was happy with the last battle’s results; the Americans totally munched the Japanese in an overwhelming victory.  If he wins this one, he’ll have guaranteed that he’s won the first part of the campaign.  I’m not willing to just let him just “take it”, though…

Historical Background:
April 27, 1942.
The Japanese had been fooled on the previous mission, not anticipating the increased fighter strength defending Darwin.  Their arrogance had cost the Japanese 8 of their 24 bombers.  They weren’t going to make the same mistake next time…

Bombers were setup 1st (naturally).  They had to cross the table to exit out of the middle table edge.  Due to the hex pattern of the table mat, this meant the Betties were going to have to side-slip (must have been a windy day!) across the width of the table, 2 hexes at a time, to exit the proper table edge.  The formation of 9 Betty Bombers (once again in a single “V” formation) were still loaded down.  The Americans would be on the offensive, this time with 8 P40 Warhawks in 2 flights of 3 and one flight of 2.  Unfortunately, one of those flights of 3 wouldn’t arrive on the map until Turn 3!  So Americans set up second, one flight of 2 (the flight leader was an “Ace” rating : +3 modifier on all dice rolls) to the right, the flight of 3 on the left, heading more or less straight to the bomber formation’s left edge.

(Note: The P40’s on the right look a lot like P39 Aircobras because they are!  I was short P40 models so the P39 did proxy duty!)

The Japanese Escorts set up last; 3 flights of 3 Zeros each.  Per mission guidelines, one flight on each side of the bomber’s “V” and the 3rd flight was set up in front of the bombers.  However, while height and speed are given, orientation was not specified.  So, Flight #3 was set up on the left – going head-to-head with the Americans on that side.  Flight #2 in front of the bombers were turned to face towards the bombers (they had obviously spotted the P40s earlier and had turned to intercept) facing where they hoped the Americans would be at the end of turn 1 while Flight #1 lined up behind the bombers, facing forward, adjacent to the 3 hex zone covered by Flight #2.  This created a 6 hex zone “Kill Zone” that the Americans on the right had to fly through. 

The Battle Begins...

By overwhelming and killing the 2 P40’s on the right with 2 full flights, I had hoped that Flight #1 would continue to fly straight ahead (without having to turn) and engage the American reinforcements as they came onto the table while Flight #2 kept the survivors (if any) busy or fly to the left and help out flight #3 on the left.  I didn’t realize at the time that the American Ace was in the smaller flight.  Also, this was the first mission (EVER) that the Japanese had GREEN pilots (no bonus for any dice rolls) and I wasn’t sure how well they would perform against the American fliers.  Historically, this was the start of when the Japanese war machine was unable to keep up with the demands for pilots due to their losses and fighting techniques.

Another cosmetic issue had to be dealt with: I had 24 flight stands and 26 aircraft on this mission.  The last 2 bombers on the end of the “V” formation were left to sit on the ground as a result.  If you see them in the photos, they haven’t run out of gas or flown too low – we just ran out of flight stands!  Sorry!  :-}

We rolled for mission variable rules:
Americans rolled “Hill of Beans” – no special rules.
Japanese rolled “Java Veteran” – one Skilled Zero is promoted to Veteran.  I chose to promote the flight leader from Team #3.

Turn 1:
So, the game started!

The Betty Bombers side-slipped to the right (as I explained earlier), towards the middle of the opposite table edge. 

Hind sight being 20/20, I think this took Graham off-guard as suddenly his P40’s on the left were no longer facing the bombers, but Fighters!  He flew straight forward towards Flight #3 as the Zeros also closed in for a Head-to-Head pass.

On the right side of the map, the American Pair turned to engage Flight #2 in a point-blank, Head-to-Head pass while the Zeros of Flight #1 could only fly forward, unable to provide supporting fire this turn.

Tracer fire was hypnotic between the fighters as the bomber crews watched in fascination.  On the right, the flight leaders failed to damage each other from a range of 1 but 2 Green wingmen blasted each other out of the sky – First Blood on both sides!  (Got to love simultaneous fire!!!)

First Blood!  (I got you 1st!  NO! I got you 1st!!!)


On the left, again in a head-on-pass, most of the tracer fire was ineffective but the Zero’s Flight Leader managed to get a good solid cannon hit and another American P40 disintegrated under the heavy-hitting cannon fire. 

Another Head-To-Head Encounter Ends Badly...


Ouch!  Two P40’s shot down in the first turn!  This left just 3 American fighters on the table against 5 Zeros!  Worse, the ace was left by himself against 5 Zeros!  The bombers hadn’t been threatened or damaged yet and the American reinforcements were still 2 turns away before they even got on the table!

End of Turn 1


Turn 2:
Once again, the bombers continued their right Side-Slip.  And waited…

On the right, the Lone P40 Ace did a hard-left turn, sliding out of the firing arc of the Zero leader who had done a Split-S while the surviving wingman flew forward and out of the way.  Flight #1 continued straight ahead, prepared to intercept the American as he engaged the bombers next turn.

The American Ace Gets Away!

 On the left, the two American fighters did a hard left turn towards the bombers,  The Zeros of Flight #3, anticipating some sort of trickery, had broken their formation.  The flight leader had done a Split-S maneuver and just managed to get the lead P40 in his (narrow) gun arc.  His wingmen had both done hard turns, one to the left, the other to the right, just to clear off any P40’s that might have maneuvered onto the other’s tail.

Tracer fire stitched across the sky, searching for a target.  The American Ace on the right took a medium range shot, but failed to damage a bomber this turn.  (WOW!  I FINALLY PASSED a Robustness Roll!)  Both P40s on the left also missed their targets.  The Japanese flight leader, however, made a successful hit on the lead P40 on the left.  Checking the damage tables, Graham needed to roll a 9+ to prevent damage to the plane.  BOX CARS!!!  Graham rolled a 12, handily passing his Robustness Save, BUT it was still a double, indicating a “Lucky Hit”.  So we rolled on the “Lucky Hits” table.  The result?  “Pilot Killed – Plane Crashed”!  So close but so far…

Death by Lucky Hit!

Sadly, the Zero that shot down the P40 had his own problems.  He had held down the trigger a little too long and was now out of ammo.  He had no choice now but to disengage…

This left the Americans with only 2 P40’s on the table.  While his reinforcements would arrive next turn, Graham’s flight of 3 P40s would be too far away to get involved for at least 3-4 turns.  And the bombers still were undamaged!

End of Turn 2


Turn 3:
Unsurprisingly, the bombers side-slipped to the right…

On the far edge, the flight of 3 P40’s came onto the table.  From a distance, they could only watch and encourage their comrades over the radio.  On the right, the P40 Ace charged head-first at the bombers, a Zero following not far behind while Flight #1 moved forward 3 hexes, flying over the bombers.

On the left, the American P40 turned to the left, just a little too soon, leaving all the bombers outside his firing arc!  Actually, it was a fortunate error as a Zero had anticipated the “proper” turn arc and would have had a shot if the P40 ended its move where it should have.  The Zero that ran out of ammo last turn did a power climb, effectively taking it out of the fight.  It would continue to climb out of the battle over the next two turns.  The last Zero, which had turned hard left last turn, was now well out of position and continued to turn to the left, hoping to get into the proper facing before the reinforcements could engage.

Bad Angle, But Safe From Zeros!

From Point-Blank range, the American Ace missed his target (He rolled Snake Eyes!)!  (Fortunately, because he rolled so low, his Ace was NOT out of ammo!).  Meanwhile, multiple bombers and two Zeros were shooting at the American Ace.  The nbombers failed to hit.  Both Zeros hit the hapless fighter, and though the Pilot made the Robustness Save against one hit, he just couldn’t dodge the damage of the 2nd hit.  The American Ace was down!  Sadly, the Zero that got the killing shot also ran out of ammo this turn.

Death of an Ace!

This would leave the Americans with only 4 fighters on the table, of which only one was in position to do anything next turn.

End of Turn 3


Turn 4:
In a Surprise Move; the bombers side-slipped to the Right!  (No!  Really!)

Basically, the last P40 fighter of the original force made an attack on the bombers, successfully hit one, but in a surprise (to BOTH of us), the bomber passed its Robustness test; no damage!  A Zero put the hapless P40 out of its misery.  The American Reinforcements could do nothing but watch hopelessly.

The Last Casualty

Looking at the table, Graham did the math; 3 P40’s against 6 Zeros and 9 bombers.  (The Japanese had started with 9 fighters, but 1 was shot down and 2 ran out of ammo.)  The bombers hadn’t been damaged yet and he was still 2-3 turns away from engaging.  By that time, the Zeros would have gotten back into proper position and approaching the bombers would have been near-suicidal.  Graham conceded the game and the remaining P40’s dove away for home…

End of Turn 4 & Game!


Victory Points:
Americans:         4 pts      (1 Zero shot down)
Japanese:            22 pts    (5 X P40s = 20, Ace shot down: +2)

Also, I was supposed to get points for the bombers getting off the table.   9 Bombers off the table successfully= 9 X D6 VPs which we didn’t bother to roll!  Another 9 to 54 points depending on how well I could roll!!!

Overwhelming Japanese Victory!

Wow!  Complete turn-around this mission.

You have to ask yourself: Why?

First off, obviously, the Japanese had more escort fighters.  That makes a huge difference.  More importantly, I got to choose where they were (somewhat) and what direction they were facing AFTER the Americans were deployed.  That was a HUGE difference.  Last mission I had less choice and placed 1st.  As a result, one flight never really got involved in the fighting - I was defending bombers with 3 fighters against 8 P40's.  There was no way to stop the American onslaught under those conditions.  This mission, with more fighters and better placement, every flight had at least 1 round of shooting and a kill.

Next, you have to discuss the American deployment.  Having 3 fighters delayed for 3 turns meant an uncoordinated, piecemeal attack.  Worse, it meant they were outnumbered from the beginning of the game thoughout to the end.  This is a complete reversal of the last mission and while Graham tried his best to pierce the fighter cover, he just didn’t have the time he needed to attack the bombers before his planes came under fire.

Finally, Graham’s unbelievable luck last game deserted him.  Last game he made countless Robustness Saves.  He just was unable to do that this game.  The one time Graham did make the save, the pilot was killed by a lucky hit.  The problem is, when you take a hit with a low velocity cannon (the Zeros all have 2), you need to have failed the roll by 1 or 2 to suffer only damage.  A difference of 3 or more will result in instant destruction due to the destructive power of the cannon.

Overall, I don’t think this or the last mission were truly fair.  Both missions were designed to make it nearly impossible for a fair fight.  As a historical perspective, they are both accurate as the battles turned out historically (in this battle, it was a historical failure for the Americans).  As a “teaching tool” or “historical experience”, it was a good mission.  As a fair fight – definitely not!

So where does that leave us?  Tied at 2 games each!  Next game will be the tie-breaker and the last mission of this phase of the campaign!


Unfortunately, it IS another bomber mission…

Monday, December 2, 2013

BatRep: Road to Rabaul Campaign Book, ANZAC Day

Playing the 3rd mission in the “Road to Rabaul” Campaign book, Graham was getting a little frustrated with Bomber Missions (and I can’t say that I blamed him).  However, that’s exactly what the next mission was…

Historical Background:
April 25, 1942.
It’s ANZAC day and Allied Command believed the Japanese would make an attempt to disrupt the National Celebrations.  Fortunately, the Americans of the 49th Pursuit Group were available and all 3 SQUADRONS were placed on alert.  Sure enough, the Japanese tried to spoil the party…

9 Betty medium bombers had just completed their bombing run and were heading home off the North-West corner.  A new wrinkle is that the Japanese bombers were flying in a “V of V’s” formation; 3 planes in a V formation leading 2 other flights of 3 planes, also in V formation, off each “wing” of the leading “V”.  This should allow the Japanese bombers to concentrate their fire more effectively as the formation wasn’t as spread out as before.  All the Bombers were crewed by Skilled crew (+1 to crew checks, etc).  The Japanese escort consisted of 2 flights of 3 Zeroes, one flight to the west (Cover Flight 1), the other leading the Bomber formation to the North (Cover Flight 2).  The leader of each flight was a Veteran (+2 for Crew Checks, etc), the rest were Skilled.

The American P40 Warhawks setup last.  One formation of 4 P40s coming in head-to-head from the north (Yellow Flight) and two 2 plane formations coming in from the right (East) (Blue Flight).  The Yellow formation was led by a Veteran pilot (+2), the 2 Blue pairs were led by Skilled pilots (+1).  All the rest of the P40s were “Green” (+0).

Start of Game - Initial Deployments


Rolling for the Variable Mission Rules, the Americans rolled “Deadly Aim”; one of the Green crew of Yellow Flight was a crack shot and was treated as a Vet (+3) for shooting purposes only.  The Japanese rolled “Rising Sun”; the lead bomber crew of each “V” formation was increased to Veteran (+2) skill level.

The American’s mission was simple: Shoot down as many Aircraft as possible for full victory points.  Bombers were worth 2 VP damaged, 8VP destroyed.  Fighters were worth 1VP damaged and 4 VP destroyed.
The Japanese mission was to get as many bombers off the board as possible:  each was worth 2VP.  Damaged American fighters were worth 2 VP instead of the normal 1VP, but 4 VP if destroyed.
So, the game began…

Turn 1:
The Bombers started things off, leisurely flying forward 2 hexes.  The American Yellow Flight more or less side-slipped and continued to close on the Bombes, Head-On.  The Blue Flight gunned their engines to max speed as they closed in on the right.  Japanese Cover Flight 1, way out of position on the left, turned sharply and headed towards the bombers.  Cover Flight 2 anticipated the American Yellow flight and managed to pounce from the side, only 2 hexes away from the closest fighter!

Ambushed!

Tracer fire flew everywhere, but the gun smoke must have clouded everyone’s vision: No Damage anywhere!

End of Turn 1


Turn 2:
The Japanese Betty Bombers shuffled forward another 2 hexes and waited for the shoe to drop.  It didn’t take long…
Two pilots from Yellow Flight narrowly avoided a collision with each other as the entire Yellow Flight charged at the bombers head on, guns blazing.  Blue Flight also charged forward from the right, attacking the right V formation.  Japanese Cover Flight 2 came in behind Yellow Flight, hoping to “dissuade” the Americans from the Betties, but Cover Flight 1 was still too far away to do anything.

Once again, tracer fire flew everywhere.  The Bombers and Cover Flight 2 got several hits on the P 40s, but the rugged nature of the American Fighters prevented any noticeable damage!  Sadly, the same could not be said of the American fire.  All 3 bombers of the rightmost V formation were shot down and the bomber #3 of the lead formation suffered serious engine damage!  However, the Americans now had 2 P40s out of ammo (# 5 & 6), meaning they would be missing 2 sets of guns already!

Americans Engage!

End of Turn 2!


Turn 3:
The Japanese bombers continued forward again, with Bomber #3 falling out of formation due to Engine Damage.  American Fighters 1 & 2 from Yellow flight both performed Immelman Turns, facing in different directions but still landing in the same hex!  Again, they managed to avoid a collision!  Fighters 3 & 4 flew through the bomber formation and made turns to Starboard, hoping to get good shots on the left-most V formation of bombers.  Fighters 5 & 6 dove out of the engagement zone (they would be off the table next turn), denying the Japanese their revenge (and any possible Victory Points).  Fighters 7 & 8 followed the damaged Betty, hoping to put it out of its misery soon…

Japanese Cover Flight 1 was still out of the way and unable to help the bombers.  Cover Flight 2 split up to try and tackle the two American Flights as best they could.  Once more, too many targets to engage, not enough fighters…

Tracer fire was stitching holes everywhere once again, but the Americans were once more invulnerable in spite of multiple cannon hits from Bombers and Fighters!  (Graham was making some INCREDIBLE Robustness saves this game!  Glad he doesn’t always roll this well for CY6! & Dystopian Wars!)  To add insult to injury, One Zero ran out of all ammo while another ran out of Cannon Ammo – leaving it with only 2 Light Machine Guns operational!

Meanwhile, Betty #3, with smoke trailing from her engines last turn, was too easy a target to miss and was shot down.  Betty #1 was also hit but made its Robustness Save (I think the only save I made all game), but rolled a Lucky Hit (doubles); and caught Fire.  If it wasn’t put out during the Movement Phase of next turn, the bomber would be lost!  During all this, Yellow Flight Leader ran out of ammo as well.

End of Turn 3!


Turn 4:
The Betties slogged forward once again.  Rolling its Crew Check, Bomber #1 successfully put out the fire and stayed in the game (for a few more seconds, anyway).  American Yellow flight Leader, out of ammo, dove out of the engagement (it would be disengaged next turn).  His wingman (P40 #2) started the long run back towards the Betties alone.  Meanwhile Blue Flight attacked bombers in pairs, hoping to take down at least two more bomber this turn.  The Zero that was out of ammo climbed out of the combat zone and disengaged.  Japanese Cover Flight #1 FINALLY turned and engaged the fighters trailing Betty #8 while the rest of Cover Flight #2 continued to try to protect the lead bombers.

American Fighters 7 & 8 from Blue flight engaged the Lead Betty, blasting it out from the sky.  As the bomber started to fall, the Tail Gunner managed to hit and damage the engine of P40 #7 – avenging itself!  Elsewhere, American P40s 3 & 4 shot down Betty #8 from the Left formation, but both fighters succumbed to the combined fire of the bombers and Cover Flight #1.

The Japanese were down to just 3 Bombers out of 9 while the Americans finally suffered their first losses of the game!  2 shot down, 1 damaged and 3 more without ammo - the Americans were down to only 2 undamaged, operational fighters!

End of Turn 4!


Turn 5:
Graham decided that he had done enough.  He had suffered some losses and his remaining fighters were outnumbered now that Cover Flight 1 had joined Cover Flight 2, so all his planes dove for home, knowing the Zeroes wouldn’t be able to keep up with him.  Technically, his planes wouldn’t be completely disengaged until turn 6, but this was the signal of the end of the game.

End of Turn 5 & Game!


Graham had 1 damaged P40 to roll for.  He failed his Crew Check and the hapless P40 crashed on landing – counting as Destroyed.

Final Tally:
USAAF: 48VP      (6 Betty Bombers)
JNAF:    18VP      (3 Betty Bomber off the board = 6VP, 3 US fighters Destroyed=12VP)

Overwhelming American Victory!

OUCH!!  That should make Graham feel better about last game!

Going into this mission, I thought the Japanese had a slight advantage over the Americans.  My pilots all had higher skill levels (on average) than their counterparts.  The new V of V formation meant the bombers could support each other more so than the single V formation.  Those tail gun Cannons on the bombers should have meant a difference .  So what happened?

First, credit must be given to Graham playing the Americans.  He knew his mission objective was the bombers and he hung onto that like a dog with a bone, never allowing himself to be distracted until he was about to be overwhelmed.  At that point, he disengaged – just like the Americans were learning to do at this time period in WWII.  Second, he was rolling INCREADABLY well on his armor or robustness rolls.  He only started to fail those in Turn 4, even though he was hit quite often throughout this game.  The bomber formations allowed for more shots and hits, though Graham took them all in stride and made his saves until the end of the game.

On the Japanese side, one glaring weakness was the deployment of Cover Flight #1 on the far west side.  Normally, I wouldn’t have deployed them there, knowing roughly where the Americans were to be deployed, but the mission deployment instructions were insistent I had to deploy that force there.  Next mistake was I didn’t increase their speed to maximum right away and I should have, though I doubt they would have been in range to engage any sooner.  Cover Flight #2 was left to defend the bombers for 3 turns before I could have Flight #1 to be in a position to help.

Anyway, a well-earned victory for Graham and the Allies.

That’s 2 wins for the Allies and 1 win for the Japanese and only 2 more missions to go in this phase!  Allies need 1 more win to earn a Minor Victory in the first phase.  As the Japanese have already won a battle, the Allies cannot win a Major Victory.  That would have required them to win all 5 missions.


On the other hand, maybe the Japanese can sneak out 2 more wins…