Sunday, May 24, 2015

BatRep: CY6! - Jet Age: Red Target: Skyhawk

Sorry for the lack of activity!  It seems after years of contract work, I finally landed a Permanent Position!  With my Professional Life stabilizing, hopefully I can post more frequently than of late!

So Graham wanted to do some “Check Your 6! Jet Age” and this was the next mission in the campaign book: “Star And Pyramid”.  So, away we go!

Date:  25 July, 1970, 1000hrs.
Location:  West of the Suez Canal (Egypt)
CAB:  Low & Surface Low (Ground level to ~ 9000ft)
Situation:  The Soviets had started deploying their own troops and pilots to Egypt.  Israel restricted missions to within 25 miles of the Suez to prevent engaging the Soviet pilots.  It didn’t always work…

A flight of Israeli A4’s is on their way to attack an artillery position when they are intercepted by Soviet Fighters in the area.

Mission:
3 Artillery Guns, with 2 Light AA Weapons and 2 Man-Portable SA-7 IR Missiles protecting the guns.
AA and SA-7 must roll a D6 and roll 3+ to target an enemy fighter within 6 hexes of a friendly.  If failed, they MUST target the friendly aircraft.
Israeli:
4 X A4H’s must try to destroy the 3 guns.  Each Gun is a Point Target and takes 2 Damage Points to destroy.  The A4’s have a Medium Bomb Load and count as Fully Loaded. 
Soviet:
MiG 21MFs have 4 X AA2 IR Missiles each.  Shoot down the Israeli Aircraft before they complete their missions.

Optional Rules:
Soviets: One SA-7 Battery has Skilled Crew instead of Green
Israeli: Half the A4’s (1 Skilled and 1 Green) are delayed and don’t arrive until turn 3

Deployment:
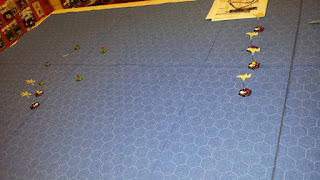
Guns were deployed as far away from the Israeli Table edge as the rules permitted.  Light AA was deployed in between Israeli and Guns.  The SA-7 missiles were deployed hidden – to be revealed when (if) they fired their missiles.

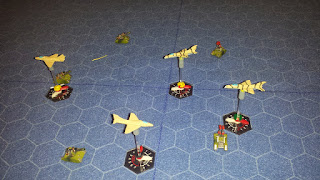
Deployment Before the Optional Rules were rolled...

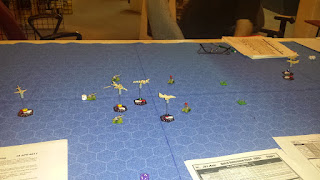
Israeli Deployment AFTER Optional Rules were rolled!


Turns 1-3:
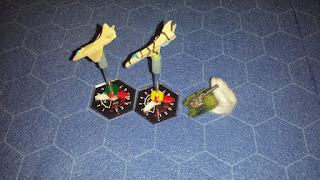
The Israelis, forced to fly as two separate flights, moved forward at max speed (5 with full loads), and climbed to TAL 5.  MiG–21’s maneuvered to get rear aspect shots with AA-2 IR Missiles.  The Green MiG managed to get a Missile shot, but then we realized he couldn’t fire as he had performed an Immelman.

Turn 4:
AA and SA-7 Fire missed the A4’s.  The Green MiG launched an AA-2 missile, but missed.  The Black A4 made an attack on one of the Guns, but failed to hit it!

Missile Away . . And MISSED!

Turn 5:
The Black A4 made a Steep Immelman, but realized too late he reduced his air speed to Zero!

AA guns failed to hit either A4, and the Yellow A4 made a successful Dive Bomb Run on one of the guns, but only damaged it (Single hit).  Both MiGs fired AA-2 Missiles at the Yellow A4, but both missiles missed their targets.

A4 makes successful hit while the other STALLS!

Turn 6:
The Black A4 managed to recover without stalling the aircraft!  The Yellow A4 made an Extreme Turn to port.  The Yellow MiG made another Missile Attack on the Black A4, but missed AGAIN!!!  By ONE!

Another Missile Attack Fails To Hit!

Turns 7-8:
Lots of maneuvering, but no one was hit or damaged.  The “late A4s continued to fly straight forward, 1 behind the other. 

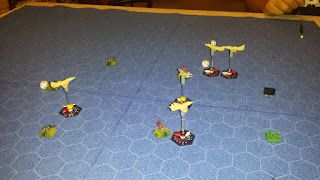
End of Turn 8

Turn 9:
As the 2nd Flight of A4’s flew by one of the AA Guns, the Gun managed to get a direct hit on the Blue A4, which caused the bombs to detonate and destroyed the A4!  The explosion killed the crew before they could eject!  The SA-7’s fired their last missiles, but both missed their targets.

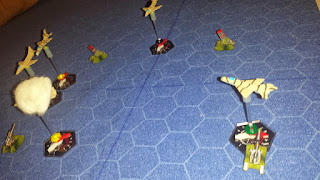
AA Gun Shot Down An A4!

The Green MiG fired another A2 Missile and FINALLY, it homed in and destroyed Yellow A4!  No parachutes were seen as the A4 fell from the skies.  Two Kills in 1 turn!

MiG FINALLY Gets a Missile Kill!


Turn 10:
The Green A4 managed to make a successful bombing run and destroyed one of the Guns with a Direct Hit!  All other shooting missed!

A4 Destroys a Gun!


Turn 11:
The Game would end in turn 12 and Graham conceded the game at this point.

Final Score:
Israel:                   3 Points (1 Gun Destroyed)
Soviets:               10 Points (2 Planes – 5 points each)

Soviet Victory

 +++++++++++++++++++++++++++++++++++

This was a tough mission and the fact that the Israelis were forced to come in as 2 waves instead of 1 really hurt their chances!  Graham really was at a huge disadvantage in this mission as a result.

It also didn’t help in missions like this that your opponent knows EXACTLY what your mission is.  We’ve been spoiled by Dystopian Wars where you draw Secret Random Missions.  Knowing the Israeli Mission meant I could place the Guns, the AA guns and the SA-7’s to make it as difficult as possible.  While in reality, it makes sense in a war-setting to make a defense in depth like I did, it makes it that much easier when you know exactly which direction they’re coming from.  I think it might have been more interesting if the Israelis could roll randomly which table edge they came in on or how deep into the table they could deploy.

Also of note; I believe this is the first time EVER that we had ground fire actually take out a plane in Jet Age!  I needed to roll 11 or 12 on 2D6 to get a hit, so I really wasn’t expecting anything from the AA guns.  The SA-7’s on the other hand only needed 7+ to hit and they all missed!  I had placed the SA-7’s so that they would get at least 1 god missile shot as the A4’s approached the Guns, but it didn’t work!

Which brings up an interesting point.  I kept missing my “To-Hit” rolls all game by 1!  It was so bad that Graham broke out into a laughing fit somewhere around turn 7 or 8 and couldn’t regain control for a couple of minutes.  Ironically, after this fit, I shot down 2 planes in one turn.  The dice must have felt sorry for me…


Good game for me, but again, I think the Israelis (and Graham) really drew the short straw on this one.  Sorry Graham!
Monday, May 4, 2015

Product Review: Fantasy Flights' Star Wars X-Wing Miniatures

Happy Star Wars Day!

May the Force be with you!


Real Life has been keeping me busy with a new job hunt as has a number of family issues.  So, I’ve been bad and haven’t been playing many games.  Sorry!

Instead, I’ll leave you a Product Review of Fantasy Flight’s Star Wars X-Wing Miniature game.

A long time ago in a galaxy far, far away . . . .

I was a Kid when the “First” Star Wars movie was released.  You “Young Ones” know it as Episode IV – A New Hope.  And yes, Han Shot First!!!


Zooming around in an X Wing Fighter, blasting away Imperial Tie Fighters was a past time we all did at some time or another.  At least, in our minds we did.


THIS was the game I wanted as a kid!  WHY, oh WHY did you take so long?!?!?

So What Is It?
If you haven’t heard of this game – what rock have you been hiding under?

X-Wing is a Ship-to-Ship combat game, specifically designed for Fighters in the Star Wars Universe.  Battles tend to be Fighters vs Fighters, but Fantasy Flight have added larger ships to the game.  Presently, there are “Normal” ships such as fighters, “Large” Ships which include the Millennium Falcon, Slave 1, etc, and finally the Huge Ships such as the Rebel Blockade Runner and the Rebel Transport (which aren’t normally legal in most games). 

In a “Standard” or Tournament game, players have 100 points to spend on various vessels and their Pilots, with options and upgrades available for most every ship.  Larger games are possible, but 100pts is standard.  Each Vessel selected has a card that shows the ship and pilot’s stats, including:
  • Pilot Skill or Initiative
  • Firepower
  • Evasiveness (Dodging)
  • Hull Points
  • Shields 
  • List of Actions available
  • Description of Pilot & Ship or Special Rules
  • Options Bar
  • Points Value


Players will also need a miniature of the vessel with the appropriate faceplate on the base.  Players receive option cards when they buy their ships.  Most cards can be used with any appropriate ship but some do have restrictions (actually printed on the cards, such as “Rebel Only”).  These cards generally give added capabilities to the ships, such as a secondary weapon or special skills or crew.  Each card has a value as well which will affect the total point cost of the ship.

Once players have their ships, their cards and their options figured out, the game (usually) plays on a 3’ X 3’ surface, though extra space will be required to lay out the cards to track damage, etc.  A standard 4’ X 4’ card table would be an ideal surface.  Unlike many Fighter Games, X-Wing is played on a “plain” surface – No Hexes!  Debris and asteroids can be (and should be) placed on the table to break up lines of fire and maneuvering.

One disadvantage (?) is that each player must buy the Starter Box set which contains 2 Tie Fighters, 1 X-Wing Fighter, Appropriate Flight Stands, Card Stock Turn/Maneuver templates, Upgrade cards, special X-Wing dice and, most Important – the Damage Cards.  In theory, you can purchase everything else singularly (there are a couple of 3rd party Maneuver templates, Range Rulers and various Tokens), but to the best of my knowledge, you can only get the Damage Cards in the Starter Box Set.  This isn’t actually a disadvantage as the box set pays for itself by virtual of having 3 Plastic Fighters (all pre-painted and assembled, BTW) that everyone usually wants.  In fact, most people will end up buying at least 2 box sets to start their fleets.

To expand your Fleets, individual fighters and ships (and their appropriate cards and flight stands) are available in blister packs so that you can pick and choose which and how many of each ship you want in your collection.  If you want to do Rebels Only fleet, you can (except for the 2 Ties you got stuck with when you bought the Starter Box)!  You could probably find an Imperial Player to trade your Ties with…

A standard game is 100 Points.  That will be 2-4 X-Wings vs 4-8 Tie Fighters – dependent on the pilots that are taken and special upgrades on either side.  Y-Wings, A-Wings, Tie Advance, Tie Interceptors and many more fighters are available.  Large ships, such as the Imperial Shuttle, The Millennium Falcon and Slave 1 are typically in the 35 – 60pts, depending on pilots and options.  So some fleets are seeing 1 or 2 large ships with a couple of fighters as escorts.  A recent addition has been “Scum and Villainy” – a 3rd “Fleet Choice” so that you are not limited to just the Rebels and Imperials.

Game Play:
Players deploy their ships within Rang Band 1 of their opposite table edges.

Typical Deployment

Range Ruler Verifying Correct Setup

Each turn, Movement is pre-plotted.  Each ship has a Maneuver Dial that has all the available maneuvers permitted for that ship.  

Maneuver Dials for Tie & X-Wing Fighters

The player first sets the Maneuver Dial to the maneuver that he wants to perform.  Once every one has placed all their dials beside all the ships, the maneuvers are revealed and performed, Lowest Pilot Skill first to highest.  Ships are moved using Special Templates that fit into notches placed into the front and rear of the flight stands.  Holding the Template still, you move the ship base along the template and place it at the other end.  If at the end of the move, there would be over-lap on another ship’s base – you stop just as the moving ship’s base makes contact with other base.  In this case, the moving ship loses its Action.  If you can move the entire distance and place the base without overlapping, then the pilot has a number of choices for an action.  Not all ships have access to all the actions (in fact, I don’t think ANY ship has ALL available actions available to it).  These actions could be an extra maneuver, enhanced targeting, evasive maneuvering, etc…

Maneuvering Templates


Movement Revealed - Template In Use


Shooting is done after all the ships have completed their maneuvers and are resolved in Reverse Order!  Best Pilot Skill shoot first!  Ranges are measured using Range Rulers which provide bonuses for shooting or evading (or NOT!) based on the distances.  Special CUSTOM Red Dice are rolled to determine whether the shooter hits (number of dice dependent on the ship and weapons) and the defender rolls CUSTOM Green Dice (again, number dependent on the ship and bonuses) to try to evade.  If hits “hit”, you remove shield markers until they’re gone and then you draw damage cards from the Damage deck and place it by the ship’s stat card (off Table).  There are two types of Hits – standard and Crits!  Standard Hits, the card is placed face down by the Stat card and counts as 1 hit and removes 1 Hull Point.  When a ship has no more hull, it is destroyed.  If you rolled a crit and all shields are down, the Damage Card is placed Face-Up beside the stat card and extra effects are placed on the damaged ship.


A Wing is shot at and takes damage...
Green Dice failed to evade hits
Shields absorb 2 hits and the hull takes 1 Hit & 1 Crit!

Repeat Ad Nausea…


The winner is the one that completes the mission (usually who killed the most points though escort mission and cargo retrieval are other options).  Players can make up their own objectives if you want.

+++++++++++++++++++++++++++++++++++++

If I were to compare it to other games, it would play and feel be similar to both “Wings of War/Glory” and “Check Your 6!”.  Maneuvers are planned in advance, shooting is opportunistic and the excitement level is about the same.  The real difference between these systems is how the ships are moved.  Wings of Glory uses a card system with lines drawn on the cards as their movement template and Check Your 6! uses a hex-map and movement charts.  The X-Wing Maneuver Templates is different, but perform the same function. 

The Maneuver Templates are based on Speeds labeled 1 through 5.  There are “Banks” that change the ship’s facing ~ 45 degrees and “Turns” that change the ship’s facing 90 degrees.  Banks and Turns are only available for speeds 1-3.  As you can probably figure out, that makes 11 Templates that you need to play the game!  It’s kind of awkward when you first start playing, but after a while, players develop an “organization” skill to help them keep track of them.  Every once in a while, someone will still misplace a particular template and game play stops as players try to find it…   ;-)

The good news is that Ship “Classes” tend to be to scale to each other.  While the Fighters are to scale to other fighters and larger ships are in proportion to other large ships, the scale is kinda skewed to make the larger ships playable on the same sized battle zone as with fighters.  There is a 3rd ship size class: “Huge” Ships.  So far, there are 3: The Rebel Transport, the Rebel Blockade Runner and an Imperial Gunship (just being released about now).  Again, they are not proportional to fighters but are “supposed” to be proportional to each other.  Huge ships are not for standard games and don’t belong on a 3’ X 3’ table, so I won’t discuss them here.  Maybe some other time…

Pros:
  • This is the game every kid wanted when the movies were first released!  COOL Factor = 10+ (out of 10)
  • The Ships are well detailed and painted (Though many seem to like repainting them)
  • “Regular” 100 Point game can be played on a smaller table! (3’ X 3’)
  • Rules are available for Free Download
  • Starter box contains everything you need to start playing
  • Very Popular – should be no problem finding opponents
  • Simple Rules with Many Ships & Multiple Options for ships = many unique engagements!
  • Each Ship blister has everything you need to use that ship PLUS SOME optional (and sometimes unique) Upgrades
  • Lots of web support from both Fantasy Flight & 3rd Party Programmers


Cons:
  • Players need to buy the Starter Box just to get a Damage Deck – everything else available separately through Fantasy Flight or 3rd party vendors
  • Specific Upgrade Cards are available only when purchasing specific models.  For many tournaments – you MUST have original card!  This means you May need to buy ships (or more of them) than you want to, just to get the cards you want for other ships!
  • Uses Custom Dice – if you lose them, you’ll need to buy Fantasy Flight’s Dice Packs or another Starter Set
  • Each Blister, while complete with cards, etc, is costly -  Imperial Fleets making “Swarms” of 8 ships will be more costly ($$$) than Rebels (typically)
  • Unless you’re just collecting 1 of each, you NEVER want just 1 of each model, meaning more $$$
  • Some Models are very fragile (X-Wing’s Laser Cannons for example)
  • “Codex Creep”: Ships have been released in “Waves”.  Some newer ”wave” ships make older wave ships less useful or appear over-priced or less desirable
  • A lot of “Rock – Paper – Scissors” in competitive play.  Many Internet lists abound
  • Collecting models will take up a Lot of space


Overall: Costly but Fun – Recommended ONLY if you can afford it!

Like most miniature games, X-Wing can become very expensive, very fast if you don’t limit yourself.  While you can probably get started and have a viable 100 point force for less than $150 (Canadian), it won’t stay that cheap for long.  Fighters range from $12 - $17 (cdn) depending on where you go.  Large Ships are typically in the $40 - $60 range (though you don't need as many of these).

This is one of those games that really is a collector’s game as you’ll never have all or enough of all the ships to please yourself.  Once you're caught up, fantasy Flight is sure to release another wave!

Still, it’s cheaper starting out than something like 40k or Warhammer Fantasy and their typical 1500 - 2500 point tournament lists…

Any way, a fun game that I would recommend unless one of the cons is an absolute no-go for you.

Have fun.  May The Force Be With You!