Tuesday, December 26, 2017

BatRep: 40k (8th Edition) 500pt Escalation League.

So, a quick update on things, first.

Real Life has been very stressful and gaming time has been minimal. That's why there haven't been any reports lately.

Also, I’m presently waiting the next edition of Dystopian Wars which has been picked up by Warcradle Studios.  So hang onto your models, I hope to be doing some more games soon!
 ============================================

An apology: I did take pictures.  Frankly, they're horrible, so I didn't use them in this report.

An “Escalation League” has started at one of the local hobby stores. It’s started at 500 Points and will increase to 1000pts in January, 1500pts in February and finally 2000pts. Only limitation is that the Warlord you start with doesn’t change throughout the campaign.

I decided to use my Space Wolves for the League. My forces consisted of:

Wolf Lord with Saga of the Warrior Born, Storm Shield and the relic: Krakenbone Sword (96pts)

Blood Claw Pack (106pts) with:
Wolf Guard Pack Leader with Bolt Pistol & Frost Sword
Blood Claw Pack Leader with Power Fist & Pistol
Blood Claw with Flamer & Chain Sword
3 X Blood Claws with Bolt Pistol & Chainswords

Grey Hunter Pack (78pts) with:
Grey Hunter Pack Leader with Boltgun, Bolt Pistol & Chainsword
Grey Hunter with Plasma gun, Bolt Pistol & Chainsword
3 X Grey Hunter with Boltgun, Bolt Pistol & Chainsword

Long Fang Pack (155pts) with:
Long Fang Pack Leader with Bolt Pistol & Chansword
Long Fang with Heavy Bolter
Long Fang with Lascannon
2 X Long Fangs with Missile Launchers

Wolf Scouts (65pts) with:
Wolf Scout Pack Leader with Chainsword & Bolt Pistol
Wolf Scout with Heavy Bolter
3 X Scouts with Boltguns & Bolt Pistols

So, my first opponent was Graham, playing a Deathwatch army.

Mission: Front-Line Warefare
Using Dawn-Of-War Deployment (24” “No Man’s Land” between deployment zones.
As we were playing only 500pts each, we played on a 4’ X 4’ Table.  The mission required 4 objectives be placed.  2 on the centre line, 12” away from dead center, meaning 1 foot in from each table edge.  Then 1 more objective in each of our deployment zones. Victory points are awarded for controlling objectives at the end of the game.  1 VP for controlling the objective in your deployment zone, 2 VPs for each of the centre objectives and 4VP for controlling the objective in the enemy zone!

Also, 1VP for killing the enemy Warlord, 1 for First Blood (1st to kill an enemy unit of any size) and 1 VP for Linebreaker (having a unit in the enemy deployment zone at the end of the game – effectively making the Enemy Objective worth 5VPs)!

Mission is Random length, we roll after turn 5 and can go a maximum of 7 turns.

Deployment:
Graham deployed 2 Terminators (1 with Cyclone Missile pod and the Unit Captain with Stormbolter and Lightning Claw) in the ruins on my right side, guarding the objective on his side.  A third Terminator with Assault Cannon and Power Fist deployed on my left.

Grey Hunters, along with the Wolf Lord, deployed behind a building, guarding the objective on my left side, the long Fangs deployed in the balcony on a Stronhghold on my right.  This allowed the Long fangs the ability to cover 3 of 4 objectives.  The Scouts went on the hunt (stayed off the table) and the Blood Claws spent a Command Point to do the same using the new Chapter Approved ".
Graham won the first activation and I failed to steal it back.

Game Turn 1:
Deathwatch:
The Company Captain moved around a corner, out-of-sight.  The other Terminator on the other side advanced forward.

Cyclone missile launcher managed to kill 1Long Fang on the balcony (I removed the Heavy Bolter; the Missile Launcher and Lascannon would be more useful against Terminators).

Space Wolves:
The Grey Hunters stayed in hiding behind the building.  Facing off a terminator with an Assault Cannon at long distance was a recipe for disaster.  The Long Fangs were in a great firing position in cover, so stayed still.  The Scouts came in on the table about ½ way up the table, hiding just behind a building from the Cyclone and Captain.

Long fangs fired at the Cyclone Terminator, but the danged Invulnerable saves warded off any damage.

Game Turn 2:
Deathwatch:
Terminator on the left of the table continued to Advance as there were no targets for him..  Using a Homing Beacon, 2 more Terminators teleported beside him. Another terminator with Assault Cannon and a Librarian with a Force Axe and Storm Bolter. The terminators on the right stood still.

The Librarian tried to cast Smite, but found he had no Line-of-Sight to the Grey Hunters and just out-of-range to the Long Fangs.

Terminator shooting resulted in no casualties.

Space Wolves:
The Scouts dove into the cover of a reinforced Gun Pit by the objective on the right.  Everyone else stood still.

Wolf shooting resulted in no casualties as they either closed their eyes or the Terminators armor saved them.

Game Turn 3:
Deathwatch:
The Captain and Cyclone missile launcher came out of the ruins towards the objective. The Terminators on the left moved normally forward.

The Librarian cast Smite and successfully killed a Long Fang (taking out the Pack Leader).

In the shooting phase, the Cyclone missiles snuck between the buildings and killed 1 scout with a Frag Missile. The 2 Assault Cannons targeted the Long Fangs, but failed to wound any in spite of 12 shots!

Space Wolves:
Once again, no movement on the Wolves side.

Finally, the Long Fangs Missile launchers found a chink in the Cyclone Terminator’s armour and killed him with a Krak Missile! First Blood for the Space Wolves! The Lascannon also hit the Deathwatch Captain and successfully inflicted 3 wounds!

Game Turn 4:
Deathwatch:
The Deathwatch Captain advance moved out-of-sight from the remaining Long Fangs.  The rest of the terminators milled around a bit for better angles of attack.

The Librarian once more cast Smite and killed 2 Long Fangs (Leaving me with just the Lascannon).

In the shooting phase, the Assault cannons managed to kill off all the scouts except 1 (the Heavy Bolter, naturally).

Space Wolves:
Finally, the Wolves strike!  Blood Claws deploy in the Enemy Deployment Zone behind the ruins that protect Graham’s Objective marker.  This was to force Graham to make a decision: have the Captain fall back and try to deal with the Blood Claws (Game could possibly end in turn 5) or continue to the Centre and try to claim that objective.  The Long Fang moved a bit for a better position to get LOS on the Librarian.  Finally, the Grey Hunters and Wolf Lord came around the corner of the building to confront the Terminators on the left.

In the Shooting phase, the Grey Hunters managed to wound the closest terminator with an Assault Cannon (the Librarian was too far away to “safely” charge).

In the charge phase, the Grey Hunters were not hit by the Assault Cannon so all made it into contact as well as the Wolf Lord.  The Wolf Lord’s ability to always strike first allowed him to dispatch the Terminator easily, in spite of the Terminator’s invulnerable save. The pack then consolidated behind a “obstacle” that provided a bit of cover from the remaining Assault Cannon. 

Turn 5:
Deathwatch:
Graham moved his Captain closer to the Objective while the Librarian moved towards the Grey Hunters. The last Terminator with Assault Cannon fell back towards the other Objective and away from the Grey Hunters (and the Wolf Lord).

The Librarian cast “Might of Heroes” onto himself for extra strength and attacks, but then failed to cast Smite.

The Librarian and Assault Cannon shot at the Grey Hunters, killing 3.

The Librarian then charged the remaining 2 Grey Hunters.  The Wolf Lord was allowed Heroic Intervention as he was within range of the Grey Hunters.  Normally the Wolf Lord’s saga would allow him to strike first, except if there is an equivalent ability (like Charging), then first swing is dependent on who’s turn it is. The Librarian decided to go after the Grey Hunters and killed 1 more for a total of 4 Grey Hunters killed.  The Lord and Grey Hunter failed to wound the Librarian.

The remaining Grey Hunter passed its morale test due to the Wolf Lord’s presence.

Space Wolves:
Blood claws move into the ruins and capture the Objective.

The Scout with the Heavy Bolter and the Long Fang failed to wound the Deathwatch Captain.

The Wolf Lord finally killed the Librarian, bringing the death toll for the Deathwatch up to 3 Terminators Dead.

Graham rolled and the game continued to Turn 6.

Game Turn 6:
Deathwatch:
The Captain moved forward, staying within the 3” range of the Objective, while the other terminator fell back a bit.

The Terminator on the left fired the Assault Cannon and killed the last Grey Hunter. The Captain fired the Stormbolter at the scout and a “Gauntlet Grenade Launcher” at the Long Fang.  Neither shot caused damage.

The Captain felt he was a little too far away from the Scout to charge this turn. The other terminator had no desire to charge the Wolf Lord, who was probably out of range anyway.

Space Wolves:
Having no shooting weapons and needing to vent some anger, the Wolf Lord moved towards the Terminator so that he could charge this turn. The Blood Claws were already holding an Objective so didn’t need to move. Nor did the Scout or Long Fang.

The Scout and the Lang Fang shot at the Deathwatch Captain, but the Terminator armour was too tough to penetrate.

The Wolf Lord declared a charge on the Terminator.  In a brilliant round of Overwatch, there were at least 5 hits! The Wolf Lord’s Invulnerable save let 2 wounds through.  The Wolf Lord’s charge JUST made it within the 1” range.  After a flurry of blows, the Terminator only took 1 wound, and inflicted none back on the Lord.

I rolled and the game went on into a final Turn 7!

Game Turn 7:
Deathwatch:
The Captain moved forward towards the Scout, staying within the required 3” to the Objective – just in case…

With no shooting this turn, The Captain declared a charge on the Scout.  The Scout failed to stop the Captain and the Captain’s Lightning Claw showed how ineffective Scout armour is to Power Weapons.  The Captain then consolidated back towards the Objective. The other side, no wounds to either the Terminator or the Wolf Lord.

Space Wolves:
The Lascannon targeted the Deathwatch captain – and missed.

On the other side, the Wolf Lord quickly dispatched the Terminator and consolidated within 3” of that objective.

End of Game:

Deathwatch:      2VPs (1 – mid-field Objective)

Space Wolves:  8VPs
2              Mid Field
4              Enemy Objective
1              First Blood
1              Linebreaker

Space Wolf Victory!

==================

So, while it appears as though the Wolves crushed the enemy, I need to point out a couple of points:
Out of 16 Space Wolf models that were on the table since Turn 2, only 2 Survived!  14 dead Space Wolves compared to 4 Deathwatch Terminators!

The Blood Claws were not touched and we originally thought each objective was worth 1 point. It wasn’t until I re-read the rules and realized my mistake.  Using our original “points”, the game would have been 4-1 and the decision to keep the Deathwatch Captain near an objective rather than trying to force the Blood Claws to flee when the game could end “That Turn”, I would have done the same thing.

The Librarian was a nasty surprise. I didn’t think anyone would bring one in a 500pt game. I’m going to have to re-consider for next game.

Graham’s advantage was taking all terminators and heavy weapons made for small army and not much time wasted moving figures. The disadvantage was by having 5 “units” of single models, killing any one was horrific and allowed me a quick and (relatively) easy “First Blood” VP. Also, with only 5 models, it was harder to cover the entire table or, worse, try to deal with a Squad that deployed in his deployment zone after most the game was over. I wonder what would have happened if I deployed both the Scouts and the Blood Claws in his deployment zone…

Anyway, good game and I look forward to the next battle!

Saturday, February 4, 2017

BatRep: Warhammer 40K: Tau vs Imperial Guard – 1500pts

So, Graham and I started to dip our toes into the wild world of 40K (after ignoring GW for years).  After a couple of smaller 1K games, so we thought it was time to escalate to a 1500 point game.
My Tau have been suffering against Graham’s Guards until I added a Riptide.  Then Graham insisted I keep the same force (plus 500pts) until he beats the Tau.  I tried, but he didn’t keep the same forces at all.

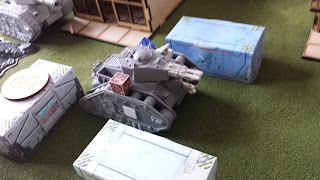
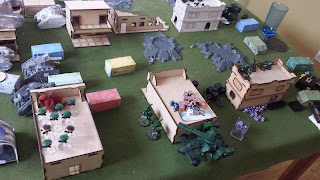
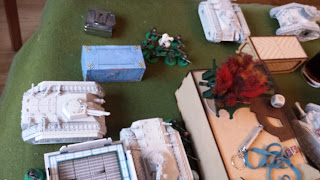
So, first we setup the table.  We ended up with, well, sort of “Main Street” with a bunch of cargo containers “strategically placed” to provide cover so armies could cross the street.  At least, that was my plan.

So, we rolled for missions and layout.  Mission was “Emperor’s Wrath” - 2 objectives within each deployment zone worth 3 Victory Points each at the end of the game.  When we rolled for Deployment Zones, we rolled “Hammer & Anvil” – deployment zones 12” from table center, playing LENGTH-Wise!  Right down the highway!  Neither of us were fond of this turn of events but I insisted: you have to learn how to play the game.  Right?

Also, I wanted to use Night-Fighting, so we rolled and confirmed – 1st turn was in the dark.  Everyone gets +1 to their Cover Saves for the 1st turn.  We rolled to see who deployed first, and it was me (Tau).

That’s when Graham played out the surprise.

Instead of the Imperial Guard Infantry Swarm I had been expecting, he brought an Armour Company!


Tau Forces:

Hunter Cadre (Core Detachment)
  • Commander with Shield, Plasma Rifle and Missile Pod
  • 2 X Crisis Suit with Twin-Linked Missile Pods and Plasma Rifle 
  • 1 X Riptide with 2 Shield-Drones, Smart Missiles and Ion Accelerator
  • 8 man (Alien?) Strike Teams with Shas’ui, Marker Light & all Bonded
  • 8 man Strike Teams with Shas’ui, Marker Light & all Bonded 
  • 8 man Strike Teams with Shas’ui, Marker Light & all Bonded 
  • 8 man Pathfinder Team with Shas’ui & all Bonded
  • 3 X Piranha with Burst Cannon & 1 Seeker Missile each
  • 1 Hammerhead Gunship with Smart Missiles, Submunition Rounds, Disruption Pods & Auto Repair
  • 1 Hammerhead Gunship with Smart Missiles, Submunition Rounds, Disruption Pods & Auto Repair


Drone Network (Auxiliary)
  • 1 Unit of 9 Drones

I was trying to setup a “Battle-Forge” Army per the 7th Edition rule.  I think this was a good 1st try!

Before you knock my Piranha having Burst Cannons instead of Fusion Guns, I was expecting an INFANTRY Company (and they were the only Piranha I had)!

For the Warlord Trait, I drew “Predator of the Skies”; for 1 turn the Commander and his unit would have the Skyfire special rule.  Not really any use in this game – I put the card to the side and forgot about it.


Imperial Army

Core Detachment:
  • 1 Leman Russ with Company Commander
  • 1st Platoon:
    - Exterminator w/ Side Sponsons w/Heavy Bolters + Hull Heavy Bolter
    - Demolishers w/ Side Sponsons w/Heavy Bolters + Hull Heavy Bolter
    - Executioner Side Sponsons w/Plasma Cannons + Hull Heavy Bolter
  • 2nd Platoon:
    - 3 X Vanquisher with Hull Heavy Bolter (no Side Sponsons)
Auxiliary Detachment:
  • Mechanized Platoon in 3 Chimeras
    - Commander Squad w/ Vox
    - 2 X Vet Squads
    - 1 Engineer (added to the Command Squad’s Chmera)


Deployment

Tau deployed first.  Playing length-wise with a wide road I felt things were kinda exposed.  Placed a Hammerhead on each side of the road, each behind a building.  Pathfinders setup on top of the building on the right, a squad of Firewarriors on the left.  A squad of Firewarriors setup between buildings on each side.  The Command Crisis Suit setup on the right, the Crisis suit team on the left.
That left the Piranha, Riptide 7 the Drones.  With the cover “lacking”, I decided to keep them back in reserves.  Better safe than sorry.

Guard setup the Tanks first.

Commander’s tank joined the 1st Platoon.  They setup the Executioner on the left of the buildings, taking aim at the Hammerhead on the left. The rest of the squad setup on the Road, between both roads of buildings.  This brought up the question about the cargo containers and maneuvering.  We decided that we would treat them as “Difficult Terrain” – roll a D6 to see how far a tank could push it around.

The Vanquisher Squadron deployed on the right side of the buildings, taking aim at the other Hammerhead.

This left the Guard with a similar problem of the Tau; where does he deploy the “Armoured Fist”?  In the end, Graham kept the Chimeras off able in the Reserves.


Game Play:

Graham tried to seize turn 1, but failed.  So, Tau took 1st turn.

Tau Turn 1:
During move phase, both Tau Firewarrior squads on the ground moved forward.  The Hammerhead on the left moved forward, hiding partially behind a building for increased cover as the Railgun drew line to the Executioner.  The Hammerhead on the right moved sideways, away from the Forewarriors and drew Line-of-Sight to the command Squad.  The Firewarriors on the building moved to the forward edge, as did the Pathfinders.  The Tau Commander jumped around uselessly in the back while Crisis Suits on the left moved forward with the Firewarriors, between the buildings.

Shooting Phase started with the Hammerhead on the left taking a shot at the Executioner.  To everyone’s surprise, the Executioner Exploded in spite of a 3+ save for Partial Cover and +1 for the cover of night!  First Blood for the Tau!

The Pathfinders took snapshots with their Markerlights at the rest of the 1st Tank Squad and still managed to hit them 3 times – despite needing 6’s!  The Second Hammerhead used the Markerlights to Cancel Cover saves and increase his Ballistic skill.  The shot is fired and hit, No save possible..Successfully Penetrated the armour..STUNNED!  (Oh well, at least I took off a hull point.)


At the end of the turn, the Firewarriors on the left-side roof were within 3”, so we rolled for the Mysterious Objective – Sabotage!  The Objective would explode at the end of the turn on a roll of 1.  Fortunately, it didn’t explode this turn.

Guard Turn 1:
The Guard didn’t panic in spite of their loss.  The Company Commander calmly gave the order “Gunners – Kill On Site”.  The Commander fired at the Firewarriors and killed 1, while the Demolisher fired at the Pathfinders, killing 1.  

The Vindicators moved forward, but were unable to draw line of sight to the Hammerheads, so they fired on the Firewarriors crawling through a ruin.  Unfortunately, the ruins provided too much cover and only a couple of the Firewarriors were killed.

The Command squad was within the 3” of their Objective and rolled “Nothing of Note”.  Still, it was 3 VPs if they could hold onto it.  At least their Objective wasn’t trying to kill them!

Tau Turn 2:
First, Night was over – no more +1 Bonus to cover!

I didn’t really want to roll for Reserves yet, but the rules don’t seem to give the option to skip it.  So I rolled – Both Piranhas and Drones arrived.  Not the Riptide.

Drones did a Deep Strike between two buildings on the Imperial side on the left.  That left the Piranha.  I didn’t relish the idea of Piranha in front of tanks, not to mention an Exterminator with its 4 shot Autocannon.  Looking at the board, there was really only 1 choice.  I dropped them via Deep Strike BEHIND the First Tank Squad!  I rolled for scatter and somehow, they didn’t!  Three Piranha in the rear-arcs of the 3 Leman Russ!  The Piranha even passed a Dangerous Terrain test as all 3 landed in Craters!


The Piranha immediately ejected their Drones, effectively giving me 2 squads behind the tanks.  The Pathfinders lit-up the 1st Tank Platoon and the Piranha launched their seekers!  Now, if I had my way, it would have been one seeker at each tank, but the rules didn’t allow for that as it was Vehicle Squadron vs Vehicle Squadron.  So, we started with the Seeker Missiles, then the Piranha’s Burst Guns and finally ended with the Drones all firing into the weaker armour of the Tanks!  When the smoke cleared, The Commander’s tank was destroyed (Warlord Kill – 1VP) and the Demolisher was down to a single hull point!

Meanwhile, the Firewarriors and Crisis Suits had continued to move forward on each side while the Hammerhead on the left moved forward and shot at the Exterminator while the other moved to the right-side of the buildings, keeping in cover and fired at one of the Vanquishers.  Both Hammerheads failed to damage their targets.

In the end of the phase – the Objective decided to explode and killed a Firewarrior that was closest.  Of course, the rules said the Objective wouldn’t go away and that there was still a chance it would keep exploding…

Guard Turn 2:
Imperial Infantry Platoon in their Chimeras arrived.  There wasn’t room to fit them on the table behind the Piranha and still maintain their 1” distance, so they were forced to deploy on the right, behind the Vanquishers.  The infantry all disembarked from their Chimeras.

The Demolisher from the First Tank Platoon turned around and fired on the Piranha, tanking one out while the blast marker from the Demolisher also took out two Drones that were a little too close to the Piranha.  Sadly, one of the Demolisher’s Plasma side sponsons overheated, the energy discharge taking away the last hull point and wrecking the tank!

The Chimeras damaged another Piranha, shaking up the crew.  The Exterminator and one of the Vanquishers used a special order of some sort that let them split fire from the rest of their squads and killed 1 Crisis Suit and wounded the other.  The other Vanquisers shot at a Hammerhead but failed to damage it.

Tau Turn 3:
Still no Riptide – it would be forced to appear next turn.
The Tau Hammerheads stayed pretty much where they were – keeping in cover while drawing Line-of-Sight to enemy tanks.  The Firewarriors on the groung on the Tau Left were trapped behind the Hammerhead while the remaining Crisis Suit and Drones moved forward under cover on the Tau Left.  The remaining (mobile) Piranha moved over a building but failed its Dangerous Terrain test and crashed through the roof, getting stuck!

Though the Piranha was immobilized, its Burst Cannon took out one of the Guardsmen from the Command Squad.  The drones from the Piranha slipped behind the Exterminator and removed another Hull Point with their combined fire.  The Hammerheads managed to hit and destroy another Vanquisher with a tremendous explosion that, sadly, did no damage to anything nearby.

Finally, the Sabotaged Objective that the Tau had claimed, did not explode.  (WHEW!)

Guard Turn 3:
Guard movement on the Tau Right Flank (The Left flank was a Tau-Only zone), slowly advancing towards the Tau Deployment Zone, while the Infantry Command squad moved out behind the destroyed Company Command Tank in an attempt to re-claim the objective.

One of the Vanquishers finally hit a Hammerhead, but only Stunned the crew!  Using the Split fire command again, one Chimeras fired on the Auxiliary Detachment’s Drones but only managed to destroy 1.  The other two Chimeras fired at and destroyed the remaining Piranha!


Tau Turn 4:
So, the Riptide finally dropped in to play!  It landed pretty much dead center on the table, in the middle of the street.  The Missile Shield drones deployed in between the Riptide and the Guard tanks.  The entire Drone squad popped out between the buildings – drawing Line of Sight to the Guard Infantry Command Squad.  The Drones from the Piranha stayed in the rear arc of the Exterminator.  The Crisis Suit jumped on top of a building so it could draw LoS to both the Command Squad and another Squad coming around the corner of a building.

Guns blazing, the Drones wiped out the Command Squad in one volley!  The Crisis Suit fired at the other squad, but did no damage.  The other Drones finally ground out the last hull point of the Exterminator, wrecking it.  The Hammerheads and Riptide fired at the remaining tanks, but failed to damage any.

Ending the Tau Turn, we rolled for the Sabotaged Objective, but once again, it did not explode.

Guard Turn 4:
The one infantry platoon moved into the crater near their objective and claimed it.
Looking at what remained on the table, the Guard commander realized the futility of continuing.  Up until then, they had only managed to destroy the Piranha squad, a couple of drones and Firewarriors and 1 Crisis Suit.  He conceded the Match.


Tau Victory!

 ===========================================

Once more, the Tau have succeeded and continue to spread the word of the “Greater Good”!


Looking at my force, there really wasn’t anything out of the ordinary in it.  It was a fairly “typical” Tau list.  The only difference between my old 6th edition lists and 7th was the addition of a Riptide which, frankly, I didn’t have back then and am not sure if they were even around back then!

Regardless of the complaints I hear about the Riptide in a Tau force, the simple fact is that in this game - it did NOTHING!  It didn't show up until Turn 4 and when it did show up, it (and the missile drones) did no damage.

My Hammerheads finally proved to be useful against other tanks.  This is the first time in this edition a Hammerhead did more than Infantry with Submunitions!  I'm glad I took them!  (Come to think of it, I can't remember my Hammerheads taking out ANY tanks before!  TGhis game, they took out 2 on their own!)

The Heroes of the match have to be the Piranha Squadron.  Through their self-sacrifice and bravery, they completely disrupted the one tank platoon, appearing in the rear and blasting away with the Seeker Missiles.While the Piranha were all destroyed, the Drones they dropped off survived the game and were a major distraction and threat.

 ===========================================

On the Guard side, well, what can we say?

I was surprised that Graham brought a Tank Company (which made me very nervous), the Terrain was definitely against him.  This was a very crowded battlefield with buildings and cargo containers everywhere.  The armour really had no where to maneuver as it should.

Graham and I discussed what happened quite a bit after the game.  Probably what hurt the Guard the most (besides the terrain layout) was the choice of deployment.  Both of us think he really should have deployed the armoured fist/infantry platoon instead and held back one tank platoon as Reserves (or deploy everything).  I don't know the rules regarding the way it deploys, but if he could have deployed a rifle squad of the Armoured Platoon on each side of the "road", the Guard could have made it much harder for the Tau to advance up the left side, not to mention preventing the Piranha from deploying behind his tank squadron.  I would probably been forced to deploy the Piranha in front of the Tanks and simply watched them "evaporate" under all that heavy fire...

The only other weakness I could think of (and it's a preference, not based on fact), I think I wouldn't have put all the Vanquishers in one squad.  The Vanquisher-Only squad was so specialised, it couldn't really deal with the Firewarriors sneaking through the Ruins. A regular Leman Russ with a normal Battle cannon and Heavy Bolter(s) would have been devastating against the Firewarriors, protecting the Vanquishers from Infantry.  Also, a Vanquisher with the other squad could have helped protect the other squad from a Hammerhead.

On the other hand, The 1st Tank Platoon really didn't get the opportunity to really show how good it was against an Infantry assault.  If that squad hadn't been "pruned" before the Riptide showed up, I think they probably could have destroyed it VERY quickly.  Maybe too much shooty in the wrong spot?