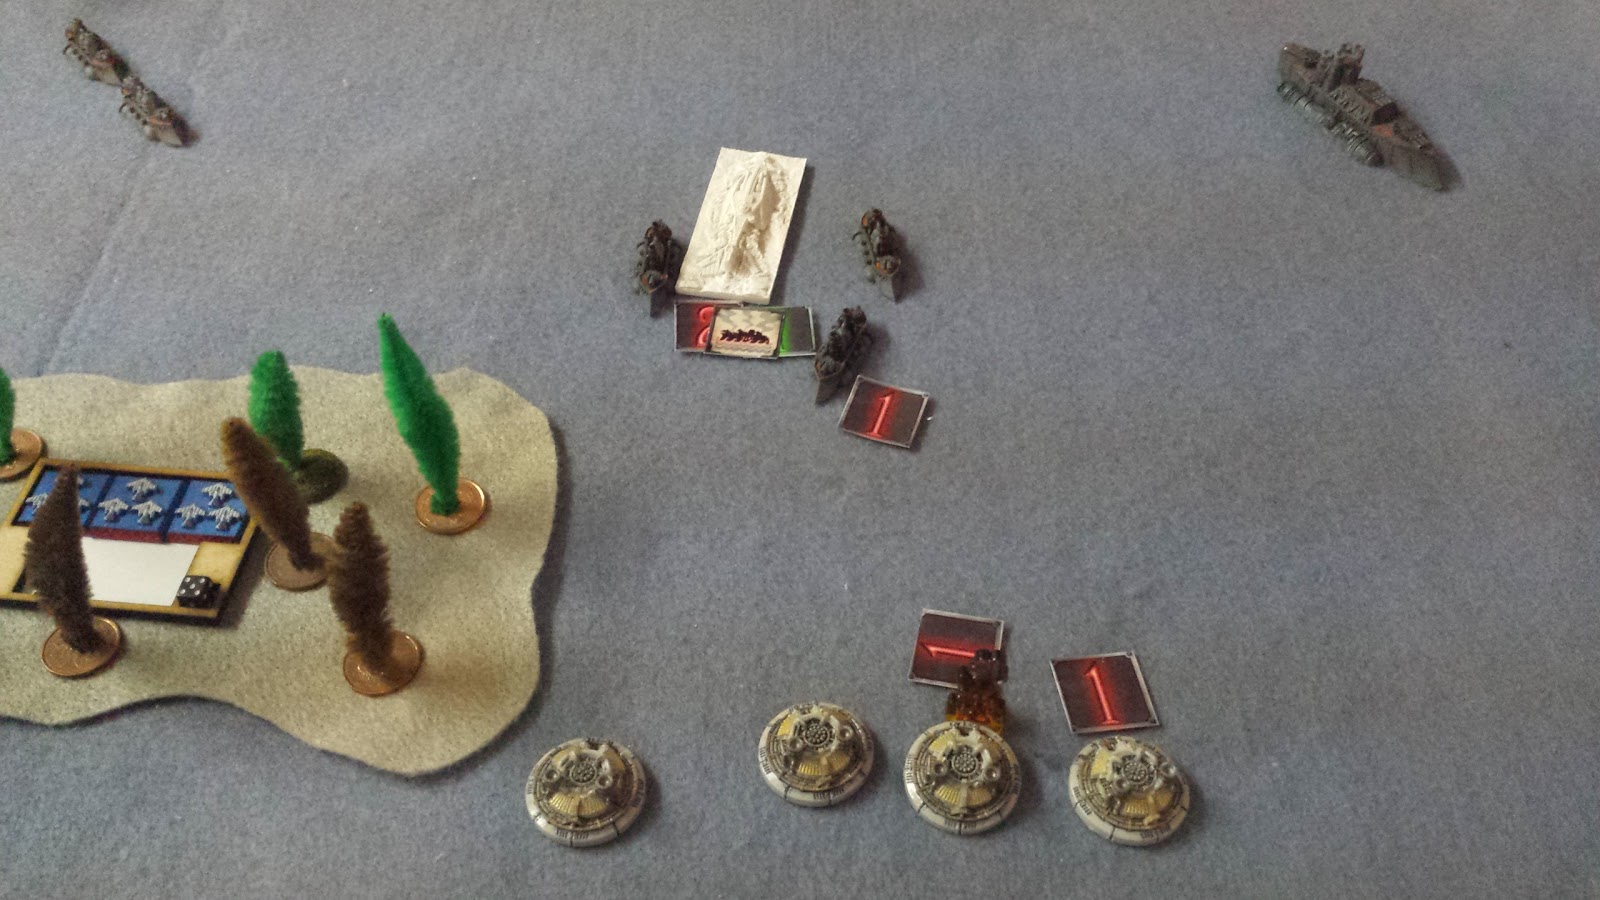
Thursday, January 21, 2016

BatRep & Review: Flames of War - 1500pts, Mid War - Canadian vs Germans!

First, sorry for the delays (again).  There was a death in the family just before Christmas.  I’ve been in no mood to do these reports for a while as a result.
=======================================================
Checking over the blog, I realize I never did a Flames of War report, so we’ll start off with a quick overview:

Flames of War is an “I-Go; You Go” system that originally was a derivative of Warhammer 40k in its beginnings, but has since evolved to its own ruleset.  The battles are company-based (200 – 200 soldiers or 10 – 20 tanks) rather than squad based and infantry stands represent a team of 4-5 soldiers, vehicles are still individual vehicles.  The models are in 15mm scale.  The advantage of this scale of battle and models is that you can play larger Infantry and Tank companies on a standard 4’ X 6’ table.  It is also more easily scaled up to Battalion Level (500 – 1000 soldiers or 30 – 50 tanks) battles.  Battle Front makes most models that you will need, but many other 3rd party manufacturers make WWII Models in this scale.

The game has split World War II (WWII) into 3 “Eras”: Early War (Pre 1942ish), Mid War (~1942 – 1943) and Late War (1944 and onwards).  Lists are split into the various Theaters of Operations: Africa/Italy, Western Front and Eastern Front.  Battlefront – the makers of the game, have announced Pacific Theatre rules and lists are coming but not available at the time of this report.  While battles can be fought with armies that are normally on different Theaters of Operation (or even allies – Russians vs British anyone?), they shouldn’t be played across different Eras as the points values and availability of (superior) equipment and arms changes drastically.

Battlefront has released new versions of the ruleset as well:  World War 1, Vietnam, Arab – Israelis wars and “Team Yankee” – the hypothetical WWIII between NATO and the USSR.  I’ve only played WWII and will not attempt to make note of the differences between the different versions.  ‘Cause I don’t know what they are!  (Good reason, EH?)
=======================================================
So, on to the battle report!

I brought out an Infantry Company from the Canadians from 1st Infantry in Italy:
  • Headquarters with the Company Commander, the Second In Command and an extra PIAT team
  • 3 Combat Platoons each consisting of 3 Rifle Squads (6 stands), a Morar team, a PIAT team and the Command Team
  • 2 Armoured Platoons with 3 Sherman Tanks each (1 platoon with AA Guns, the other without)
  • 1 Heavy Mortar Platoon with 2 Sections (4 Tubes), a Command Team and an Observer Team; with Trucks
  • Limited Air Support with Hurricane IIC

I chose an Infantry Company as a way of increasing the number of units I would have on the table.  I was required to take 2 Platoons, but chose the 3rd as 2 platoons is usually not enough if you want to attack.  To Support an attack, I wanted a Unit of tanks for covering fire and weakening the opposition.  Heavy Mortars were a good Artillery support and have the option for smoke screens, for fairly cheap. 

Now that I had my Essentials, I had to round off my force. I chose a 2nd Tank Platoon as insurance to help with an attack.  Now I was in a quandary.  I wanted another Artillery Support, but didn’t have the points or models to add more.  If it was a larger battle, I could have had a battery of 25lb artillery.  So, wracking my brain, I remembered I could take Air Support to attack ground targets.  Air Support is quite random and unpredictable, but it was better than the alternatives that I could think about. It would also provide Anti-Aircraft capability if the Germans brought Air Support as well.

My opponent brought out a German Grenadierkompanie which consisted of (from memory):
  • Company Command including Company Commanders, Second in command and a Mortar Section of 2 mortars.
  • 3 Combat Platoons of 3 Grenadier Squads (6 teams) and a Command team, each.
  • 1 Grenadier Machine Gun Platoon of 2 sections (2 teams each), split up and attached to two of the Grenadier Squads
  • 1 Grenadier Mortar Squad of 2 Sections (4 tubes), a Command Squad and an Observer
  • 1 Grenadier Anti-Tank Platoon with 3 PaK38 guns and a Command team
  • 1 Tiger Tank 
  • 1 Grenadier Scout Platoon with 2 squads (4 stands) and a Command Team


After setting up the table, we needed to determine who the Attacker was and who was the Defender.  Standard Missions always have an Attacker and Defender which (usually) define who goes first, deploys first and any special rules associated with either side.  

Unlike most games, Flames of War doesn’t just randomly roll to determine this.  There is a “Pecking Order” as some Companies are more suitable for attack, while others are defensive in nature.  Order of preference of “Attacker” are:
  • Tank Companies
  • Mechanized Companies
  • Infantry Companies
  • Fortified Companies (Always Defends)

There are some army lists that by their very nature are “Always Attack” or Always Defend” as defined in the unit’s special rules.

In the event that 2 armies of the same type are forced to fight each other, then a roll-off determines who attacks.

Germans won the roll of Attacker – Canadians Defend

Flames of war has 12 standard missions, so we followed the instructions to roll for a mission and ended up with “Encounter”: two small forces encounter each other and the call goes out for re-enforcements from both sides.  Both sides have 12” deployment zones and 2 objectives are placed within 8 inches of the long board edges but more than 8” from the short edges.  Both teams must hold back ½ their units (rounded up) off the table and they are delayed.  Rolls for re-enforcements don’t begin until turn 3. 

That could be a very long time to wait for help…

Players then start deploying their troops, alternating teams until all remaining troops are deployed.
  • Canadians deployed 2 Combat Platoons and the Mortar Platoon.
  • Germans deployed 2 Grenadier Platoons, the HQ Mortar Platoon and the Anti-Tank platoon.


Start of Game

Turn 1:
Germans:
All platoons spent the turn trying to “Dig In” (make Foxholes).  Only the Mortar team behind the hill succeeded.

Canadians:
All the Canadian units attempted to Dig In, but failed the required skill test to do so.

Hurricanes arrived and bombed the units on the Eastern hill protecting one of the Objectives, but only succeeded in killing one team.  The unit became pinned as a result.

Turn 2:
Germans:
The Infantry squad on the hill failed their Moral Test and remained pinned for the turn.

The AT teams in the wood successfully dug in inside the woods near the German Centre. 

German Mortars bombarded and killed 2 teams in the Canadian Centre, 2nd Platoon, pinning the Canadians.

Canadians:
The Centre Squad failed to unpin.

First Squadron moved to the left, behind a hill and out of sight.  None of the Canadian shooting this turn did any damage.

Turn 3:
Germans:
Germans rolled and succeeded in getting an infantry platoon to arrive this turn.  Unfortunately, all Reserves are randomly deployed and the new platoon arrived on the far West Corner, far from the action.  In the movement phase, the new Reserves did a double-march, allowing them to march twice as far, but leaving the teams more exposed to fire.

The unit on top the Eastern hill finally unpinned.  PaK38s in the woods managed to shoot and kill 2 teams from the 1st Platoon who didn’t quite make it out of range or sight around the hill.  Mortars once more hit 2nd Platoon, but failed to kill any.

Canadians:
Canadians rolled for Reserves and successfully brought on an Armoured Platoon of 3 Shermans in the Centre. Worse for the Germans, another flight of Hurricanes arrived and caught the Reserves in the open ground with no cover!  2nd Platoon managed to unpin

1st Platoon moved further around the hill.  The Shermans took position and fired on the Infantry Platoon on the Eastern hill, killing 1 team.  The rest of the teams failed to hit except the Hurricanes.  The Hurricanes strafed the doble-marching re-enforcements and killing 9 teams!  The survivors failed their Moral test and fled the field!  Canadians were holding their own!

Turn 4:
Germans:
Germans failed to get any Re-enforcements this turn.

The Squad on the Eastern Hill FINALLY dug in and positioned themselves (more) safely in their foxholes.

After another turn of firing, only the Mortars managed to hit (the luckless 2nd Canadian Platoon, again), but though failed to kill any teams, managed to pin them once more.

Canadians:
So once again, 2nd Platoon stayed pinned…

No Air Support this turn, either..

The 2nd Armoured Platoon arrived on the Eastern Corner and drove forward, following the 1st (infantry) platoon around the east side of the hill (away from the PaK38s) while the other Armoured Platoon moved to the East, behind a hill. 

The Mortar team changed tactics and successfully laid smoke that covered one PaK 38 Team and most of the Infantry Platoon on the Eastern hill, limiting their range of view.

Laying A Smoke Screen


Turn 5:
Germans:
Uh Oh.

The last Grenadier Infantry Platoon arrived on the Eastern Corner and moved towards the woods.  Worse, the German Tiger tank arrived this turn in the German Centre. 

For those not familiar with the Tiger, it was probably the second most feared tank in the Second World War.  (The Most Feared would probably be the King Tiger.)  A Sherman’s 75mm gun would have to hit a Tiger in the rear or flank from very close AND be very lucky to knock it out.  A Tiger’s 88mm gun would kill a Sherman from outside the Sherman’s 75mm range…

(Stories are told that a Sherman could beat a Tiger by driving in rings around the Tiger as the Sherman could drive faster than the Tiger’s turret would rotate.  Of course, it usually cost 5 Shermans to get 1 Sherman close enough to do that!)

To make me worry more, the Tiger drove towards the East, obviously trying to intercept my Shermans, presently out-of-sight, thanks to the smoke screen.

German shooting was lack lustre – no casualties, but the Canadian 2nd Platoon was pinned (still).

Canadians:
The last (3rd) Infantry Platoon arrived in the center.  Two Hurricanes arrived and tried to bomb out the Tiger tank.  2nd Platoon (again) failed to unpin.

Mortars laid Smoke once again.  Then we all stood back and waited for the Hurricanes’ bombs to land…

So, the bombs landed on the Tiger, casing “5 points” of damage.  A Tiger has 2 points of Armour and rolls a D6 to add to its armour to try to cancel the 5 points of damage.  All Graham needed to do was roll 4+.  A 3 would “tie”, which could result in a “bail-out” (the crew evacuates the tank).  A 1 or 2 would mean the Bombs would have to roll a “Firepower test” which if passed, would destroy the tank.  A fail would also cause the crew to bail out.

Graham rolled a 2!

I passed the Firepower Test and the Tiger was destroyed!
(I ALMOST PASSED OUT HOLDING MY BREATH ON THIS ONE!)

Death of a Tiger!


Turn 6:
Germans:
The last German (RECCE) platoon arrived in the German Centre.

The Platoon in the Eastern woods moved farther forward, while German Mortar fire all failed to hit their targets. Smoke hampered the rest of the German shooting.

Canadians:
The 2nd Platoon FINALLY unpinned. 

The Mortars failed to spot and drop smoke this turn.  One Sherman Troop moved on top of the hill and fired at the infantry team guarding one of the objectives, somehow killed to teams.  Surprisingly, the Germans had had enough and broke! 


That made 2 platoons out of 8 that had fled the battle!  Instead of going for an objective, the Canadians’ new battle plan was to try and make 2 more platoons break and run.  This would force a Company Morale Check and (if I was REALLY lucky) the Germans could fail and abandon the battlefield to me – an Auto Win!

Turn 7:
Germans:
The Germans, realizing my new plan, started to hide and dig in where they could.  While the Command Mortar Team missed their target, the other Mortar team hit 2nd Platoon (AGAIN), and killed 2 stands, this time taking out the last stand that was in range!  Fortunately for me, the squad was still over 50% so I didn’t need a Morale Test.

Canadians:
All squads that were pinned successfully unpinned.  (I think it’s the first time since the fist platoon was pinned in turn 2?)

All Canadian shooting missed this turn.  2 Hurricanes bombed the Mortars on the west side, but only succeeded in pinning them.

Turn 8:  (Last Turn)
Germans:
The Mortar team succeeded in getting unpinned.  Anyone that wasn’t dug in before succeeded this turn.  The Mortar teams both failed to hit targets.  They then waited for the Canadians to do their worse.

Canadians:
Being a Jerk and knowing it was last turn, the one platoon of Shermans behind 1st Platoon moved to the Hedge row to get off some shots off this turn.

When the smoke cleared from the tank shells, Mortar bombardment and the Hurricane bomb drops; 1 PaK 38 was destroyed.  Not enough to cause a morale test for the squad, let alone the entire company!

A Draw!
Or Was It?

End of Game

=======================================================

After getting home and writing this Battle Report, I discovered something we missed during the game.  According to Flames of War, there are no draws!

Usually a battle goes on until one side or the other achieves its Objectives or forces their enemy to retreat off the table.  The exception is a timed game (either based on actual time or number of turns).  If NEITHER side achieves their Objective, then you work out how many Victory Points each team earned.  These VPs are based on the number of losses the Winner or Enemy suffered during the game.

In this case,
Germans suffered 2 lost platoons, so Canadians got 3 VP.
Canadians suffered no lost platoons, so Germans got 1 VP.

Canadians Won the Battle!

(What would have happened if both sides had same amount of casualties, I don’t know!)
=======================================================

First of all, I know I didn’t go into too much detail.  There’s good reasons.

1 – It was only the second game in ___ Years.
2 – As such, we made a lot of errors
      (I’m too embarrassed to say how badly, but at least we played our errors consistently!)
3 – I took VERY poor notes!

Evaluating the battle itself:

The Canadians were LUCKY!  The Hero of the battle has to be the Air Support and the Hurricane Pilots that did a wonderful job!  If the planes hadn’t taken out the Tiger, I dread to think what would have happened to the Canadians!  Brrrrrrr.

However, that brings up a weakness in these types of missions.  When you have Infantry vs Infantry battles (and 2 cautious players), they can quickly become highly Defensive battles; neither side willing to move until they think they have the advantage to move.  If this hadn’t been a “Timed” game (8 turns), we could easily have had the battle go on another 8 turns OR MORE!  Though with 2 undamaged tank squads, Canadians definitely had an advantage.

A Motor Company or Armoured Company, being more “attack-oriented”, will tend to result in battles with more movement (and definite action) than this battle.

So, because I’m a chicken, no real Infantry fighting happened in this battle – it just became a long-range duel until we ran out of time.  Canadians could (and should) have been far more aggressive once the Tiger was knocked out.

=======================================================
So, what are my impressions of Flames of War?

Overall, a decent rule set.  It allows for larger scale battles than a Squad-based game, though the models are smaller and less detailed at 15mm compared to 25-29mm scaled models.  There are some weaknesses to the rules that can create some interesting situations.

First, this is more of an “Era-Specific” issue.  Tanks are VERY expensive (points-wise) in this era.  For Example, 1 squadron of 3 Sherman Tanks for the Canadians is 350 points.  Two Infantry Platoons are only 155 points.  (And Canadians are cheaper than British…) 1500 points would be on the “lower-Standard” Battle size.  To take a Tank Company would give you your minimum tanks and not much else.  Late war, tanks are “cheaper” in general, but you have to worry more about the escalation factor.  It’s no fun facing off a company of Shermans against a company of Panthers, Tigers or worse, King Tigers.  (A valid list is 3 King Tigers and an option or two in late war.)

One “pet peeve” of mine about the rules; you have to target an enemy team when you want to do a smoke screen.  I would much rather be able to target a spot on the table for laying smoke so that it conceals the area I want hidden, rather than concealing the enemy!  If an Enemy shoots from the concealment of the woods and it makes it that much harder to spot the teams in the woods to zero the mortars in, why wouldn’t you drop smoke in front of the woods…

While there are a number of mission options and rules for just about every conceivable weapon system and situation, there can be a case of the “I’m gonna Lose!” if you draw the wrong forces against someone else’s list or mission. 

Case and Point: Graham’s Germans had no ability to deal with the Hurricanes in the British Air Support.  There are units that are AA and MOST tanks can buy an AA machine gun (I did for 1 unit of Shermans), but in this one battle, Graham had NO AA at all.  I hadn’t taken the AA to be an “Overwhelming Force”, but in this case, Graham’s list was caught flat-footed with no defense.
On the other hand, if I had taken my typical Anti-Tank squad with 6lb cannons, I would have a rule that says I can’t shoot them at Infantry (No HE (shells)) and they would have been useless against a Tiger.  There can be a lot of “Rock – Paper – Scissors” in Flames of War, as a result.

In my defense for taking Air Support, historically, Canadians would have called down for Air Support to deal with German Armour.  So in theory, it was historically accurate.

One HUGE advantage to Flames of War is the Army lists.  There is a very active testing and review group and if someone can work out something historically accurate that isn’t too far over the top, you can probably find it.  If they uncover a flaw in a Table of Organization, they will address it.  Eventually.

Also, when you buy a book for a Theatre of operations and era, it includes armies for both sides.  The “Intelligence Handbook” for North Africa, contains multiple lists for each the Germans, the Italians, the British and the Americans. This allows you to see the potential enemy lists in the same volume as your own lists.  This is a much cheaper alternative to buying each and every army book (like other game systems I could name…).  If you are not interested in a particular theatre, there’s no reason to buy the book.  On the other hand, armies in the same era should be “playable” against each other, no matter what theatre of operations.

Overall, Flames of War is a good choice for those wanting to experiment with WWII battles.  They’re well known and should be easy enough to find someone else almost anywhere that has played or is willing to play.

Hope you enjoyed the battle and the review.  Good Luck and keep your dice hot!


Overall, Flames of War is a Decent Game.  There are flaws, but so do most games.  

Sunday, November 15, 2015

Dystopian Wars: Kingdom of Britannia vs Russian Coalition (1000pts)

Admiral Dimitry Orlov was relaxing in his cabin on the Russian Borodino-Class Battleship, Georgy Pobedonosets II ("St George the Victorious II").  It was good to be home once again, back at sea.

Once more, Orlov was being sent to the Britannian Embassy to partake in some war games.  He dreaded these games as there was no glory in defeating an allie in a wargame, but penalties for failure were real (what with the Russian Political Police).

++++++++++++++++++++++
So, after many moons, I finally got a chance to play a game.  (Don't you hate "Real Life" getting in the way?)

Deployment:
Britannia, north edge, west to east:

  • Hood Battle Cruiser
  • Ruler Battleship with Guardian Generator
  • 4 Attacker Frigates
  • 2 X 5 SAS Fighters
  • 4 Attacker Frigates
  • Hood Battle Cruiser
  • Ruler Battleship with Guardian Generator
  • Eagle War Rotor

Russia, south edge, west to east:

  • 3 X Saransk Skyships
  • 4 X Novorod Frigates
  • 5 SAS Fighters
  • Borodino Battleship with Torpedo / Rocket Jammer (Commodore)
  • 3 X Savoy Cruisers
  • 5 SAS Fighters
  • 4 X Novorod Frigates
  • 2 Chany Strike Submarines

The Start of Game

After deploying terrain and fleets, we drew our random mission cards.  Neither side liked the mission they drew, so we both announced we were doing the default 70% of the enemy fleet mission.  Blah!

Turn 1:
No Cards played during the TAC phase. 

Russians won initiative for Turn 1.  (DANG!)

Russians started things off by moving a squadron of fighters forward, over the island on their side.  The Britannian War Rotor turned to starboard, stayed in the clouds and moved towards the table centre.  Russians wasted an activation by moving the other fighter squadron forward, moving beside the other squadron over an island.  By this point, my opponent realized I was killing activations and started moving his fighters to prevent me from getting a decent shot at something valuable…

Having nothing else that I could “waste”, I moved the two Russian Strike subs forward (submerged).  A squadron of Britannian Frigates moved forward and fired on the subs, but were unable to damage the submerged Russian ships.  The squadron of Frigates on the east side moved behind the island, out of sight of the Britannian forces (with much harsh language from the Britannians, I might add.  Do you sing the Queen’s Anthem with that mouth?). 

Britannian Fighters moved to join the previously moved fighter squadron over the island in their deployment zone.  Russian Frigates in the west moved to Port (mostly to get out of the Battleship’s way and to avoid getting rammed).  The western Britannian Hood moved forward, turned to port and damaged one of the Skyships with long-ranged turret fire.  To stall for time, the Russian Cruisers moved forward their minimum move.  The Britannian Frigates on the west side moved around the corner of an island but found their weapons were all out-of-range.   

Running out of things to move, the Russian Command Ship moved out, trusting in the Tzar, God and Ablative Armour to keep her safe.  Though she was able to get the Lord Hood into gun range, the Range Band 3 Salvo failed to damage the (lucky) Battle Cruiser.  The western Britannian Battleship charged forward like a hound released from its leash and fired on the Russian Battleship.  Surprisingly, the Jammers stopped ALL torpedoes from hitting the Russian ship while Ablative Armour once more prevented damage to the great ship!

For the last activation of the Russians, the Skyships stayed hidden in the clouds, moved forward and fired on the Lord Hood.  Once more, the there was no damage caused to the Britannian Battle Cruiser.  Commander has a horse shoe hidden somewhere on that boat!

With the Russian Activations complete, the Britannians were able to activate their remaining fleet without worrying about Russian Retaliation.  The other Lord Hood moved out and fired on the damaged Skyship, but failed to damage it.  Finally, the last Britannian Battleship played “Stoke the Engines” and moved straight forward to get into range on the Russian Fleet.  Sadly, they were unable to damage anything this time. 

Ironically, the only Victory Points this turn were for the Russians as a result of them allowing the TAC to be played on the Britannian Battleship!

End of Turn 1


Victory Points:
KOB:      0
RC:         40

Turn 2:
In the TAC Phase, the Britannians played “Radio Intercept” (rolled +1 for their Intiative roll) while the Russians played “Espionage” and discarded the Britannian’s “Battlefield Repair” TAC!  20VP each!

Britannia won the initiative – by 1!

Britannia started things off with a bang!  A squadron of fighters “jumped” a squadron of their Russian contemporaries, and successfully shot down 2 token!  For a loss of 5!  The entire Britannian squadron was wiped out!

The Russian Battleship failed its Sturginium Boost roll (does it ever pass it?) and moved forward at maximum speed towards the Hood Battle Cruiser, and crit the Britannian warship (Generators offline), though the Battleships secondary guns failed to cause any damage.

The western Hood moved forward at maximum speed and finally managed to damage the Russian Battleship, though her AA guns failed to damage the Skyships.   The Russian Subs surfaced and attacked the eastern Hood, but failed to damage the Britannian ship.  The Russians then played “Break Neck Maneuver”, but the Britannians cancelled it with “Brace For Impact”, giving up 20 more points to the Russian Cause. 

Of course, the Russian Subs failed their Maneuver test and were caught on the surface by the Britannian Frigates who formed up a perfect Cross-fire for their torpedoes at Point-Blank-Range, before realizing they were too close for torpedoes!  Oops!  It didn’t matter, the turrets made quick work of one (sank with a double-crit) while the other was damaged.  Ther ferocity of the attack shocked the surviving Sub Commander and the sub failed its Disorder test!  First Blood to Britannia!

Frigates Sink a Sub!

The Russian Cruisers failed their Sturginum Boost roll, but managed to move forward far enough to get the damaged Hood into Turret range.  When the smoke cleared, the Hood was gone!  Russia’s First Blood!
Lord Hood Sinks

The remaining Hood Battle Cruiser prepared for a Hit-And-Run attack; turned to port and crit the damaged Skyship (Weapons damaged), then continued forward, hopefully out of arc of any retaliation.

The eastern Russian Frigate squadron popped out from behind the island and sank 1 frigate, damaged another but failed to damage the Hood with their mortars.

Britannian Frigates Are Attacked!

The eastern Britannian Battleship turned to starboard and opened fired on the Russian fleet.  Two Frigates were damaged but the sub was undamaged!

The remaining full-strength Russian Squadron attacked the remaining Britannian Fighter Squadron and shot down 4 tokens for a loss of 4 tokens which left both squadrons with a single token each!
On the west side of the battle zone, the Britannian Frigates moved forward and managed to damage another Skyship.

The Skyships  moved forward, dropped mines in front of the Britannian Battleship and made a turn to starboard, then spotted one of the Frigate Squadrons (only 1 spotted token, sadly).  The Skyships’ guns failed to do any damage.

The Britannian Battleship got its revenge by turning to starboard, avoided the mines and destroyed one damaged Skyship, crit a Cruiser (Guns Damaged) but failed to damage another Cruiser.  The Skyships failed their Disorder Test!

Skyship Destroyed!

The Western Frigate Squadron sort of hid behind the main fleet line, but using the Spotter token, managed to sink one frigate with Indirect fire (the first time ever I can think of that the Russians successfully used Indirect fire)!

Russian Indirect Fire Sinks a Frigate

The Britannian War Rotor turned to starboard and attacked the surfaced sub, but once more, the sub escaped damage.

In the End Phase, the Britannians had nothing to repair or roll for.  The Russians successfully repaired the Cruiser’s guns and then we started to roll to recover from the failed Disordered tests.  The Skyships lost 2 AP on the damaged Skyship, but the Russian Sub was down to 1AP & 1HP after their roll!  The Sub was almost lost!

Victory Points:
RC:         280
KOB:      150

Turn 3:
In the TAC phase, the Russians played “Radio Intercept” (got +3) and gave the Britannians another 20 easy points.

(For the Russians, this was the “all or nothing” turn – I NEEDED 1st turn for my plans to work.)

Russians won Initiative.  (YAY!)

While it looks like the Russians are doing well, the opposite it true.  In order to win, I would need to sink, prize or Derelict 2 of the 3 Battleships and War Rotor.  So far, I wasn't making ant headway there... 

The Commodore took first activation and did something I always forget to do; I declared the Commodore’s Order!  “Sturginium Overload” – All ships with Sturginium boost automatically pass their test; all without get +1” movement anyway!

As the Commodore was on the Battleship – away we went at Full Speed!  At RB2, the Battleship got a Crit on the western Britannian Battleship (Engines Damaged) ( JUST missed a double-Crit) and sank a Frigate.  WHAT?!?!?!  IS THAT ALL????

Russian Battleship Disappoints!

The Britannian Frigates on the east moved forward, sank a damaged Frigate and successfully boarded the surfaced sub!  Realizing that keeping the sub as a prize would leave his ships (and the sub) vulnerable to more boarding this early in the turn, the boarding parties all returned to their ships and left the Sub a Derelict!

Sub Derelict, Frigate Sunk

The Russian Cruisers moved out and played “Devastating Barrage”, which was cancelled with Espionage (more points for the Russians) and while the Turrets failed to damage the Battleship, the broadsides successfully sank another Frigate.

Cruisers sink a Frigate

The western Britannian Battleship moved forward at ½ speed (thanks to Engine damage) and failed to damage a Skyship, but did manage to crit one of the Russian Cruisers (Shredded Defences).  The remaining Skyships stayed in the clouds, moved forward and dropped a linked mine just in front of the other Britannian Battleship, then managed to damage the Britannian War Rotor!

The War Rotor made a 180 degree turn and moved forward.  Gunnery failed to damage 1 Skyship, but the War Rotor managed to Baord and Derelict the other Skyship for a loss of 4 AP.  The remaining Skyship failed its Disorder test!

Skyship Boarded & Derelicted

Frigates on the east moved towards the last Hood and successfully damaged the Britannian Battle Cruiser.  The Hood got its revenge by ramming and sinking 1 Frigate, then shot and sank another Frigate!

Lord Hood Rammed and sank a Frigate..
..Then Sank a Frigate!


The other Russian Frigates moved quickly towards the hood, but failed to damage it, though the mortars did sink another Britannian Frigate.

The eastern Britannian Battleship was forced to run over the linked mine – there simply wasn’t enough room to maneuver away in time.  Sadly, the linked mine wasn’t powerful enough to damage the great warship.  The Battleship then damaged the last Skyship, a Frigate and removed the Ablative Armour off a Cruiser!

For their last moves of the activation, the Russian Fighters “buzzed” towards the War Rotor (with no real hope of damaging the beast).  The remaining Britannian Frigates sank another Russian Frigate.

Another Russian Frigate Sunk

In the End Phase, the Britannians repaired the Battleship’s Engines and the frigates lost 1 AP to the Disorder Test.  The Russian Cruiser repaired its defences but the Skyship lost 3 AP!

The Derelict Sub and Skyship both crashed and/or sank to the bottom of the deep blue sea…

Victory Points:
KoB:       420
RC:         410

At this point I capitulated to the Britannian Commander, but we rolled to see who would get next turn anyway to see what would happen.  The Britannians won the init, moved their Battleship forward and blasted the Russian Battleship at Point-Blank-Range, which caused 3 Crits!  Two from Turreted attacks and 1 from Broadsides! (Raging Fires, Chaos and Disarray, Shredded Defences). 


At this point, there was no doubt that the Britannians would win the battle.  It would just be a matter of time.

++++++++++++++++++++++

Nasty Battle.  I knew the Russians were in trouble as soon as I saw Graham's list.  3 Massive/Large choices are always difficult to deal with and with only 1 Large choice on my side, I was overwhelmed.

I need to re-evaluate the use of Battle Cruisers.  I've not used them because I consider them sort of a "Glass Cannon"; unable to take significant damage.  However, Graham's use has shown how they can be used effectively.  I still think a single Battle Cruiser is too weak, but multiples makes your opponent split his fire (not to mention an extra activation is always nice).

Anyway, hard fought battle and Graham earned the victory.  Congrats!

Monday, June 29, 2015

BatRep & Product Review: Relic Knights: Basic Boxes – Black Diamond vs Star Nebula Corsairs

So a friend sold me one of his factions he got from Kickstarter, so I figured I should get off my butt and try it!

Product Review:


Relic Knights is a Miniature Skirmish Battle in an Anime Universe.  Figures are the ever-popular 28mm-ish scale with multiple races/disciplines in this futuristic Sci-Fi environment.

Basic Fluff:

The galaxies are disappearing and finally, there is only 1 left.  Can you help stop the “Darkspace Calamity” from claiming the last Galaxy or will you encourage the destruction.  Only time will tell…

If you are a fan of Anime, you’ll recognize the basic outlines of the various Factions very quickly.  They’re VERY stereotypical.

  • Doctrine: the Wizards and Magic folks, trying to control “Esper” rather than “Winds of Magic”
  • Cerci Speed Circuit: Think “Speed Racer” and all those other futuristic race cartoons.  Happy go lucky racers fighting against each other and the syndicate as they try to entertain their audiences and earn credits to keep on racing.  Saving the Universe just happens to be part of the fun…
  • Shattered Sword: All those virtuous Knightly Orders and Paladins trying to protect the innocent and save the day.
  • Black Diamond: Your Mercenary Guns for Hire with some being honorable, and some, well, we’re not sure.  Sometimes you gotta take a dirty job to put rounds in the mags, ya know?
  • Noh Empire: The REALLY ugly alien monsters that want to destroy or take over everything.  The 2nd biggest threat to the Universe after the Deadspace Calamity.
  • Star Nebule Pirates: Of course there’s those loveable rouges that rob from the rich and keep for themselves.  One of the Pirates is ‘Captain Harker” – need I say more?


Rumor has it, a new version will be released soon, with more options for the original Factions as well as possibly more Factions!

Models:

Models are plastic / resin that I never really investigated further.  Wash the figures before painting and you should be good.  I’ve only used Zap-A-Gap and it works fine.

Model Detail is decent.  I’m not a master modeler or painter, but there was enough detail for me to paint interesting figures and not so much as to overwhelm me.  They look like 3D Anime figures – which is what they’re supposed to be! 

Overall, I like the models.  They’re easy to file / shave / customize.  Painting is normal and up to the painter’s imagination.  These figures pass the 2’ rule; if painted well, they look great from across the table – 4 out of 5 stars.

Warning: There is a lot of controversy about the figures released by Relic Knights.  Some people will consider some of the figures “Mature”, bordering on Adult.  The controversy is North American perception that Cartoons should be “Family Friendly”.  Japanese Animation, on the other hand, has NEVER been restricted just to Children’s fare as it has in North America.  Adult themes in Anime is common and some series / movies are specifically written for adults.  As a result, certain factions use a lot of “Fan Service” poses: Skimpy and tight costumes, poses that may/may not show panties, figures that appear naked or almost so.  Add some of the paint jobs being displayed by some of the more imaginative adult painters out there and Voila!  Extreme Over-reaction.

If you are not offended by Games Workshop’s Slannish or other companies’ “interesting” figures, then you shouldn’t have an issue with Relic Knights.  If you are bothered, review the site’s figures carefully before purchasing. Don’t let younger kids play with your figs so there aren’t any “interesting” questions asked, either!

Game Play:

This is the most unique play style I’ve played so far.

First, there are no dice to this game.  Everything is done using “Esper” Cards.  There are 6 “Colours” of Esper.  Each colour represents a different aspect of esper: Law, Creation, Corruption, Entropy, Chaos, and Essence.  Each Aspect has certain properties and can be used to do different things by those with the ability to manipulate it.  The most powerful manipulators become Knights.

The Esper deck contains 42 cards that are shuffled and dealt or flipped to get your random results.  Most cards have 2 circles of different colours, one larger than the other.  The Larger circle is worth 2 Esper points of that colour, the smaller only 1 Esper point of its colour.  There are also “Wild Cards” that are worth 1 Esper of any type and “Void” cards that aren’t worth anything.  Also note – each Esper type is strongly affiliated with a Faction.  At the beginning of the game, a player has a hand of 5 Esper Cards to start using their abilities.

Players form Cadres, consisting of at least 1 Knight (larger games can support more) and their Cypher (think Spirit Guide with extra abilities), Minions and Uniques.  These Cadres draw random missions and attempt to carry them out.  Whomever earns the Minimum required points to finish a game first, wins.  Wiping out the enemy Cadre is an automatic victory as well.

The other unique aspect is that this is not a Turn-based game!  Unlike You-Go-I-Go, Relic Knights uses alternate Activations.  Players activate a unit, then the other player activates a unit.  Unlike Spartan games, instead of going through all your units once before repeating, you can “Stage” your units in almost any order you want.  With limitations.  Players place their units on a “Dashboard” with a Ready Queue.  Dependent on the number of points in the game, your queue grows in size.  As you finish activating a card, you throw it into an Idle Section and advance all the cards in your queue forward one space, then select a unit card to go from the Idle Section to the Ready queue.  (Very simplified and not quite correct – there’s an “Active” slot you move to, but it’s basically all the same.)

For example, a Start Box game (~35 Points) has a queue of 2.  A 50 Point game has a Ready Queue of 3 slots.  Large Battles (100 Points) have Ready Queues of 5 Slots.

This means you need to plan in advance what unit(s) you want to play when and try to have the required Esper cards ready for them by the time they activate!  It’s not always that easy!

Units all have 2 cards: 1 “Tracker” card that is used to track damage and place within the Idle or Ready Queue & 1 Reference card that shows the various capabilities of the units and how much Esper (and what types) are required to perform them.

++++++++++++++++++++++++++++++++++++++++++++++++

Battle Report:

Best way to explain the game is to play the game!

Wer decided to play basic box sets, no extras.  So Mike brought his Black Diamond Boxset while I brought my Star Nebula Corsairs.

Black Diamond Force:
  • Questing Knight Leopold Magnus
  • Cypher Static
  • M8-Blitz Auto-Tank
  • 5 X Diamond Corps (Basic Line Troopers)


Black Knight’s Missions:
  • Secure Perimeter (Primary Mission – 5VP)Team must place Secure Tokens on their Primary Objective and on both enemy Secondary Objectives.  Tokens must be on all 3 at the same time.
  • Defense of Life (Secondary Mission – 3VP)
    Opponent picks a unit and that unit must deposit a token on the farthest board edge from the unit’s starting position.
  •  

Star Nebula Corsairs Force:
  • Questing Knight Captain Harker
  • Cypher Caeser
  • Broadside (Portable Cannon thingee!)
  • 5 X Corsairs (Basic Line Troopers)


Corsair’s Missions:
  • Secure Perimeter (Primary Mission – 5VP)
    Must destroy either 1 Enemy Primary Objective or 2 enemy Secondary Objectives.
  • Anarchy (Secondary Mission – 3VP)
    Place Sabotage Tokens on 5 different objectives, enemy or friendly.


We placed our Objectives, then our units, alternating placement between the players.
So, after drawing some random cards, Diamond’s got first Activation.

Initial Startup
Orange - Corsairs' Tokens
Purple - Diamond's Tokens

I put the 5 Corsairs in my first Ready Queue and Harker in the second.  The Broadside & Cypher in the Idle pile.

First Activation, the Diamond Corps moved towards the Corsairs, picked 1 Corsair model as a target (All models within 6” of the target and LOS were fair game) and fired on them using PR-12 Rifle Burst, playing 2 points of Purple (corruption) Esper.  The Corps then drew an Extra 2 cards (using the first value of the shooting icon) and “pressed” Piercing on the shot – reducing armour by 1.  With only 3 models able to see the Target, the Corsairs suffered 5 points damage (3 Points + 1 point for each extra shooter) and reducing armour to None from 1.  The Corsairs drew 2 Esper cards from their own deck (2nd number of the Shooting Icon) but didn’t have enough of the correct Esper to do anything in defence.  Corsairs are worth 3 hit points each so I lost 1 Corsair and another took 2 wounds.  After applying damage, the Diamond Corps did their Follow-up move.  The Diamonds then moved their Corps to the Idle pile and both players did their “house-keeping” (Both players needed to “return” to 5 Esper Cards in hand, the “Active” player dumping any they don’t want and the Non-Active only dropping extra or filling their hand – no dumping of unwanted cards.  Active player advances all their Ready Section 1 slot and grabs a card from “Idle” to put in the last slot.)

Diamond's Corps Gun Down Corsairs

The Corsairs were not pleased and vented on the Diamond Corps. The Corsairs moved forward, 3 in contact with one model and declared No Quarter - a melee attack using 2 Orange (Chaos) Esper.  I then drew 2 extra cards and was able to “Press” with 3 Red (Entrophy) Esper to increase the damage to 7.  With 3 models in contact, I got a bonus 2 damage for a total of 9 Damage!  The Corps drew 2 cards and were able to power-up Force Screen increasing their armour to 2.  This dropped my damage back down to 7, but it was enough to kill 2 Corps members and damage a 3rd!  I then made my follow-up move towards the survivors.  During clean-up I dumped some cards I didn’t want and brought my hand back to 5, Moved Harker to 1st Ready Queue and added Broadside to the 2nd while the Corsairs went into the idle pile.

Corsairs Charge Into The Corps!

And that’s how play basically works…

Diamond’s Cypher, Static cast Electroshock over by Harker.  It did no damage as it was an Area of Effect, but when Harker Activated, he would trigger the AOE effect and lose any Buffs he had as well as suffer Damage 4.

Harker activated (and got Zapped – took 4 damage) and Gained a Held Esper as he could draw Line-Of-Sight to his Cypher.    Held Esper can be used as 2 Esper points of any colour you chose, when you want it.  Harker then ran towards a friendly Objective and placed a Sabotage Marker on it, then hid behind a container during his follow-up move.

Harker Sabotages an Objective and Hides!

The Diamond’s Tank activated, moved forward, shot at and damaged the Broadside (5 Damage) then scooted behind a canister for cover.

The Broadside moved behind a container of his own and shot back at the Tank, but due to my screwy rules reading, I misunderstood how cover worked and ended up reducing my damage output BADLY!  I only managed to put 1 damage point on the tank!

(READ THE RULES!!!)

The Diamond Corps took another shot at the Corsairs, and killed 2 more Corsairs.

Corps Shoot More Corsairs!

The Corsairs shot right back and killed 2 more Corps Members.

Corsairs Return the Favour!

Magnus activated and Gained a Held Esper as he could draw Line-Of-Sight to his Cypher.  Magnus then moved towards Hawker and once he could draw LOS, he used Esper Overload to cause Hawker extra damage as the Pirate had Held Esper – causing another 8 Damage points, leaving Harker VERY hurt (I think I had 1 or 2 Damage Points left)!

Harker Activated but couldn’t see his Cypher this time, so no extra Esper for him.  Harker moved out and shot the last Corps member using I’ll Take That – then pressed Reave & Lifeleech which allowed Harker to recover 3 Damage Points (that felt better) and gained an Extra Held Esper for killing the model.

Harker Kills The Last Corpsman
&
Gains Some Healing!

The Diamond’s Tank came out from cover and blasted the Broadside (it had only 1 damage point left – I hadn’t even bothered to pull it from the Idle pile as I knew it wouldn’t last long enough to do anything).  The tank then took cover behind another cargo container.

Broadside Goes Down In Flames

The Corsairs moved out and placed another Sabotage token on an Enemy Secondary Objective.

Magnus moved towards the Corsairs and target them with Electric Blast – killing one Corsair and pushing the other 4” away.

Magnus Kills a Corsair

The Cypher Caesar activates and stole a Held Esper from Magnus, then flew out of sight!

The Tank continues driving towards the opposite table edge, and finally completed its move to the Opposite Board Edge, dropped their Life Token and claimed the Secondary Objective complete (3 VPs).

Harker moved out to get a Clear Line Of Sight and in desperation fires Command Shot, then presses it to increase the damage to 9 points.  The Tank’s armour reduced the damage down to 6 – not enough damage to stop the tank!  The Attack used up the last of Harker’s Held Esper.

Magnus then used Esper Overload on Harker again.  Fortunately, by dumping his Held Esper previously, Harker saved his own life – though he was down to 1 damage point!

The Last Corsair took a shot at Magnus with Lead Tooth, and damaged the Diamond Knight.

Corsair Bravely Shoots Magnus!

<I lost track of an activation here – my tablet’s power died and I changed over to my cell’s note app.  Sorry!>

Harker Activated and charged Magnus with Relentless, pressed the attack for 7 damage and overrun 6”.  (Overrun pushes the target away, then the attacker follows the same distance – maintaining contact.)  The attack wasn’t powerful enough – it only did 5 damage Points due to Armour and left Magnus Alive!

Magnus wasted no time.  Cast Esper Overload on Harker and kills the hapless Corsair Knight.  With his master down, Caesar flies away and left a single, solitaire Corsair on the battlefield.

Magnus Takes Down Harker

I conceded the game at this point.

End Of Game!

Black Diamond Victory!
++++++++++++++++++++++++++++++++++++++++++++++++

So, First Game, very different, lots of Fun!

I Like the Esper deck mechanic.  I’ve simplified things greatly here, but you should get the general idea how things work.  The models are nice.  The rules seem complete.  The basic rules are simple, but there are a bunch of Minor rules or “Abilities” to try to learn and remember.  The good news is that they’re all together in the back of the rule book – you don’t have to go digging through multiple sections for them.  It sounds complicated at first, but once you start getting into it, the activations go quickly.

The Basic Boxes all include 1 Knight, a Cypher, a unit of multiple Minions and a single Minion (plus the Tracking and Reference cards for each).  More importantly, you get the Esper Deck (with reference cards for Scenarios, various special rules and Esper Manipulation, damage card for the Objectives and a Token Tracker) and a bag of tokens – giving everything you need for a game – EXCEPT TERRAIN!

Speaking of which, Relic Knights is a very terrain intensive game.  If you’re familiar with Infinity (and why aren’t you?), then you’re looking at that scale or DENSER!  They recommend 2-3 pieces of terrain per Square foot!  Half of it tall enough to block larger models (Humans are Size 2 – they recommend blocking LOS for Size 3).

Most of the box sets seem ok – I can see why you want to buy more units quickly.  The Knights are usually ok, but some of the other units are “Meh” to Poor.  For example, the Broadside for the Corsairs has a poor reputation, but everyone seems to like the versatility of the Corsair unit and recommend multiple units.

No matter what Faction you chose, I would recommend everyone get the basic box set.  Play a game or two, then start filling out your army.

Bonus Marks Soda Pop Miniatures for additional support.  They’ve released a Cadre Builder and Digital Dashboard for use on both Android and Apple Tablets & Phones.  The cost is quite reasonable and you can purchase the Digital Rulebook as well for extra.  I don’t know if they will extend this to Windows, but we can hope so.


Screen Shots of Digital App On Android!

Anyway, I like the game and I'm going to recommend it.  I’m looking forward to my next game!

Hope you enjoyed this write-up!