Admiral Von Shtupp paced the bridge of his new flagship, the
Blucher Class Dreadnought SMS Knesebeck. A new ship, she hadn’t the opportunity to
finish her sea trials when word came from the Fleet Headquarters: an English
Battleship was seen drifting out of control in the area with only a couple of
escorts tending her. Capture the
battleship and return it to Prussian Port for scientific evaluation.
“Admiral! There’s a
task force in our way”
“What? Who is it?”
“It appears to be an Italian Carrier force.”
“Radio Room! Find out
what they’re doing here!”
“Admiral, the Italians claim they are here under contract to
protect a foreign Investor’s property.
They recommend we turn back as they complete their mission.”
“Did they mention who their clients were?”
“No Sir”
It didn’t matter. Von
Shtupp’s orders were clear. He wasn’t
going to let the Italians get in his way.
Besides – they would be sure to move out of the way rather than engage
the pride of the Prussian fleet.
Wouldn’t they?
I know, I know.
Italians are supposed to be allied with the Prussians, but Thurston
wanted to face another “new” fleet” with his new Italians. Also, he wanted to try out the Italian
Carrier which he hadn’t used until now.
So out came the Prussians – most off my paint prep box and
strips…
The Italian fleet consisted of:
An Affondatore Fleet Carrier (and a squadron of 6 Uggisore
Assault Boats) with 2 Scutum Escort Frigates
3 Gladius Cruisers (with another squadron of 6 Uggisore
Assault Boats)
1 Squadron of 3 and 1 Squadron of Scutum Escort Frigates
1 Squadron of 4 Scutum Escort Frigates
1 Squadron of Cinquedea Destroyers
1 Squadron of 2 Fortuna Bombers
I figured I wanted to experiment with the Prussians as
well. The Prussian Fleet consisted of:
A Blucher Dreadnought with 2 Shield Generators
A Rhine Fleet Carrier
A Squadron of 2 Hussar Gunships
3 Squadrons of 3 Arminius Frigates
A Squadron of 2 Pflicht Scout Airships
A Squadron of 3 Jaeger Small Airships
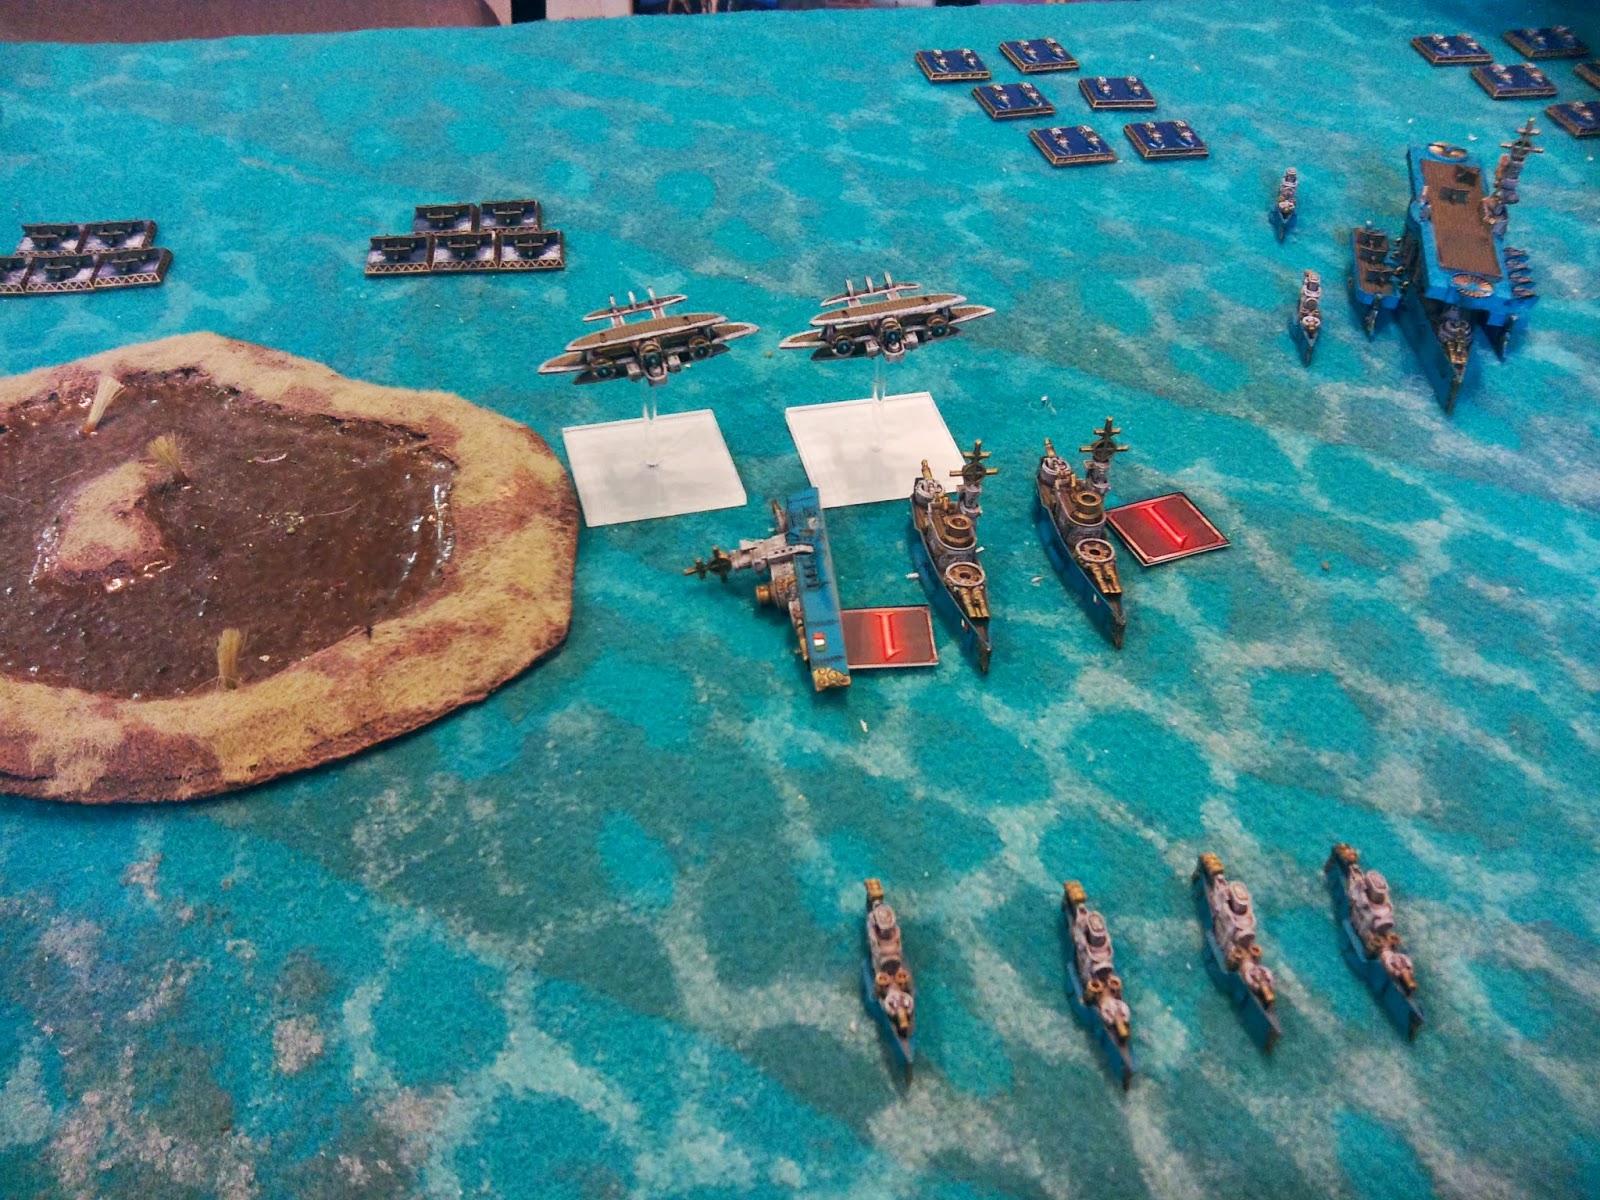
Table was 6’ X 4’, divided into 2' X 2' sections. There was an islands in the center and a reef
in the right side of the Prussian side, and the Italians had an island in each
corner and another reef in their center section. We set up Energy Portals (a first for us), 1 in my left section, 1 dead center and 1 in the far right section.
Italian Deployment (Top to Bottom):

Italian Deployment
- 3 Frigate Squadron
- Torpedo Bombers
- Torpedo Bombers with the Bombers behind
- 4 Frigate Squadron with Cruisers behind, Assault Boats to the left of the Cruisers
- Carrier with 2 Escorts, Assault Boats to the left
- Squad of Destroyers in front of the Assault Boats
Prussian Deployment (Left to Right):

Prussian Deployment
- 3 Frigates
- Scout Airships (Obscured) with the Dreadnaught between
- Squadron of Fighters
- Gunships behind the island – pointed to the right side
- Squadron of fighters with the Carrier behind – a recon flight and a 3rd fighter squadron deployed beside the Carrier
- 3 Jaeger Airships (Obscured)
- 3 Frigates
- 3 Frigates
The Italians rolled capture or destroy 50% of the enemy
fleet value + all Smalls as their Mission objective and decided to go for it.
The Prussians rolled “Capture the Commodore’s Ship” (the
Carrier) – I elected to return to the 70% captured or destroyed fleet value.

Turn 1 about to start!
Turn 1:
No Turn cards played.
Prussians won the Initiative.
Killing an Activation, the PE Recon plane moved forward Max
Speed to get pretty much all of the Italians within spotting range. Italian Bombers moved around the reef to
prevent it from interfering with their torpedoes, and unleashed a salvo at the
Prussian Frigates in the center, sinking 2!
The survivor passed its Break Test.
Prussian Scoutships stayed at Obscured level and moved forward; holding
their fire. The Italian Carrier moved
forward – keeping his planes on the deck.
Prussian Jaegers moved forward at maximum speed, also staying Obscured as
they knew they would not have any targets.
Italian Frigates from the center activated and moved to shoot the
Jaegers, but failed to hit them.

Lucky Jaegers
Prussian Fighters moved forward at ½ speed, ending their
move over the central island. Italian
Cruisers advanced and fired at the Jaegers, successfully critting 1, destroying
it. The remaining Jaegers passed their
Break Test. Angry at the Italians, the
Prussian Gunships advanced using Tesla Generators to boost their speed, and
fired all their guns into a single Cruiser.
In a flash of light and thunder, the Italian Cruiser disappeared in a Magazine
Explosion! The force of the blast
damaged the other two Cruisers in the squadron!
The Italians passed their Break Test in spite of the impressive show of
force!
Cruiser go BOOM!
Italian Destroyers raced forward, guns blazing and torpedoes
swimming. One of the Prussian Gunships
suffered a crit (Raging Fire) but the Concussion Charges stopped the torpedoes
from causing further damage.
Prussian Gunships Under Fire
The
Prussian Dreadnaught, moved forward and fired indirectly from behind the center
island and successfully did a Crit (Engine Failure) on one of the damaged
Cruisers. Italian Assault Boats moved
forward, followed by Prussian Fighters advancing ½ speed near the center. (Why are they called “Assault Boats”? They have no AP!) The 2nd Squadron of Assault Boats
moved behind the 1st squadron.
The Prussian Carrier moved forward and fired its Bombards at one of the
Cruisers, damaging it, leaving both Italian Cruisers Crippled! Italian Torpedo Bombers moved at Max speed
towards the Prussian Carrier. Prussian
Frigates on the right charged forward but only damaged a single Italian
Destroyer.

Shots Traded!
Italian Frigates on the left moved across the center of the
table, and damaged another Jaeger.
Prussian Frigates on the left moved to intercept but only managed to
damage 1 frigate.

Prussian Frigates Firing
Italian Fighters moved forward ½ speed. The lone surviving Prussian Frigate in the center
turned around and drove towards the rear of the Prussian Carrier, looking for
protection. Finally, the Prussian
Carrier’s fighters moved towards the Assault Boats at ½ speed.

End of Turn 1!
In the End Phase, both the Prussians and the Italians
managed to repair all Critical Effects and put out all fires.
Losses:
LoIS: 180
PE: 100
LoIS: 180
PE: 100
Turn 2:
Italians played “Pass The Tools” and repaired all the damage
on 1 Cruiser!
Prussians played “Misinformation”, but the Italians countered it.
Italians won the initiative
Prussians played “Misinformation”, but the Italians countered it.
Italians won the initiative
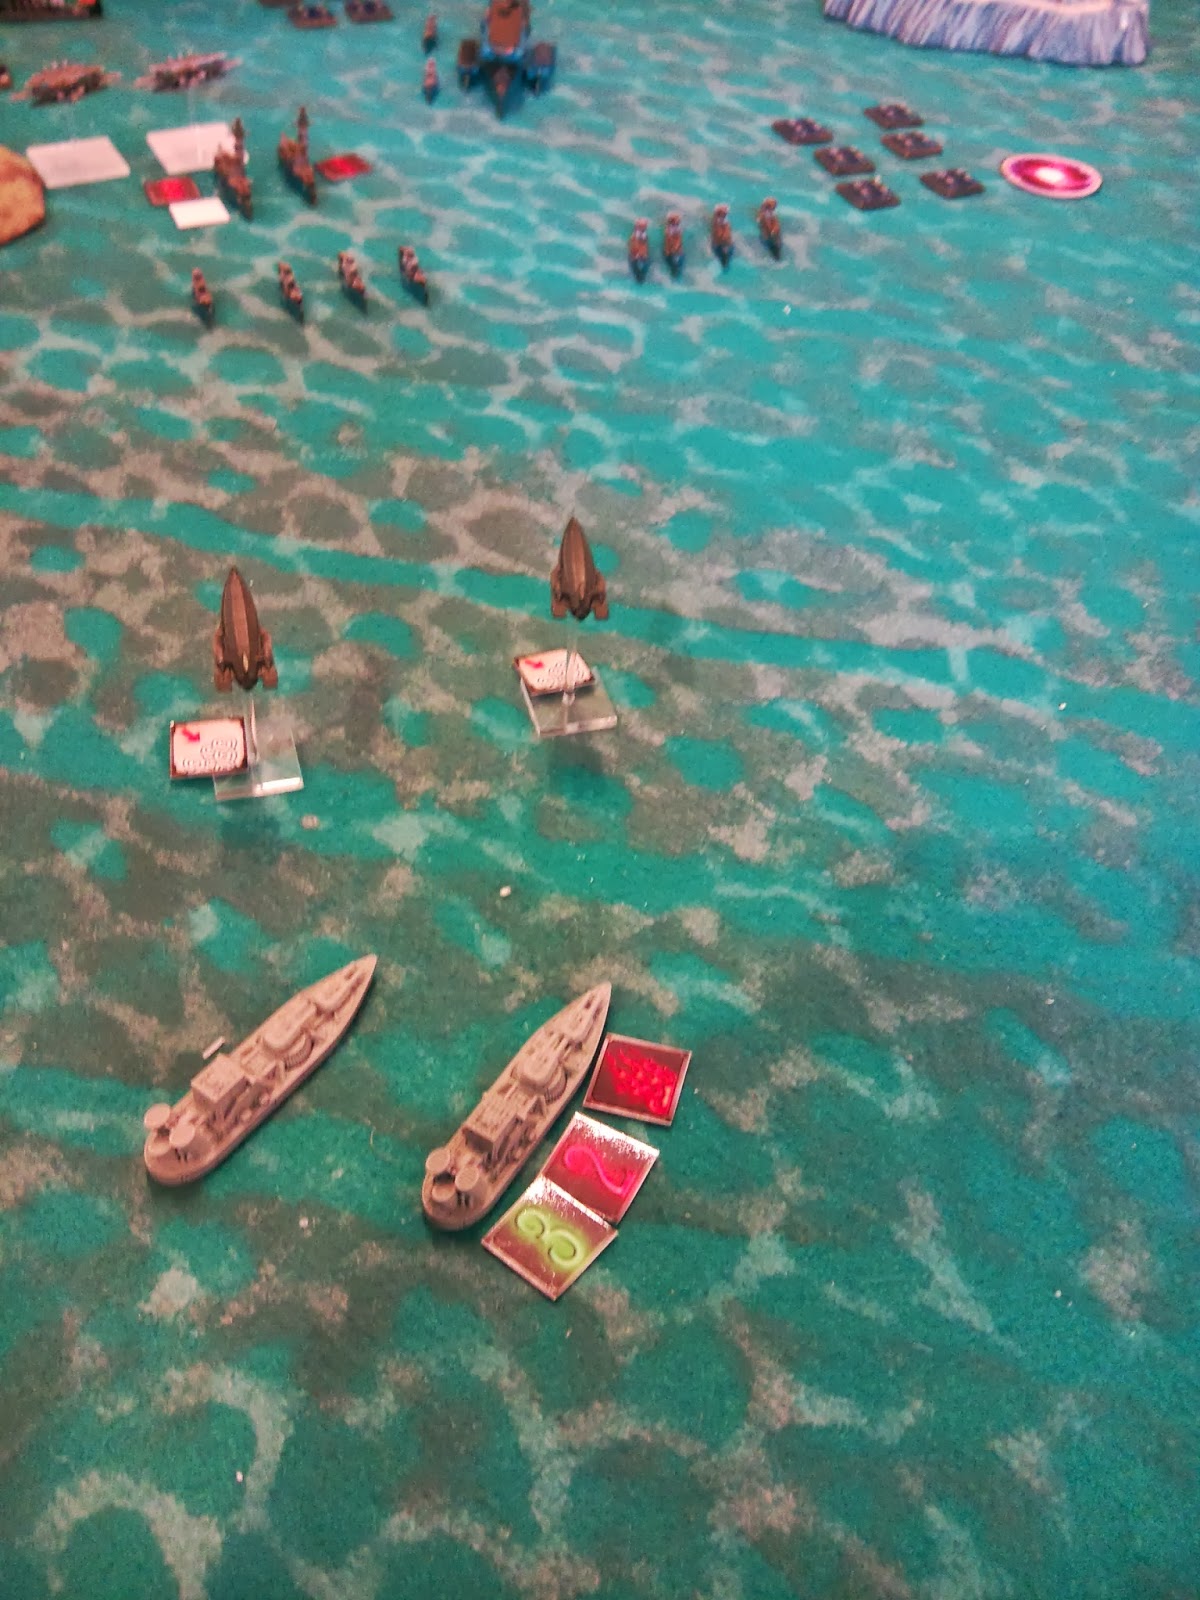
Italian Destroyers moved forward at full speed, weapons
firing in all directions. As a result, the
damaged Gunship was critted (Fusion Leak), the undamaged Gunship was critted
(Engine Damage) and both damaged Jaegers were shot down! OUCH!!!

Italian Destroyers Earning Their Name!
Prussian Frigates on the right moved forward minimally, sank
1 Destroyer and successfully boarded a second, taking it as a Prize!

Capturing a Destroyer
Italian Torpedo Bombers attacked the Prussian Carrier. The Bombers lost a token to AA fire but caused
an HP damage that was reduced to No Damage by the Prussians playing “Hard As
Nails”. The Prussian Gunships, angry at
the Destroyers, moved forward and brought their turrets to bear. One destroyer was sunk, the other damaged.

Gunships' Revenge
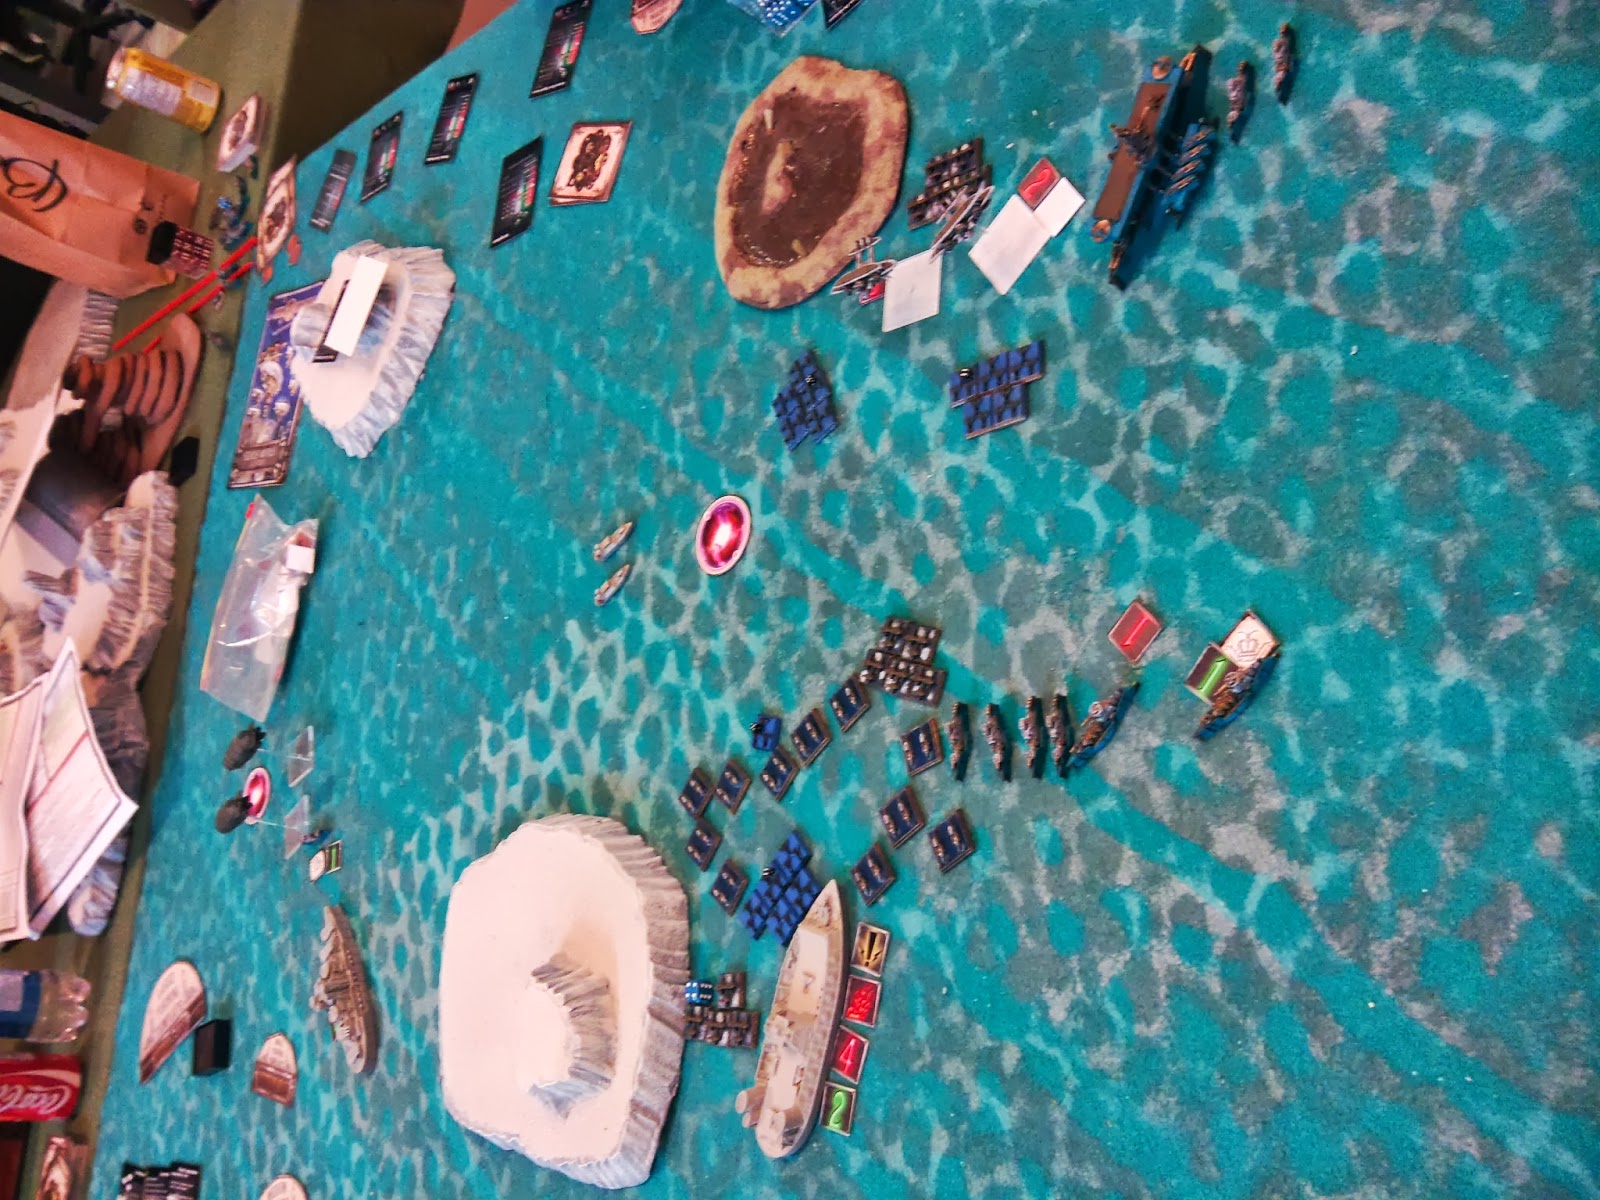
The Italians, being the devious, sneaky, scheming player
that Thurston is (he writes Role Playing Campaigns as a sideline), moved their Frigates
into contact with the Center Portal.
Passing the random test, they popped out again out of the Left Portal
and sank a Frigate! Grrrr! At least the Frigates passed their Break
Test.

Going in . . .

And getting the drop on the Prussians!
The Prussian Carrier moved forward slowly, and fired its Bombard
at the Italian Cruisers, causing a double crit on 1, sinking it. The surviving Cruiser failed its Break Test! The Italians got their revenge quickly; their
Assault Boats raced through the Portal on the right, popped out the center
Portal, and launched a torpedo attack on the Carrier, causing a crit (Hard
Pounding) but the Fuel Reserves caught fire, bringing the defences down to just
2 AP to defend the Carrier! This is a
BAD sign…

Prussian Carrier in TROUBLE!
The Prussian Dreadnought weighed in again. Moving forward, the Great Ship pointed its
bow directly at one of the enemy frigates, but fired its turrets indirectly at
the enemy Cruiser, successfully sinking it.
Firing the Prow Tesla, the Dreadnaught sank the Frigate in front and
successfully boarded a second Frigate!

Dreadnought In Close Quarters!
Italian Frigates moved up the center, critted one Gunship (a
2nd Engine Failure – no extra effort to repair) and critted the
other Gunship – sinking it. The survivor
passed its Break Test.

Prussian Gunships in Trouble!
Prussian Fighters attacked and sank 1 token of Assault
Boats. The Italian Carrier launched a
Torpedo Squadron, moved forward and, with its Escorts, sank 2 Prussian Frigates,
then damaged the 3rd on the right!
The last Frigate passed its Break Test as well.

Prussian Frigates Attacked by the Italian Carrier!
(We realized later in the game that the Carrier was not
allowed to fire its guns after launching a squadron of Tiny Fliers, but by the
time we realized this, it was 2-4 activations later and I didn’t want to try yo
redo all those activations again!
Sometimes it’s better for game flow to just shrug your shoulders, learn
the lesson and carry on rather than disrupt the game flow!)
Prussian Frigates on the left attempted to shoot down the
bombers from RB2, but failed to damage any.
The Italian Bombers then successfully sank the last Prussian Frigate on
the right. The Prussian Scout Airships
successfully sank the last Italian Frigate on the left (probably should have
captured it – hind sight being 20/20).
The Torpedo Bombers that had launched from the Italian Carrier earlier,
launched their torpedo attack on the Prussian Carrier, causing a Crit (Chaos
& Disarray)! The Last Prussian
Frigate on the right side, continued to dash behind the island, trying to get
away from the waves of Assault Boats and Torpedo Bombers. The 2nd squadron of Italian
Assault Boats hit the Portal on the right and popped out in the center – then continued
their movement and attacked the last remaining Prussian Gunship – sinking it
with another Crit!

Prussian Gunship Sunk! Carrier In Danger!
One of the Prussian Fighter Squadrons went full speed and
attacked an Italian Bomber, critting it (Weapons Damage)! Italian Fighters moved around a bit – unable to
do much but waste their activation, then a second Prussian Fighter Squadron
went full speed and critted the other Italian Bomber (Shredded Defences)!
End of Turn 2
In the End Phase, the Prussian Frigate Rallied, but failed
to repair any of the damages on the Carrier.
Italians repaired 1 Bomber, but failed to repair the
Shredded Defences on the Second!
Losses:
LoIS: 590
PE: 350
LoIS: 590
PE: 350
Turn 3:
Italians played “Lost Orders”, but the Prussians Countered
it.
Prussians won Initiative!
Prussians activated one of the Fighter Squadrons, shooting
down 1 of the Italian Bombers , then played “Tally Ho”, and activated the
second Fighter Squadron, shooting down the last Italian Bomber for the cost of
1 fighter token! Italian Assault boats
raced around the central Island and sank the Prussian Frigate hiding behind it –
Only 2 Prussian Small Targets left on the board! The Prussian Frigates, in desperation, hit
the Center Portal, popped out the left one and ran as far away as they
could. It didn’t work. Italian Assault Boats followed the Prussians
through the Portals, and sank both frigates with torpedoes! Italians completed ½ their Objective – all small
targets were destroyed!

The Death of the Prussian Smalls!
The Prussian Carrier, with only 2 Assault Points left was
doomed to be boarded, so I used it while I could. Moving forward, the Prussian Carrier failed
to damage anything with either its Bombards or Tesla Broadsides.

Carrier Failure!
The Italian Carrier then moved to “Cross The T” with the
Prussian Carrier, and attempted to board, playing “Swift Strike”. In response, the Prussians played “Stormtroopers”
and managed to SAVE the Carrier (with 1 AP left)!

Still ALIVE!!!
The Prussian Dreadnaught activated and moved forward to
clear the island finally, used Direct Fire with all 4 turrets at the Italian
Carrier from RB3, managing to cause a crit (Nav Lock). Sadly, it was not enough to cripple the
carrier and get the Prussians the points they desperately needed.

Too Little, Too Late!
Italian Frigates then advanced and successfully boarded and
captured the Prussian Carrier.

Prussian Carrier Finally Captured!
In their final action, the Italian Destroyers attempted to
recapture the Prized Destroyer, but lost all their marines in the attempt!
In the End Phase, the Fire on the Prussian Carrier didn’t go
out, but still remained in Italian Hands.
Losses:
LoIS: 650 50 points shy of Prussian Victory Conditions!
PE: 720 Italians successfully sank all Smalls AND over 50% of the Fleet Value!
LoIS: 650 50 points shy of Prussian Victory Conditions!
PE: 720 Italians successfully sank all Smalls AND over 50% of the Fleet Value!
Italian Victory!
WoW! Great Game! A nail-biter until the end! We both thought it was a draw until we
realized the Prussians failed to get that last 50 points it needed to get a
draw!
Playing the Prussians means the Excitement Starts Turn 1! We were trading shots almost immediately. If this had been my Russian Fleet, I wouldn't have gotten a shot off until Turn 2! It made for a much faster game.
First of all, let’s go over my lists and what I did right
(or wrong).
The Dreadnaught: we were both experimenting with new ships
and I’d never used the Dread before (I think).
I had heard all sorts of issues with using the Dread in Prussian
Fleets. The main reason I took it was I
wanted to try to prove/disprove Indirect Fire.
The argument around here was that it wasn’t practical or useful. Well, I think I proved Indirect Fire is fine –
you just need enough dice! A Dreadnaught
works! However, the points cost of the
Dread made it a huge expenditure of points – especially with 2 shield generators. So as an experiment for Indirect Fire – it was
successful, but I think the rest of my fleet suffered as a result. I needed the extra firepower from direct fire
and I needed “more Bodies” in the main fleet to deal with the swarms of Italian
Assault Boats and Torpedo Bombers! I can
see why people don’t think Dreadnaughts should be used at less than 1000
points. I should have put it directly
into the fight on the right side – as soon as possible or taken a couple of
Battleships instead!
The Carrier: I needed the extra fighters and would have
liked to have been able to swap out torpedo bombers or dive bombers, but I went
for cheap Rhine carrier rather than the Skyfortress. Also, the Bombard was more suitable to my “Stand
Back and Shoot” strategy. Surprisingly,
the bombard did quite well! I just wish
I could have kept control of the carrier better. The Carrier was probably better off on the
other side of the map beside the Dreadnaught (probably following it from a safe
distance). So carrier did well, I just
didn’t protect it properly.
The Skyships: I knew Thurston’s Italians had issues with the
Russian one last time, so I thought I would test how bad they really were for
the Italians. Sadly, the Jaegers proved
to be useless – they all died quickly and didn’t have a chance to do anything
(with an RB1 weapon system, I really didn’t expect much). The Medium Scouts on the other hand saw very
little action where they were on the left side of the table. That’s mostly because the battle was fought
on the right! So, while I don’t think I’ll
use the Jaegers much, it’s too early to make a decision on the Scouts.
The Gunships: they’re more expensive than the Cruisers, but
I liked the Tesla Generators for the extra burst of speed, the extra Hull Point
means it takes more than 2 Crits to sink and having 2 Turrets each really
seemed to help. I didn’t miss the Tesla
Guns that the Cruisers had, so I may consider this as either a straight
replacement or maybe adding the Gunships to make Reinforced Cruiser Squadrons. Yes they were sunk, but they went down
fighting.
Frigates: What can you say?
The Staple of the Prussian Fleet – you can never have enough and
unfortunately they got chosen as the primary target. They didn’t do badly but they were
overwhelmed by the smalls and the additional Assault Boats of the Italian fleet.
What did I think of the Italians? They were FUN! The Frigates have Elusive, meaning everything
requires 5+ to hit them – makes them far more survivable against other small
ships, but easier to Crit! The
Destroyers were nasty – I had to re-evaluate and make them a priority target
far sooner than I intended.
The Cruisers have lots of little features that makes them
useful but probably the biggest thing to deal with is those Assault Boats! A Squad of 3 Cruisers give the Italians an
effective squad of 6 more Assault Boats that move and act on their own. Worse, they’re not worth Victory Points! You don’t earn anything for destroying them,
but you really can’t ignore them either!
You need to treat them as another offensive Frigate Squadron (either in
attacking with or defending against them).
Finally, the Carrier.
It’s worth the cost of some Dreadnaughts, but should be. It has the turrets of a Battleship, the Amplified
Shield Generator, the standard flight of 6 Tiny Fliers AND another 6 token
strong Assault Boat Squadron!!! You’re
getting potentially 3 activations MINIMUM for each carrier and each element is
a force to be reckoned with. Like the
Cruisers though, only the Carrier is worth Victory Points! What is the bigger threat or more
important? Make your call carefully!
Special Note: Thurston did a great job painting his Italian
fleet! My Prussians were still not
complete and I’m ashamed. I’ve had them
over a year and the Italians are what, 3 weeks old??? Unfortunately, I’m not going to be able to
finish them for a bit more. Hopefully in
a couple of weeks I’ll be able to get back on my painting cap.
Over all, I find the Italians to be a very effective
swarming fleet. To counter them, you
need lots of weapon systems able to roll lots of dice at lots of small
targets. Very different from everything
else I fought against and I look forward to fighting them again sometime soon!
Thanks Thurston! I’ll
get you next time! ;)
Awesome battle reports you do! I've just started with Spartan Games (Firestorm Armada) but I am really interested in getting into Dystopian Wars, and your battle reports are really making it tempting! Thanks for sharing!
ReplyDelete