So, another report with the Prussians vs their standard
enemy, the Brits!
But something different this time. This time, we had 2 sets of official Tactical
Action Cards (TACs) AND, I had the Secondary Objectives set, ready to use. While Graham and I were both experienced in
using TACs (from Beta Testing), we had never tried the Secondary Objectives.
TACs:
So what are Tactical Action Cards? In a nutshell, they are “extra” capabilities
that are used one time only. Little
elements of surprise that can make your life wonderful or heck! They can grant you a bonus to your initiative
rolls, repair damaged ships or make an attack stronger – all dependent on the
card.
When using TACs, each player starts off with a Deck of 16
cards. In the future, using special
commanders or formations will let you swap cards out, but players are always limited
to 16 cards in the player’s deck and each swapped card must replace a card of
equal value. Yes, TACs have value! Just before a game starts, both players
select a number of cards (chosen, not randomly drawn). Players get 2 cards to start, plus 1 card for
every full 250 Points of fleet value, up to a maximum of 10 cards each. These cards are chosen, per the rules, after
deployment and drawing of the fleet’s mission objective. So cards can be selected to help for or against a
specific foe or mission.
During the game, a player can attempt to play a TAC at
certain times (usually defined on the TAC itself). The Official TAC phase is just before the roll for Initiative (giving players a chance to modify their Initiative Roll), but some cards will tell the player to use them during movement or firing phases. When played, the opponent gets a bonus number
of Victory Points that the card was worth as the player gains the abilities of
the card! However, sometimes you do NOT
want a card to work. To stop a card, the
opponent can “cancel” the effect by playing an equal or higher equivalent value
of VPs in cards (yes, more than 1 is an option). The opponent has stopped the cards effect,
but now the player that played the original card gains the VPs used to block
their card! Note: Only 1 TAC can be played at each phase or activation (with the exception of cancelling cards). If a player plays a TAC during the TAC phase and his opponent also plays a TAC, the first player cannot cancel it as he's already played a TAC.
Secondary
Objectives:
Really, these are intended for multi-player games, but I had
them and wanted to try them, so we did.
Secondary Objectives are just small counters, deployed after
the terrain has been deployed but before the fleets deploy. When a unit gets within 2” of one, the unit
can attempt to capture the Objective.
This is done by rolling 3 D6 and if successful at getting 2 hits (4+ are
hits, 6’s count as 2 hits), an event card is drawn. Like TACs, there are descriptions as to what
happens. Cards have either Immediate
effects or can be “banked” and used later. They work just like TACs, except they usually include actions that are not available to TACs (such as granting immediate Victory Points). These can be anything, including a booby-trap. You never know until you draw the card…
On to the game…
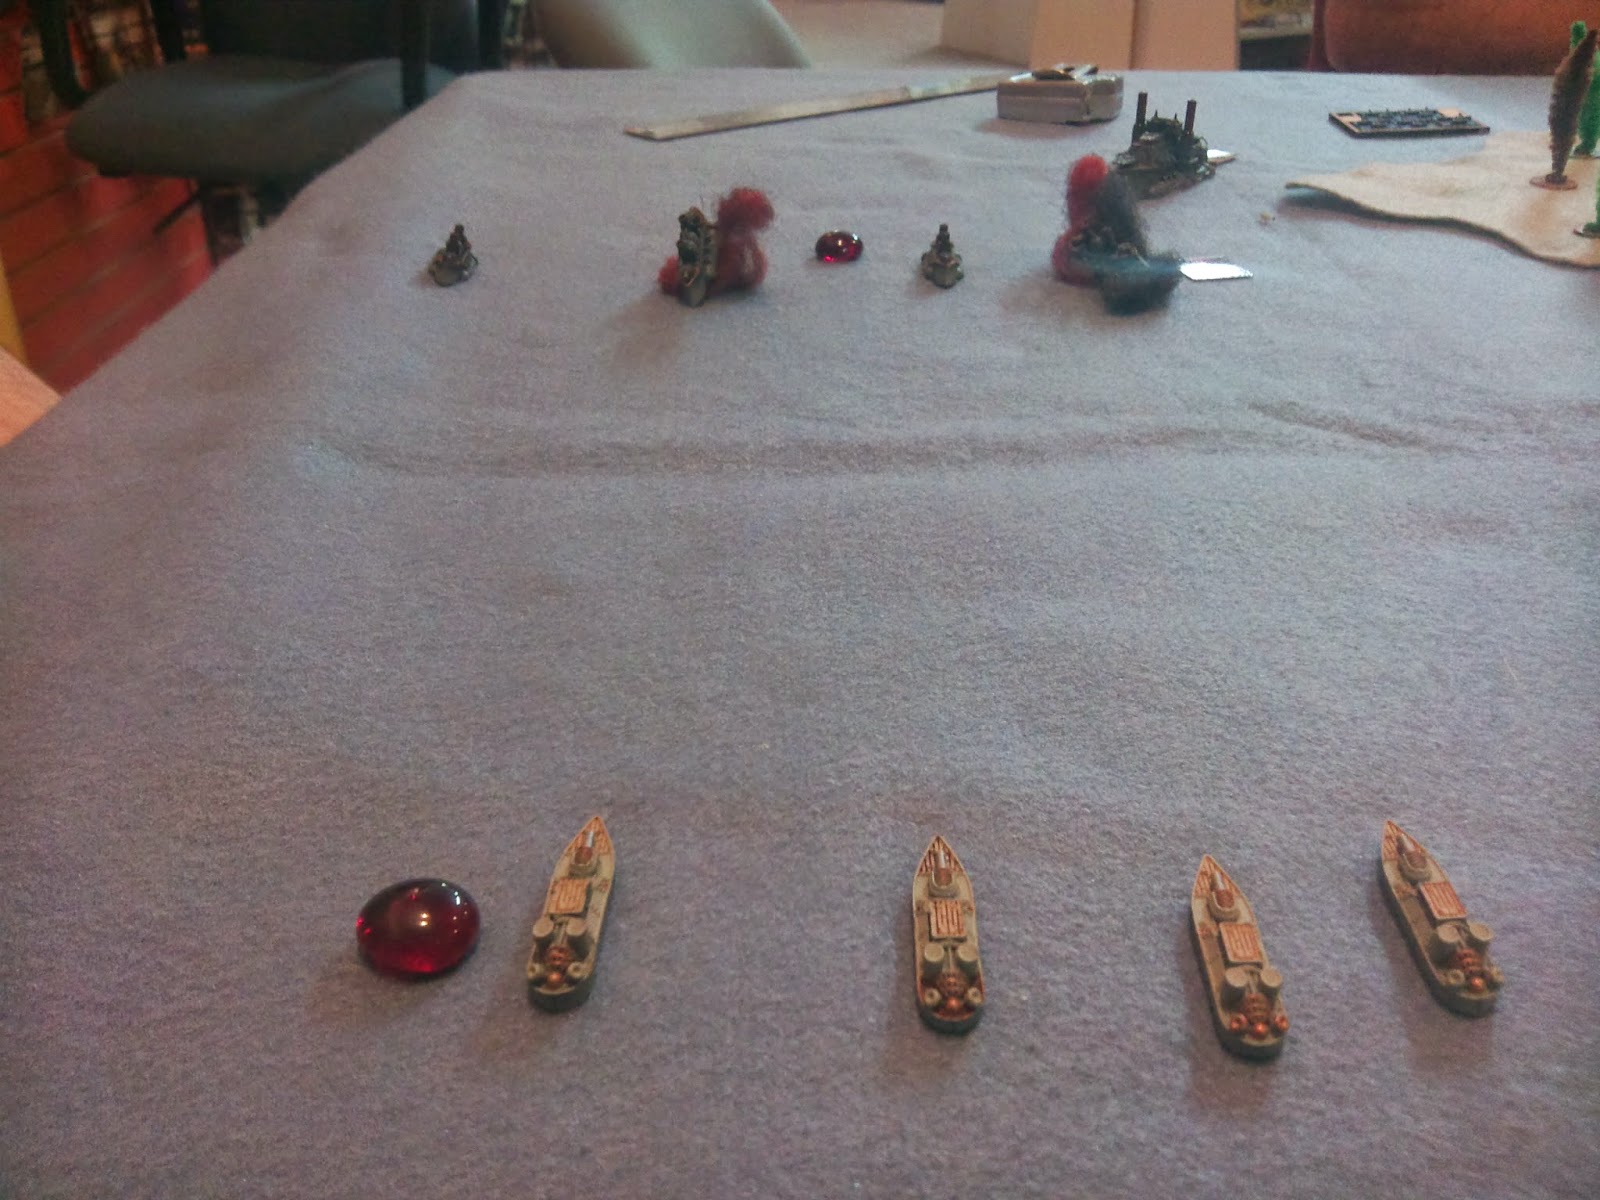
Terrain was rolled for, and we had 4 islands, one in each of
the w Northern Sectors and one in the South West, as well as one sand bar in
the South East sector. Britannia was
deployed on the Northern edge, Prussians on the Southern edge. Neither side had Flankers, Reserves or
Advance Deployment.
The British deployment (North-West to North-East):
- 3 Attacker Frigates
- Commodore’s Ruler Battleship with Guardian Generator
- 5-Strong SAS Fighters
- 5-Strong SAS Fighters
- a 2nd Ruler Battleship with Guardian Generator
- Lord Hood Battle Cruiser
- Lord Hood Battle Cruiser
- 4 Attacker Frigates
- 4 Attacker Frigates
The Prussian deployment (South-West to South-East)
- 4 Arminius Frigates
- 5-Strong SAS Fighters
- Commodore’s Elbe Fleet Carrier with:
- 5-Strong SAS Fighters
- 4-Strong SAS Dive Bombers
- Kaiser Karl Heavy Battleship with Elite Crew
- 3 Uhlan Cruisers
- 3 Saxony Corvettes
- Konigsberg Battle Cruiser
- 5-Strong SAS Fighters
- 3 Saxony Corvettes

View from North (British) to South (Prussians)
Turn 1:
In the TAC phase, British played “Radio Intercept”, gaining
+1 to their Initiative Roll. The
Prussians played “Lost Orders” and randomly pulled the TAC “Battlefield
Repairs” (worth 60 points and allowed a player to repair random # of Hull
Points). As both TACs were worth 20VPs,
each player started with 20VPs (the discarded Battlefield Repairs doesn’t count
in this case as it was not “played”.)
British won the Initiative by 1…
On the west table side, the British Frigates advanced
forward at full speed, but were out-of-range from any targets. Prussians wasted an activation by advancing a
Fighter squadron forward just a bit.
Seeing that the Prussians weren’t being baited by the
Frigates on the west, a Lord Hood Battlecruiser advanced forward and targeted
the Prussian Battle Cruiser. The British
played the TAC “Devastating Barrage” which the Prussians cancelled with the
same card, giving the British another 40 points. After firing with “regular” weapons, we originally
thought the Prussian Battle Cruiser had been critted, but realized that the
wrong range band stats had been read, and were forced to re-rolled the results
(though this was after the Prussian Battle Cruiser had been activated). The Prussia Battle Cruiser was damaged.
The Prussian Battle Cruiser activated (as it was thought to
be critted) and moved forward at amx speed with an extra 2” move due to the
Tesla Generators and returned fire to the Battle Cruiser, but failed to damage
the British ship. However, the Prussian
vessel was close enough attempt to capture and successfully captured the
closest Secondary Objective – drawing the card “Dispatches”.

Capturing Secondary Objective 1!
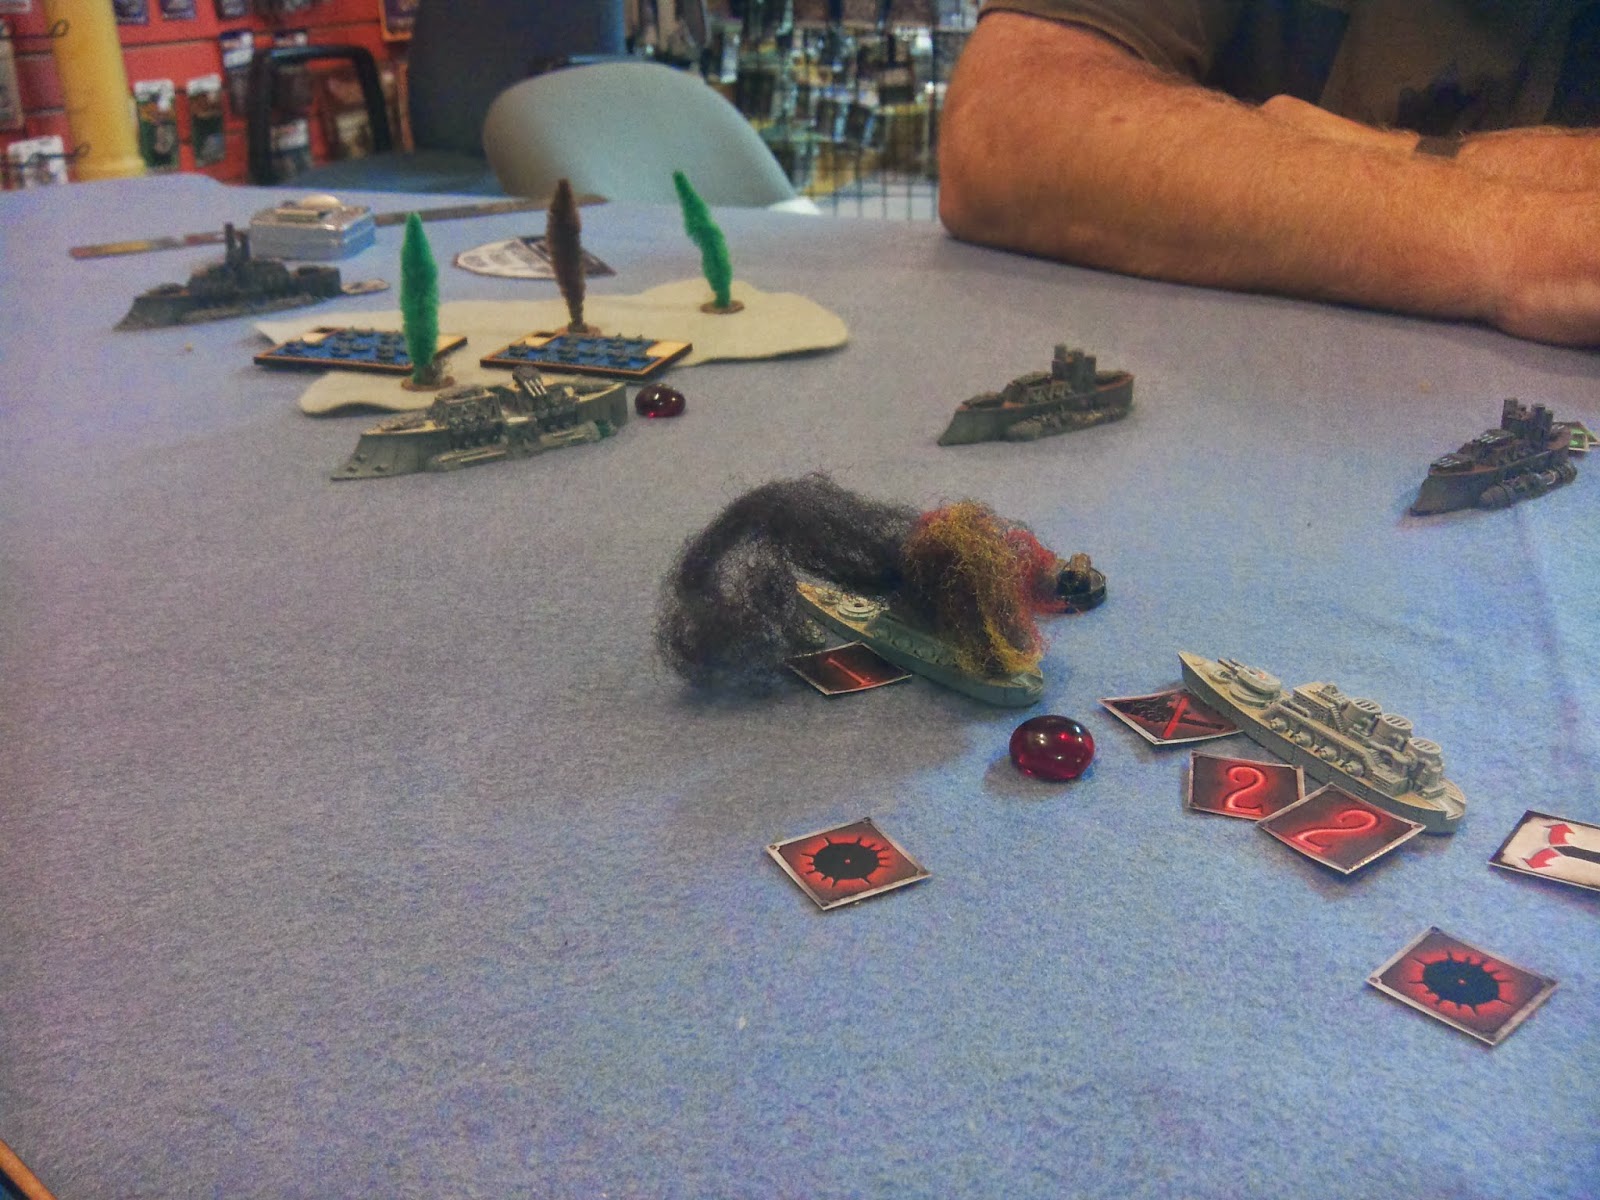
The 2nd British Battle Cruiser advanced past the
1sr, lining up all guns on the damaged Prussian Battle Cruiser, causing a
Double-Crit. First Crit was Raging
Fires, but the Second was a “Magazine Explosion”, sinking the Prussian vessel
with all hands! I thought that was
supposed to happen to the Hood!!!

First Blood: A Magazine Explosion!
Things were not going well for the Prussians. The Prussian Cruisers advanced straight
forward at full speed and managed to crit one of the Battle Cruisers (Hard
Pounding, -1AP) and damaged a Frigate to the West. The British retaliated by advancing a
Battleship then critting a Cruiser (Engine Damage).
Prussian Fighters stalled again by moving fighters from the
East of their line towards the table center.
British Frigates on the East moved forward, turning to port to line-up
torpedoes, but failed to damage the Cruisers.
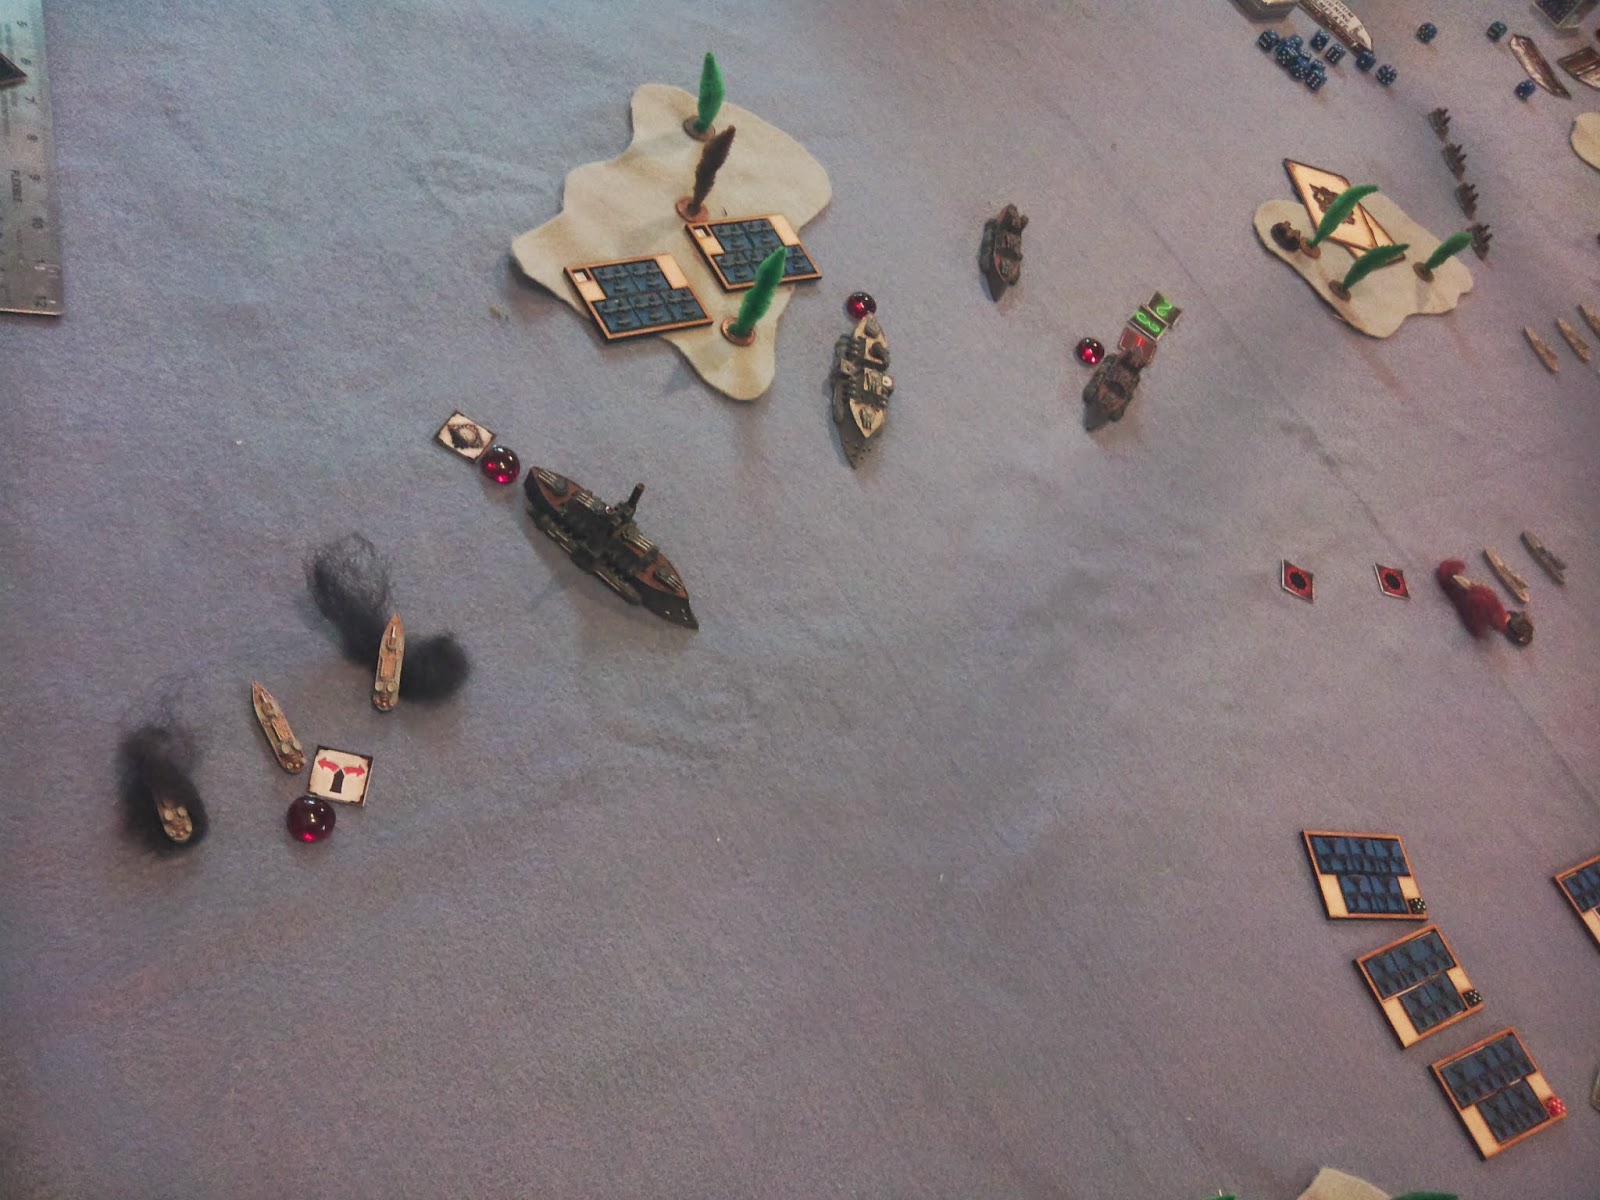
The Prussian Battleship moved out from behind the island (and the
Carrier) but was still too far away to damage a Battle Cruiser. The British Commander’s Battleship slowly
advanced from around the island, brought 2 turrets to bear on the Prussian
Cruisers and, disgustingly, sank it with a 2nd Magazine
Explosion! This time, the explosion was
sufficient to damage one other Cruiser and crit the last Cruiser (Engine
Damage). This was getting ridiculous…

ANOTHER Magazine Explosion?!?!?
Finally, the Prussian Frigates activated, moving forward at maximum
speed and sank 2 British Frigates on the west table side. Finally – Points for the Prussians!
First Blood for the Prussians!
The Last British Frigates on the East side formed a
Line-Of-Battle and started out from behind the other squadron of Frigates. The Prussian Carrier re-purposed a squadron
of Fighters as Dive Bombers, then moved forward max speed. Unfortunately, it wasn’t enough to clear
line-of-sight to any targets. British
Fighters moved forward, over the islands.
Prussian Dive Bombers moved forward. Behind the Prussian Fighters. The 2nd squadron of British
Fighters moved forward, beside the 1st squadron over the
island. This was the last British
Activation of the turn.
Unopposed, the 4-strong Dive Bombers advanced forward, then
both squadrons of Corvettes advanced.
The first squadron sank 2 Frigates, the other squadron captured the 2nd
Secondary Objective and received “Sturgigite Fuel”, allowing the squadron an
extra 5” movement when they chose to activate it in any of their activations. Sadly, it was not transferable. (I really could have used it on the
Battleship about now…)

First Corvette Squadron Attacks While...

Second Squadron Captured Another Secondary Objective for the Prussians!
In the End Phase, the Prussian Cruiser’s damaged engine was
repaired, the only thing that needed to be repaired.
VPs:
KoB: 260
PE: 140
KoB: 260
PE: 140

End of Turn 1
Turn 2:
Knowing I was going to be pounded on badly this turn, the
Prussians played the “Dispatches” event card that captured last turn. This would give us +1 Bonus on all Disorder
tests. The British played no cards this
turn.
Prussians won the initiative for the turn.
Looking at the situation, it was apparent the Prussian
Cruisers were going to get plastered, so it was a case of
“Use-‘em-or-Lose-‘em”. Off they went
forward, then turned to port, dropping mines as they turned. I REALLY didn’t want to drop the mines, but
then again, I didn’t expect the Cruisers to survive. At Point-Blank range with Close Gunnery
ability (ignores the -1 for firing Primary Weapons at RB1), I blasted both the
Battle Cruisers. Unfortunately, BOTH
Battle Cruisers made EXCELLENT shield saves.
Neither was damaged. Just to
throw salt on the wound, the Cruisers were unable to capture the last
objective! ARGHHHH!!
The British Battleship sailed forward, turning 2 turrets on
each cruiser and proceeded to sink 1, crit the other (Weapons Damaged). The surviving Cruiser failed its Disorder
Test. Then, the great brute fired
torpedoes in contempt at one of the Prussian Frigates and sank it. Nope.
This turn wasn’t going any better for the Prussians than the last turn…
Lost: 1 Brave Cruiser...
Ah well, the Prussian Corvettes moved forward and sank 1 of the
3 British Frigates they targeted.

Outnumbered Corvettes Fight On!
The British Battle Cruiser sailed forward and finally sank
the last Prussian Cruiser, then proceeded to capture the last Objective:
Emergency Repair: the Battle Cruiser was able to repair one of its lost Hull
Point.

The Last Prussian Cruiser, Sunk!
Prussian Frigates rushed forward and from point-blank range sank
the last 2 Frigates on the West side of the Table.

Prussian Frigates Counter-Attack!
The Commodore’s Battleship played the TAC “Stoke the Engine”
(gained an additional 2” move), turned to port around the island and headed
towards the table center. Firing turrets
in each direction, the Battleship sank 2 Frigates (the last failed its Disorder
Test) and a Corvette. The only good news
for the Prussian was that we got 40 Points for the TAC that was played.
The British Commodore Speaks!
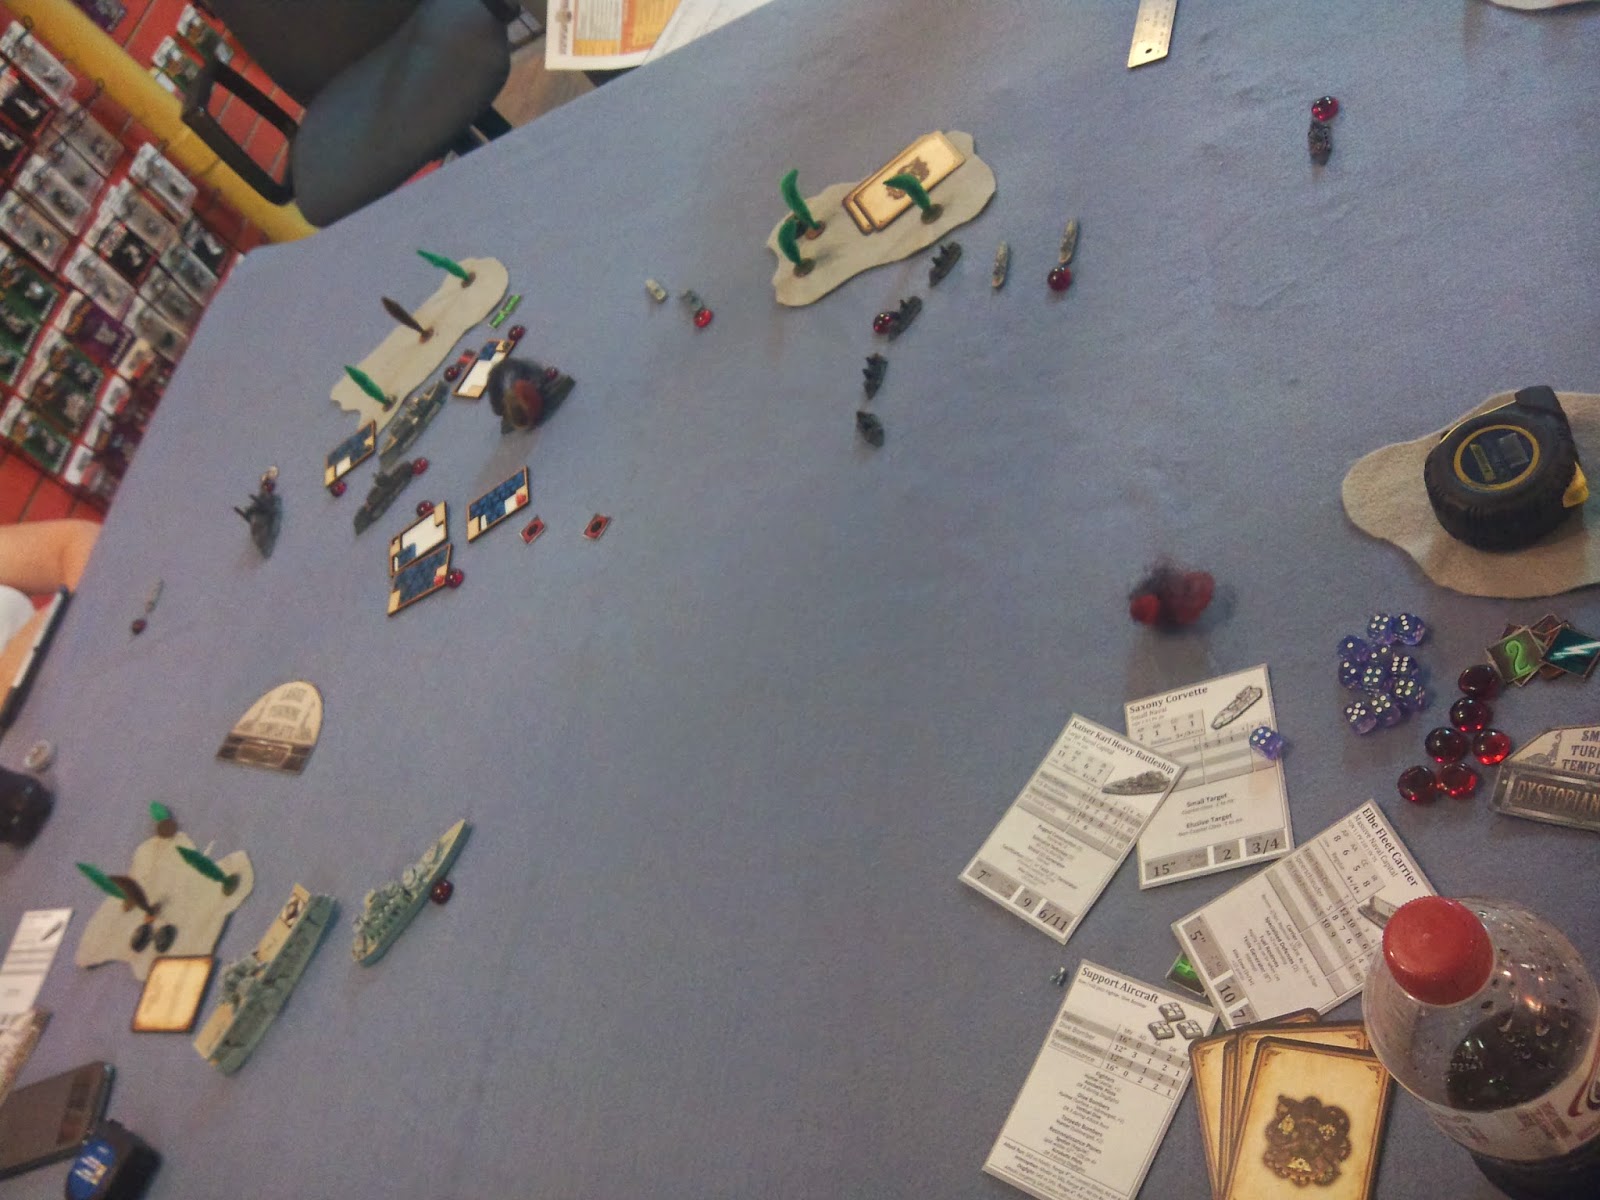
The Prussian Battleship turned towards the table
center. Firing all weapons, the great
ship crit the Battle Cruiser (Engine Damage) and managed to damage and stick a
Lightning Rod in the side of a Battleship!
A British Battle Cruiser moved forward at maximum speed and targeted the
Prussian Battleship. When the smoke
cleared – no damage was to the Kaiser Karl!
The combination of Rugged Construction and a Shield Generator was too
much for the Cruiser to overcome.
The Prussian Corvettes used up their Sturginium Fuel they
had captured and zipped behind the damaged battlecruiser and raked her stern,
causing a crit (Shredded Defenses).
Meanwhile the British Frigates to the East sank a Corvette. The Survivors failed their Disorder Test.

Prussian Corvettes Taking Fire!
I needed to use the Dive Bombers, but those British Fighters
were too close. Prussian Fighters
attacked the British Fighters and shot down 2 tokens for the loss of 2. British Frigates then moved between the
island and Prussian Corvettes, formed a curved Line-Of-Battle and blasted the
Corvettes, but when the smoke cleared, neither Corvette had been damaged!

Maybe there was too much smoke in their eyes?
The second squadron of Prussian Fighters attacked the
undamaged British Fighter Squadron, and shot down 3 tokens for the loss of
1. The larger British Fighters attacked
the smaller Prussians Fighters, but were completely destroyed, taking 2
Prussians with them. Prussian Dive
Bombers prepared to attack the Battle Cruiser, but found they were 2”
short! They moved forward, preparing to
attack next turn (I hoped!). Of course,
the remaining British Fighters “Bounced” the Dive Bombers. Unfortunately (for the British), the Fighters
were unable to shot down any of the Dive Bombers while they lost 1 of their
own. That ended the British Activations
for the turn.
The Second Dive Bomber squadron went forward, again
out-of-range of the British ships.
Finally, the Prussian Carrier turned around the island and fired
everything it could bring to bear. The
undamaged Battle Cruiser escaped damage, but the Damaged Battle Cruiser was
sunk with a Crit from a combined Forward Tesla & Speerschleuder attack,
finally sinking the stubborn Battle Cruiser.

The Battle Cruiser is Finally Sunk!
In the End Phase, all damage was repaired and no ships were
lost due to Rallying from being Disordered.
VPs:
KoB: 520 Points Mission: 50% + all Mediums – Both Completed
PE: 410 Points Mission: 50% + all Mediums – Neither Completed
KoB: 520 Points Mission: 50% + all Mediums – Both Completed
PE: 410 Points Mission: 50% + all Mediums – Neither Completed
British Victory!
End of Turn 2 & Game!
British Victory!!!
British Victory!!!
======================================================================
So, let's talk about the TACs:
If you were keeping track, both the Prussians and the British were granted Victory Points due to the use of TACs. In fact, both players "earned" an extra 60VPs.
If the Prussians had not cancelled that Devastating Barrage in Turn 1, the British would have had 40 less VPs - leaving them a total of 480VPs - LESS THAN the 50% they needed to win!
Hind sight being 20/20 - if the Prussians had let the Devastating Barrage TAC play, I probably would still have lost all my mediums by the end of turn 2, but I potentially could have drawn the game an extra turn and forced a draw as my Dive Bombers, Battleship and Carrier would all have had a chance to sink the last Battle Cruiser, earning me the required 50% & all Mediums..
And that is the key to TACs. Depending on how they are played, you can "force" your opponent to "give" you extra Victory Points or risk the potentially horrific outcome of letting it play out. You can hoard your cards and play them when your opponent has none, or draw out their cards while saving an "ubber-card" to play (hopefully) unopposed.
Secondary Objectives: Well, we only had 3. None of them were outstanding or affected the "Primary Missions" but they were a fun add-on. For the record, the wording on some of these cards is pre-Version 2 so I'll be waiting for some updates and clarifications, but they can be used as an extra add-on, for a change of pace.
Now about the game play...
------------------------------------------------------------
DEPLOYMENT! DEPLOYMENT! DEPLOYMENT!!!
DEPLOYMENT! DEPLOYMENT! DEPLOYMENT!!!
Followed closely by:
ORDER OF ACTIVATION!
ORDER OF ACTIVATION! ORDER OF ACTIVATION!!!
I blew this game so badly before the first activation, it
was not funny.
First Problem: Prussian Deployment. While there is alternating deployments, there
is the handicap of having to deploy your largest units to smallest. Not having used these ships since Beta
Testing and I forgot how “robust” the Battleship & Carrier were. So I hid them. While this protected the Battleship and
Carrier from Enemy fire, it also limited my ability to damage his fleet as my 2
strongest units were unable to direct their fire where it was needed most. Not to mention, it kept my Medium choices in
the open as there was insufficient room to hide my entire fleet behind 1 small
island. As a result, my Medium choices
were under fire from the beginning of turn 1 when they should have been the
ones hiding behind the island or the larger ships.
Second Problem: Order off Activation. While I can blame the British for “falsely”
critting the Battle Cruiser and my resultant attempt to use the Battle Cruiser
before it was destroyed, that doesn’t justify activating the Prussian Cruisers
so early, making them that much more easily damaged and eventually sunk. If I had been smarter, I would have waited a
bit before charging forward, into the guns of 2 Battle Cruisers and a
Battleship. The only saving grace was
that the 2nd British Battleship was on the other side of the island
and couldn’t bring her guns to bear right away.
I held back the Dive Bombers too long, my major Carrier
Weapon. As a result, I was in great
position for Turn 3, but the game didn’t last that long!!! I could/should have been more aggressive with
my SAS.
Finally, as the Prussians, I didn’t have a plan. Other than to grab the Secondary
Objectives. But I really hadn’t thought
it through beyond that. The British, on
the other hand, obviously had a plan and played it through to the end. I didn’t start to form a plan until the 2nd
turn. By then, it was too late.
I won't comment on the fleet composition too much as I think I made my point when I said I didn't have a plan. It wasn't the fleet's fault the Prussians lost, it was my failure as a commander. So I won't critique the various fleet components. I will say that the Kaiser Karl was a GREAT ship. Rugged Construction (2) AND Shields (2) made
this one tough ship. I did miss the
extra speed from the Tesla Generator, but it’s available as an option.
I did waste a number of points upgrading the crews of both the Battleship and the Carrier. Hind-sight being 20/20, I should have bought another Corvette and added it to one of the Corvette squadrons.
I did waste a number of points upgrading the crews of both the Battleship and the Carrier. Hind-sight being 20/20, I should have bought another Corvette and added it to one of the Corvette squadrons.
-----------------------------------------------------------
On the British side, I also have to comment on the toughness
of the fleet. Not only were the Primary
Weapons redoubtable, Graham was making some incredible shield saves! He was averaging 3 shield saves which made it
incredibly tough to even get Damage, let alone Crits. However, it was his not getting distracted
that let him win handily this game.
By taking a 2nd Battleship instead of a Carrier, the British were forced to charge forward and blast away immediately. He couldn't wait for me to start rearming and replenishing my SAS. It was a gamble, but in this case, it worked well for him.
One thing Graham thought that won him the game was the 2 instances of Magazine Explosions in the first turn. I will admit it was depressing and slowed me down. I was starting to gain momentum though by the end of Turn 2. Again, if the game had lasted 1 more turn, my Battleship and Carrier were in great position to do lots of damage in turn 3. We just didn't get that far...
No comments:
Post a Comment