Admiral Von Shtupp was
once again enjoying the view from the command deck of the SMS Graf Zeppelin.
The last battle was a
great victory for the Prussian Navy. They not only stopped a Britannian probing mission, they stopped it dead in its
tracks and inflicted significant casualties.
Already communications had made their way back from Prussia, with the
Emperor expressing his happiness at the outcome. More importantly, the British Navy’s future attempts
to attack the new Prussian Base of Operations in the Caribbean would be delayed
by the loss of surprise and a significant portion of their force in the
area. Things were looking good for Von
Shtupp…
The Prussian Fleet was
on their way back to base to resupply. The
Battle Cruiser and Corvettes had been separated from the Task Force to do a
long–range patrol. Meanwhile, Von Shtupp
was ordered to meet up with another task force and to escort it to the
base. What the force consisted of, he
did not know. Yet…
“Admiral! Lookouts report they see aircraft to the
North. They’re ours, 2 Pflicht
Zeppelins. We’ve established radio
contact with them now.”
“Excellent! It will be good to have some more Air
Support. How soon before they can join
formation with us?”
“If they maintain
present speed – about 2 hours.”
“What’s their Task
force consist of?”
“A squadron of
Frigates, a squadron of Destroyers, a squadron of Riever Cruisers, 2 Pflichts
and . . Sir! They have SMS Graf von Zieten! A Blucher-class Dreadnought!”
“The von Zieten! Here?
At last, we’re going to have some REAL power under my command in the
Caribbean!”
Another aide came
running onto the bridge deck.
“Admiral! Our ships have spotted
a fleet coming from the south! It
appears to be the Antarcticans!”
“WHAT?!? Wave them off! Warn them if they come closer, we will engage
them as a threat to the Prussian Empire.”
“We’ve tried,
Admiral. There has been no
response. What are your orders?”
“Radio the von Zieten and have them form up with
us. Prepare all ships for battle. Send a message to our base. Tell them we are about to engage forces of
the Covenant!”
=================================
Bwa-ha-haaa! I
finally dug out the Dreadnought! I was
going to surprise my opponent this time!
We had decided to play a 1500pt battle; something large
enough to justify a Dreadnought. I could
have just added a Dread and a couple of other choices to my previous
fleet. However, there were a couple of
things I wasn’t comfortable with.
First, I did expect to face a Dreadnought, thus the primary
reason to include my own. The Battleship
Kaiser Karl & the Elbe Fleet Carrier would round up my Large and Massive
Choices. Both were excellent ships with
good capabilities.
For my medium choices, I started with a couple of
Pflichts. These airships are some of my
favorites. Good attack characteristics,
decent bombs, assault points and Air Hunter for dealing with other
aircraft. I would have taken 3, but
jus\t couldn’t swing the points for it. I
decided to keep the Uhlan Cruisers.
They’re decent ships with decent capabilities. I decided to put away the Konigsberg Battle
Cruiser. Though it did well in the last
battle, it was a single ship squadron. I
just couldn’t risk the points and I had enough heavy-hitters. I needed something to deal with smalls. For that reason, I took a full squadron of
Riever Light Cruisers. While they have
decent firepower, the more important fact is they are not Capital ships – no
penalty for shooting at most smalls!
They’re good dual-purpose machines and cheap at 150pts for three.
My choices for smalls were limited. I was low on points but still needed to have
at least 1 squadron, preferably 2. In
the end, after playing around with multiple squadron configurations, I ended up
with a squadron of 4 Arminius Frigates and 3 Stolz Destroyers. I could have taken a full squadron of
Corvettes, but it left me with 20 points free.
Any other combination of smalls and I was going to be over 1500
points. Finally I confesses to my
opponent I was 5 points over. He agreed
to let me have the extra points and I spotted him an extra 5 Victory Points at
the start of the game.
So I was ready to defeat The Bashing Britannians or Confusing
Chinese or Samurai Suns!
At least, that was what I thought…
I forgot he also had Accursed Antarcticans!
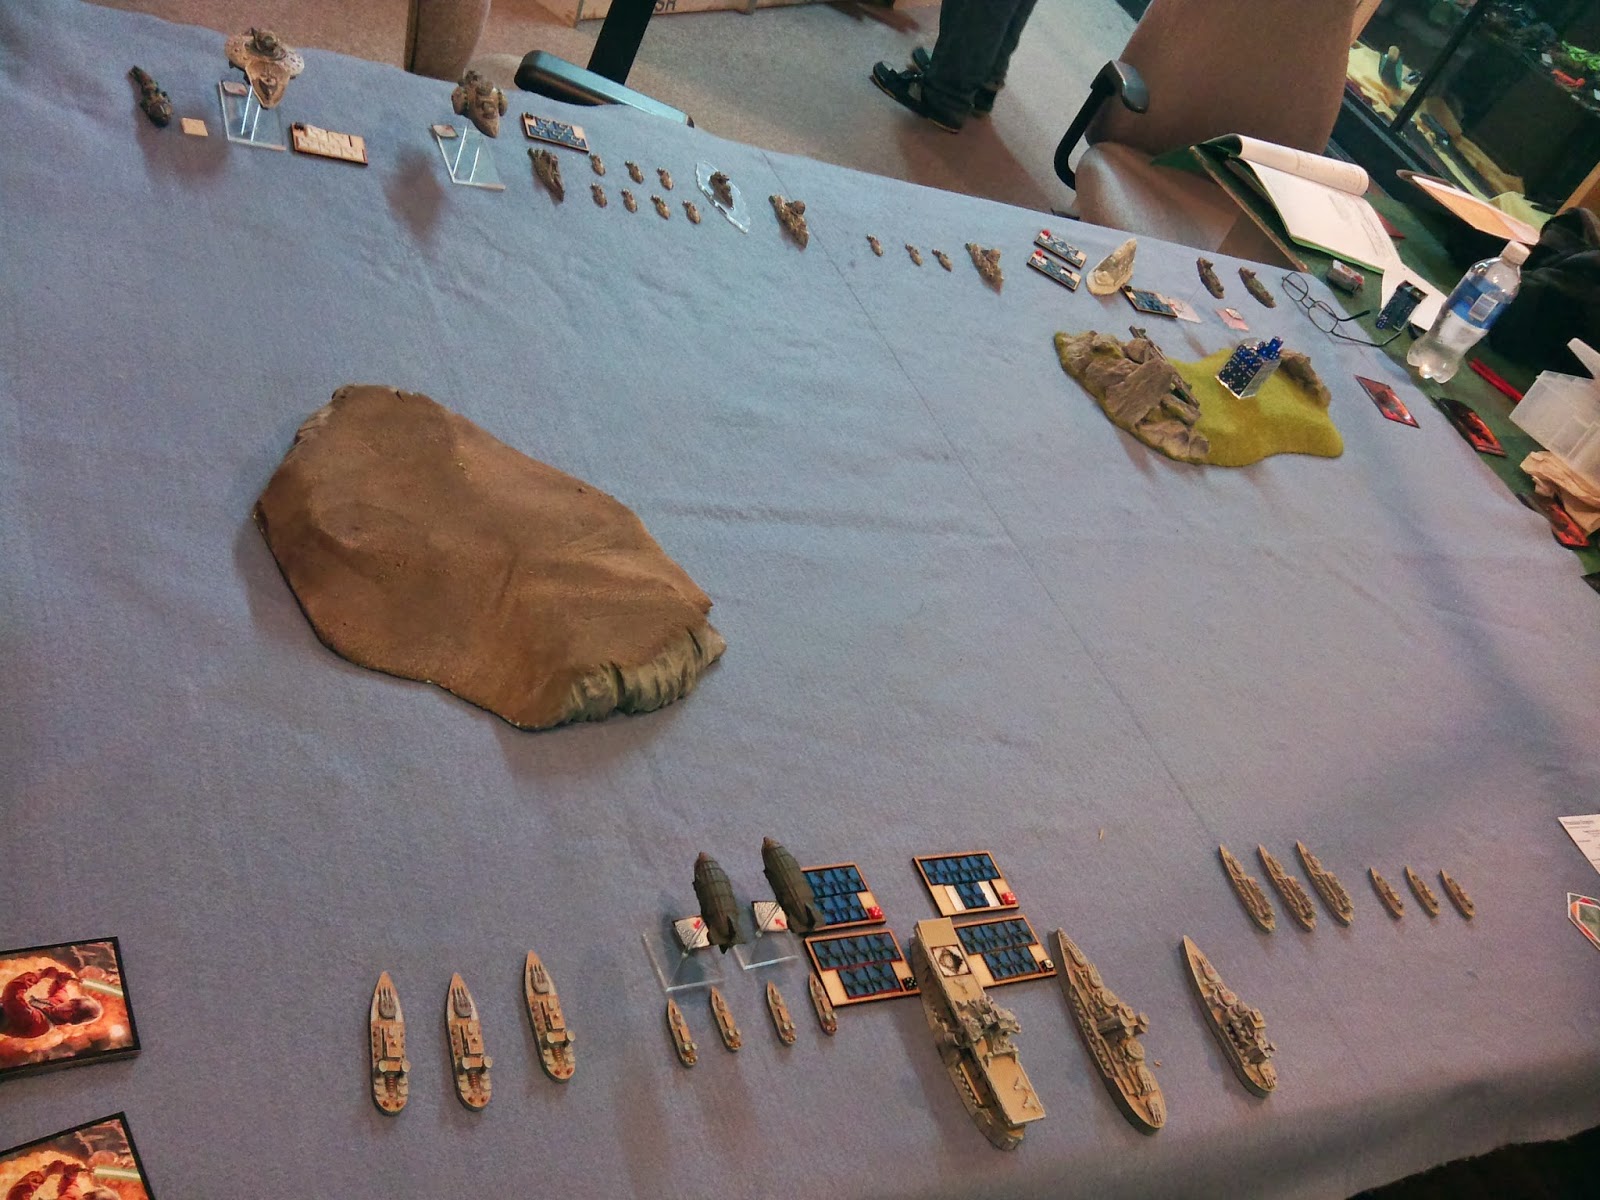
Table was 4’ X 6’, an island on the North-East corner and
the South-West Corner. We rolled for
Advantages and the Antarcticans won Operational Advantage and the Prussians won
Strategic.
Covenant of
Antarctica (CoA):
Southern Table Edge, from East to West:
Southern Table Edge, from East to West:
- 1 X Arronax Assault Robot
- 1X Epicurus Sky Fortress with Fighter SAS (5 tokens) and a Recon
- 1 X Daedalus-Beta Large Flier with Energy Turrets
- 1 X Zeno Armoured Cruiser
- 1 Fighter SAS (5 tokens)
- 4 X Diogenes Frigates with 3 X Diogenes Frigates following
- 1 X Aristotle Battleship with Energy Turrets & Disruption Generator
- 1 X Fresnel Gunship
- 3 X Diogenes Frigates
- 1 X Fresnel Gunship
- 1 X Pericles Fleet Carrier with 2 SAS Dive Bombers ( 1 with 5 tokens, 1 with 4) & Energy Turrets
- 1 Fighter SAS (5 tokens)
- 2 X Icarus Medium Fliers with Energy Turrets
Prussian Empire
(PE):
Northern Table Edge, from East to West:
Northern Table Edge, from East to West:
- 3 X Riever Light Cruisers
- 2 X Pflicht Scoutships
- 4 X Arminius Frigates
- 1 X Elbe Fleet Carrier with 2 SAS Dive Bombers ( 1 with 5 tokens, 1 with 4)
- 2 x Fighter SAS (5 tokens)
- 1 X Blucher Dreadnought with Shield & Tesla Generators
- 1 X Kaiser Karl Battleship
- 3 X Uhlan Cruisers
- 3 X Stolz Destroyers
Carriers for both fleet were the Commodore’s Flag Ship. All fliers were Obscured, the Aristotle was “Wave
Lurking” (Partly Submerged).
We drew our Orders and selected our Tactical Action Cards
(TACs). We were ready to play!
Start of Battle
Turn 1:
In the TAC phase, both sides played “Lost Orders”: we each
drew a random card from the other’s hand.
The Prussians lost Break Neck Maneuver (20VP) while the Antarcticans
lost “Devastating Barrage (40VP). That
and both sides “gave up” 20VPs to each other.
Prussians won the Initiative! (Though I didn’t want it…)
Killing an activation (that I didn’t have), The Prussian
Dive Bombers moved behind the North-Eastern island. Not for cover, but to keep distance from the
CoA Fighters. The Antarctican “Worm” (Arronax)
played “Stoke the Engines” (giving the Prussians a free 40VP) and gained an
extra 2” movement. Moving full speed
across the water, the Arronax headed towards the North-Eastern Island. The Prussian Rievers turned to port, peeked
around the corner of the island and blasted the Arronax, but only lightly damaged
the “worm”.
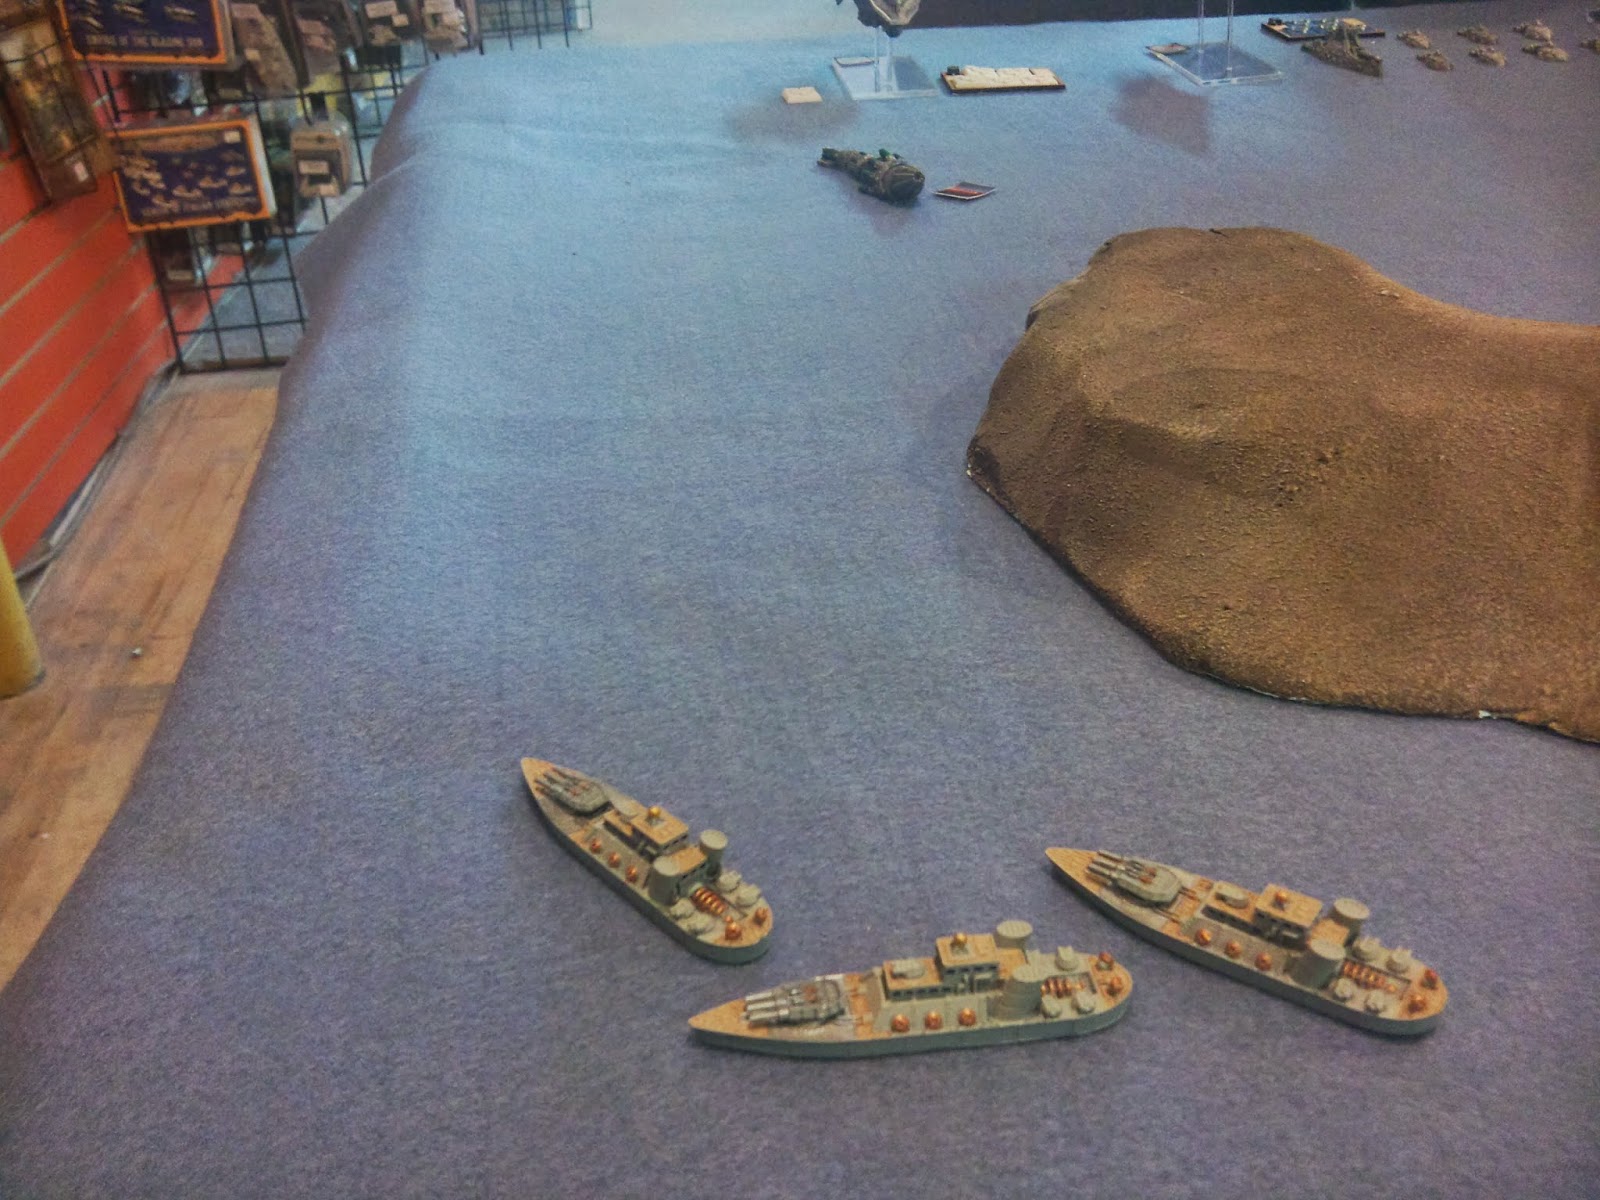
Rievers attack the Arronax
On the western table edge, the Icarus Airships moved over
the Island, fired their Energy Turrets at a Uhlan Cruiser and caused a crit
(Generator Offline). Seeking vengeance,
the Prussian Uhlan Cruisers made hard turns to starboard and targeted the
Icarus airships, but failed to cause any damage. A CoA Fresnel Gunship turned to starboard and
fired at 2 Uhlan Cruisers. Though it
failed to damage the previously damaged Uhlan, the other Cruiser took
damage. Being cautious, the Stolz
Destroyers moved forward their minimum move and hid behind the Uhlan Crusiers. The other Fresnel Gunship also turned to fire
on the Uhlans and critted a damaged Cruiser (Generator Offline). In anger, the Prussian Battleship moved
forward and blasted at both Fresnels and did . . NOTHING?!?!?
The CoA Battleship Commander, laughing at his Prussian
Counterpart, turned to starboard and with its energy turrets, Crit the Karl! (Guns Damaged)
Things were not going well for the Prussians. In desperation, the Prussian Dreadnought
activated. First, the Prussians played “Stoke
the Engines” and gained 3” movement AND gave up 40VPs to the Antarcticans. The, activating the Tesla Generator, the
Dreadnought gained another inch! Racing
forward, the Dreadnought fired in all directions. The Guns damaged the Antarctican Battleship
(missed a crit by 1 hit due to shields!) and Crit a Fresnel Gunship (Raging
fire (3)) as well as inflicting an extra AP damage due to Lethal Teslas
(leaving 1 AP left).
A squadron of Antarctican Frigates moved forward their minimal
move to avoid collisions. Prussian
Fighters move over the Eastern Island.
The Antarctican Armoured Cruiser turned and lined up its Particle
Accelerator on the Dreadnought. Sadly
for the Antarcticans, the PA did nothing.
Prussian Dive Bombers moved forward to kill another
activation. Antarctican Fighters moved
forward over the western island. The
Prussian Carrier activated. First, it
converted the 2 Fighter SAS into 2 Dive Bomber SAS. The Carrier then moved forward and zapped the
Armoured Cruiser with Linked Tesla & Speerschleuder, causing a Crit
(Corrosion (1)), as well as an extra lost AP and a Lightning Rod Token.
The Daedalus Flier came out of the clouds, turned starboard
and fired on the Prussian Cruiser and caused a crit (Engine Failure). Both Prussian Pflichts dropped from the
clouds, fired broadsides at the Daedalus but missed. The forward Teslas triple-crit the Armoured
Cruiser, sinking it! First Blood to the
Prussians! The Pflichts then slipped
back into the cover of the clouds.

Pflichts Sink a Zeno!
The Antarctican Carrier then moved forward from behind the
western island. Though it fired on the
Prussian Dread, it caused no damage.
Prussian Dive Bombers then moved straight forward from in front of the
Prussian Carrier. The Antarctican
Skyfortress dropped from the clouds , turned to starboard and fired on the
Riever Cruisers and caused a Magazine Explosion and sank 1 Riever in one shot! The resulting explosion damaged another
Riever and crit the third (Nav Lock).
The Skyfortress then damaged a Pflicht, then failed to climb into the
cover of the clouds.

Riever is Lost to a Magazine Explosion!
The Prussian Frigates, startled by the massive explosion of
the Riever Cruiser, forgot to turn on the engines and coasted forward their minimum
move. Sadly, this was also the last
Prussian Activation of the turn.
Totally unopposed, the Antarctican Frigates ran amok! One squadron of three maneuvered between the
Fresnel Gunship and the western island, then made a torpedo run on the Uhlan Cruisers. The Cruiser’s Concussion Charges (CC) stopped
the attack – no damage got through.
Another Frigate Squadron of 3 made a torpedo attack run on the
Dreadnought, but also failed to damage the great ship. Antarctican Drones fluttered around various points
of the table, preparing to be a nuisance next turn…
End Phase:
The Prussians managed to repair all damage except for the
Generator Offline on 1 Cruiser. For the
Antarcticans, the managed to put out 2 fires on the burning Fresnel Gunship,
but the 3rd fire took out their last AP!
VPs:
CoA: 115
PE: 150
CoA: 115
PE: 150
(Sorry! Forgot to take a picture!)
Turn 2:
In the TAC phase, the Antarcticans played “Radio Intercept”
for a bonus on the Initiative roll, giving the Prussians another “free” 20VP.
The Prussians still won the Initiative – by 1!
The Prussians started the turn activating their
Dreadnought. I played the TAC
“Devastating Barrage” (all 6’s on initial roll gain an extra dice on the second
set of rolls (total 2)). As expected, it
was countered by “Espionage, so the Prussians gained another “free” 40VP. The Tesla Generator granted the Dreadnought
an extra 2” movement and away she went!
When the smoke had cleared, the Antarctican Battleship had suffered a
double-crit (2 Generators Offline) and both Fresnel Gunships had been damaged!
The Antarctican Battleship performed a hard turn to port and
fired its PA through the Dreadnought and through 2 Uhlan Cruisers and 2 Stolz
Destroyers! Fortunately, the PA had lost
significant fire power and only damaged 1 Destroyer. The Battleships turrets fired at the Pficht
Scoutships, but missed and the broadsides fired at a Cruiser, but also failed
to damage anything. The damage suffered
was really telling on the Battleship! To
add insult to injury, Prussian Dive Bombers pounced on the hapless Battleship,
and sank the Antarctican Battleship with a Double-Crit for no losses!

The Dive Bombers (and the Dice Roll)
that sank the Antarctican Battleship!
that sank the Antarctican Battleship!
Antarctican Dive Bomber Drones made an attack run on a
Prussian Cruiser, but Ack-Ack shot down 3 of the 4 tokens. The surviving token crashed into the sea
without damaging the Cruiser – placing all 4 tokens into the “Scrap Pile”.
(Antarctican Drones work differently than other nation’s
Tiny Fliers. They’re basically missiles
that once they’ve completed their attack, they crash and are placed in a
separate pile. Each turn, the Drone
Carriers can re-launch as many drones as are in the Scrap Pile, up to their
carrier limit. Each time a Carrier or
the Commodore’s command ship takes a crit, they lose a drone from the Scrap
Pile, never to be launched again. What
makes this especially nasty is that a Drone SAS can attack and be relaunched in
the same turn!)
Prussian Uhlan Cruisers continued to attack the Icarus
Skyships over the Eastern Island, turning slightly to port as they moved. Once again, the clouds and angle caused the
Prussians problems and the Fliers remained undamaged.
The Antarctican Worm finally made landfall on the Western
Island. It took a shot at a damaged
Pflicht and caused more damage. In
retaliation, Prussian Dive Bombers attacked the Worm before it could burrow away,
causing a crit (Raging Fires (3)) for a loss of 1 token. Antarctican Fighters made their attack run on
a Prussian Dive Bomber squadron and wiped out the entire squadron. (Remember, Prussians cannot re-launch
destroyed SAS!) The Drones lost 2 tokens
in the attack, but the rest of the force joined them in the Scrap Pile after
the attack run was complete.
Hoping to prevent another lost squadron, Prussian Fighters
attacked a Drone Fighter SAS and shot down 4 of the 5 tokens for a loss of 2 of
their own. Another Antarctican Dive
Bomber SAS attacked one of the Uhlan Cruisers, lost 1 token to Ack Ack and this
time caused a double crit! One of the
Crits rolled was Magazine Explosion (of course)! The damaged Cruiser suffered another lost HP,
but the Undamaged Cruiser suffered a Double-Crit – Sturginium Flare! The extra damaged sank the luckless ship as
it started to teleport. The sole
surviving (damaged) Uhlan managed to pass its Disorder test, in spite of losing
both squadron mates in 1 attack!

Another Magazine Explosion
AND
A 2nd Cruiser lost to Sturginium Flare!
AND
A 2nd Cruiser lost to Sturginium Flare!
Not wanting to be too exposed to enemy fire, the Prussian
Pflichts stayed in the clouds, then turned to engage the Worm and the
Skyfortress. Sadly, they failed to
damage either. One of the Antarctican
Fresnels moved forward and engaged the Uhlan Cruiser, but failed to damage
it. Prussian Destroyers raced forward
and managed to damage the Fresnel. The
solitary Antarctican Drone attacked the Pflichts, but was unable to do anything
to the Scoutships before the drone crashed and was added to the Scrap
Pile. The Prussian Carrier didn’t have
any SAS to restock, re-purpose or replenish when she activated, so turned to
port and engaged the Daedalus Flier with forward Tesla & Speerschleuder
while the broadsides targeted a Fresnel.
The Fresnel was sunk, and the Daedalus suffered a crit (Fusion Leak (1
counter)) as well as an extra lost AP and a Lightning Rod Token!

Prussian Carrier Damages the Daedalus & Sinks A Fresnel
The Antarctican Carrier activated. First she launched 2 Dive Bomber SAS (on
strength 5, the other 4 tokens), then moved forward its minimum speed and
declared “Slow Maneuvers”. She fired on
her Prussian Counterpart, but was unable to damage the Carrier. The Prussian Battleship then moved forward,
but failed to damage anything. The last
Fresnel then copied the Prussian Battleship; moved forward and failed to damage
anything. The Prussian Rievers then
maneuvered to the west of the island and tried to get a shot at the Skyfortress
with turrets and broadsides, but failed to damage the Fortress. Finally, the Antarcticans were able to do
something when one of their Frigate Squadrons made a torpedo Run on the last
Uhlan Cruiser, and sunk it along with 2 Destroyers using their broadsides! Ouch!!!

Torpedo Run On the Uhlan & Broadsides on Destroyers
For the last Prussian Activation of the turn, once more the
Frigates activated, moved forward and attacked the last Fresnel. Taking a shot, they managed to damage it and
remove an extra AP due to the properties of their Tesla Guns.
That left the Antarcticans to run the rest of their
manoeuvres unopposed again.
First, the Daedalus moved forward and attacked both Pflicht,
critting both! (Nav Lock on one,
Shredded Defences on the other!) Drones
attacked a Dive Bomber SAS and shot down 2 before they all crashed and
restocked the Stock Pile. The
Skyfortress launched another flight of Fighter SAS and shot down one of the Pflichts,
the survivor passing its Disorder test.
The Icarus moved forward and missed both the Prussian Battleship and
Destroyers. Then the last two Frigate
Squadrons made their attack runs. The
first fired at the Dread with torpedoes, but caused no damage, though they did
succeed sinking a Frigate with Broadsides.
The other Squadron made attacks on both the Dreadnought and Destroyers,
but failed to damage anything.

The Final Casualty Of The Game
End Phase:
The Antarcticans lost another Hull Point from the Daedalus
due to Corrosion as well as being unable to remove the Lightning Rod. The Worm put out 2 fires but lost another AP
to a third. For the Prussians, they
fixed the Shredded Defences on the Pflicht and the Destroyer lost all 3 AP as
they rallied from their Disorder.
Sadly, we were playing at the local store and between the
gabbing and answering questions, etc, we had wasted the afternoon and had run
out of time.
VPs:
CoA: 500pts Mission: 70% of the fleet’s force - Incomplete
PE: 530pts Mission: 70% of the fleet’s force – Incomplete
CoA: 500pts Mission: 70% of the fleet’s force - Incomplete
PE: 530pts Mission: 70% of the fleet’s force – Incomplete
A DRAW!

End of Battle
=================================
TACs:
CoA:
CoA:
Stoke the Engines
Devastating Barrage
Espionage
Radio Intercept
Lost Orders
Flank Speed (Drew it in error – Meant to take Stormtrooper but picked up the wrong card!)
Brace For Impact
Battlefield Repair
Devastating Barrage
Espionage
Radio Intercept
Lost Orders
Flank Speed (Drew it in error – Meant to take Stormtrooper but picked up the wrong card!)
Brace For Impact
Battlefield Repair
PE:
Devastating Barrage
Stoke the Engines
Break Neck Maneuvers
Lost Orders
Battlefield Repair
Prepare My Personal Transport
Medic
Espionage
Stoke the Engines
Break Neck Maneuvers
Lost Orders
Battlefield Repair
Prepare My Personal Transport
Medic
Espionage
=================================
As we were being kicked out of the store, we really had
little time to talk about the battle, but I did pick up a few thoughts from
Graham before we left.
First thing to note – he confessed right away as we reviewed
the TACs he selected that he grabbed the wrong card. Flank Speed is useless to a force without
flankers. He had meant to take
Stormtroopers and somehow got the cards mixed up as he flipped cards from the
main deck to the game deck. Oops! We’ve all done something similar at one time
or another.
Graham’s fleet was chosen specifically to take two
“complete” forces. Though it was a naval
battle, he had what he thought was a complete Air Force. (In fact, he didn’t have any “smalls”, but
other than that, he was right.) The
Antarcticans wanted Air Superiority (something I usually had on him) to throw
me off my game. It was working too as I
was having a horrible time dealing with all those fliers. The Prussians just couldn’t seem to hit
them. With both a Sky Fortress AND a Fleet
Carrier, he had more SAS squadrons as well as fliers on the table than I
did. Not to mention he could relaunch
his destroyed drones every time he activated a carrier. Definitely, the Antarcticans won the Air War.
The cost of this large Air Component though deprived him the
points he needed to take a Dreadnought for his core force. As a result, he took a Battleship instead to
protect his Carrier (not that I ever really tried to move against it). Limited in points by his Air Force, he was
happy to discover he could take Gunships and Armoured Cruisers in Squadrons of
1. He chose to do so in part to try it
out but also to get more activations.
That worked really well for him as he had pretty much free reign at the
end of the turn when I could do nothing to counter his remaining
activations! For the rest of the
Antarctican forces, limited available points dictated what choices and how many
in each squadron he took.
While this was a larger battle than I’ve posted in a while,
we both acknowledged playing the game at the store was not the best idea we
had. While it generated some interest, a
lot of questions, bantering and posturing, it really did impact how quickly we
could have played. If we were isolated
somewhere, we probably would have finished at LEAST 1 more turn, if not 2 in
the same time period. Turn 3 would
probably see one of us completing our objectives as we were quickly coming to
the crunch!
From my side, I really liked the synergy between the
Prussian Dread and the Carrier. Each had
a large forward-facing Tesla Coil, tough as nails and in the case of the Dread,
3 Shields. Both performed well. What’s not to like?
The “Mighty” Kaiser Karl Battleship is making a reputation
for itself; hard as nails and can’t hit the broadside of an aircraft carrier
from 5 feet away. I may have to drop a
turret and add a Tesla Generator to make her faster. Maybe I can use her as a Boarding Ramp if I
can’t hit with the guns…
My poor Cruisers!
Both Squadrons suffered a Magazine Explosion that damaged their fellow
squadron mates! Though the Uhlans didn’t
do much (they couldn’t hit the fliers at all), the Rievers at least damaged the
Worm!
Speaking of the Worm (Arronax), both of us were kind of
befuddled by it. The way the rules are
written, it can burrow in the earth, but it cannot submerge in water! This is a drastic change from the V1.1 rules. Neither of us really agreed with this logic,
but we think it’s the only “vehicle” in the game that could potentially move on
both land and sea and Burrow (it is Multi-Purpose). No other Submerging or Burrowing model that
we can think of can operate on both terrain types – land and water.
Overall, it was quite an interesting and challenging
game. I wish we had more time to play
another turn, but that was not to be.
I hope you enjoyed the report!
No comments:
Post a Comment