Admiral Von Shtupp was bored.
He was onboard one of the Empire’s latest innovations – a Sturmbringer Submarine and was being shown around by a junior officer. While an impressive achievement, Von Shtupp didn’t need to be shown galleys and crew bunks – they were all pretty much the same on all Imperial Ships.
Suddenly the Klaxon sounded – “Action Stations! Action Stations! Admiral to the Bridge!”
Oh dear. They’re putting on a show for me. At least it’ll end this awful boring tour…
“Captain, what’s the situation?”
“Admiral! We’ve spotted an Antarctican Fleet heading this way. We still have your launch tied along side. We can get you to shore before we engage…”
“Captain! I will not permit you to endanger this ship or its escorts while you worry about me! Cast-off the lines and get underway IMMEDIATELY! Consider this a test for your new command and don’t you let down the Emperor!”
“Sir!?!? Are you sure you wouldn’t like to take command?”
“No Captain, I haven’t the experience with your task force or this ship. Consider me an Observer for this action.”
Well, thought Von Shtupp, this could be an interesting day after all…
So I received my “Wolf Pack” box set and wanted to try it
out. My opponent and I agreed to 1ooo
points and away we went…
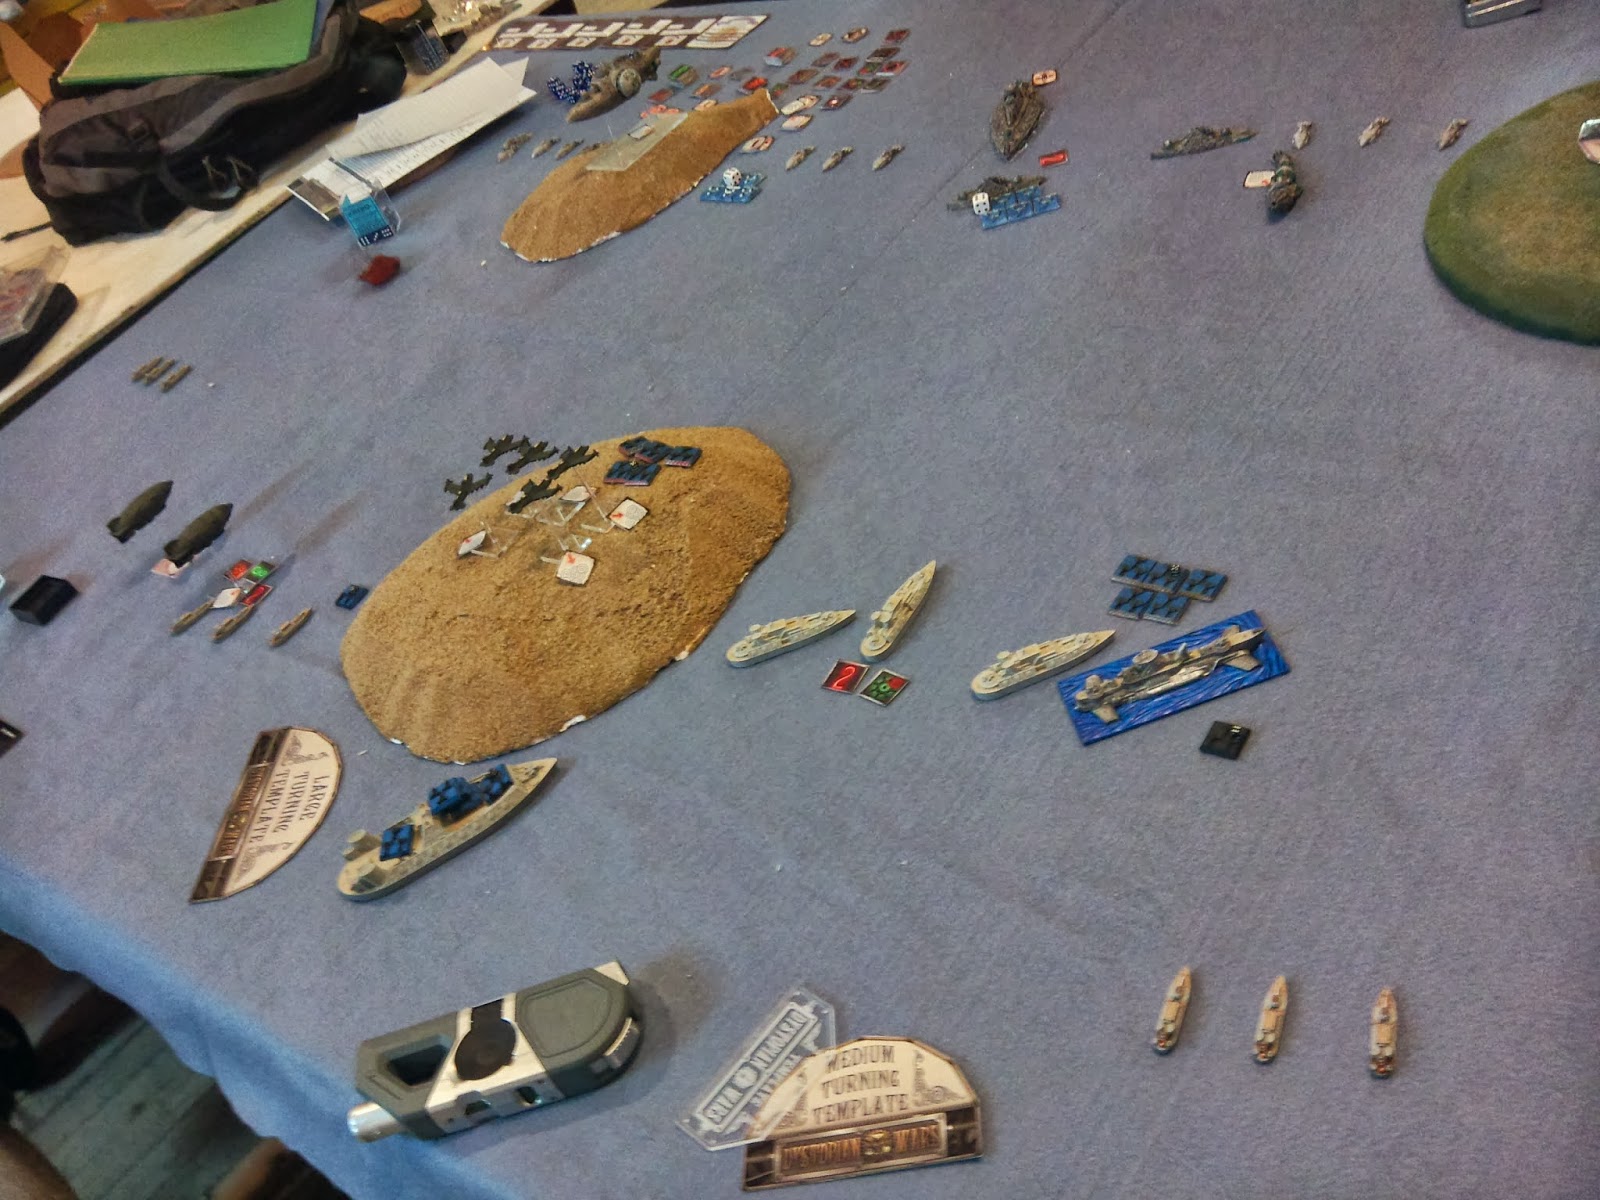
Prussian
Deployment (Top to Bottom):

3 Arminus Frigates
2 Pflicht Scoutships
3 Arminus Frigates
Wing of Fighters
5 Zerstorer Strike Bombers followed by
1 Rhine Carrier with a Fighter Wing & Spotter Token deployed
3 Donnerfaust Support Cruisers
Wing of Dive Bombers
1 Sturmbringer Submarine with Spotter Plane launched.
3 Arminus Frigates
2 Pflicht Scoutships
3 Arminus Frigates
Wing of Fighters
5 Zerstorer Strike Bombers followed by
1 Rhine Carrier with a Fighter Wing & Spotter Token deployed
3 Donnerfaust Support Cruisers
Wing of Dive Bombers
1 Sturmbringer Submarine with Spotter Plane launched.
3 Arminus Frigates
Antarctica
Deployment (Top to Bottom):

2 Plutarch Destroyers
3 Diogenes Frigates
1 Daedalus Skyship
Wing of Fighter Drones
3 Diogenes Frigates
1 Aristotle Battleship
2 Plato cruisers with 1 Fresnel Support Cruiser
3 Diogenes Frigates with
1 Aronax (the “Worm”) Submersible
3 Diogenes Frigates
1 Daedalus Skyship
Wing of Fighter Drones
3 Diogenes Frigates
1 Aristotle Battleship
2 Plato cruisers with 1 Fresnel Support Cruiser
3 Diogenes Frigates with
1 Aronax (the “Worm”) Submersible
Being lazy, we both opted for the standard 70% Victory
Points mission.

Turn 1:
PE won initiative
PE won initiative
I didn’t really want first activation, so I stalled by
moving the sub’s Spotter forward at ½ speed.
CoA Destroyers moved forward about ½ speed, baiting my frigates. I didn’t fall for it; I moved the Carrier’s
spotter plane around the left of the island on my table side. CoA Fighters moved forward at ½ speed to kill
an activation. Prussian Dive Bombers
moved forward at full speed. The CoA
Skyship moved forward over an island.
Prussian Fighters moved forward at full speed. The CoA Worm advanced, submerged, turning
towards the frigates on the right side of the table. Prussian Frigates on the right moved forward
about 4”. CoA Frigates on the left moved
forward about ½ speed. Prussian Strike
Bombers stayed obscured and moved over the island at ½ speed. CoA Frigates in the center moved forward at ½
speed. Prussian Scoutships stayed high
and moved forward 4”. CoA Fighters moved
forward at ½ speed. Prussian Frigates
moved forward in the center. Finally the
CoA Battleship moved out, coming to surface level and firing broadsides at one
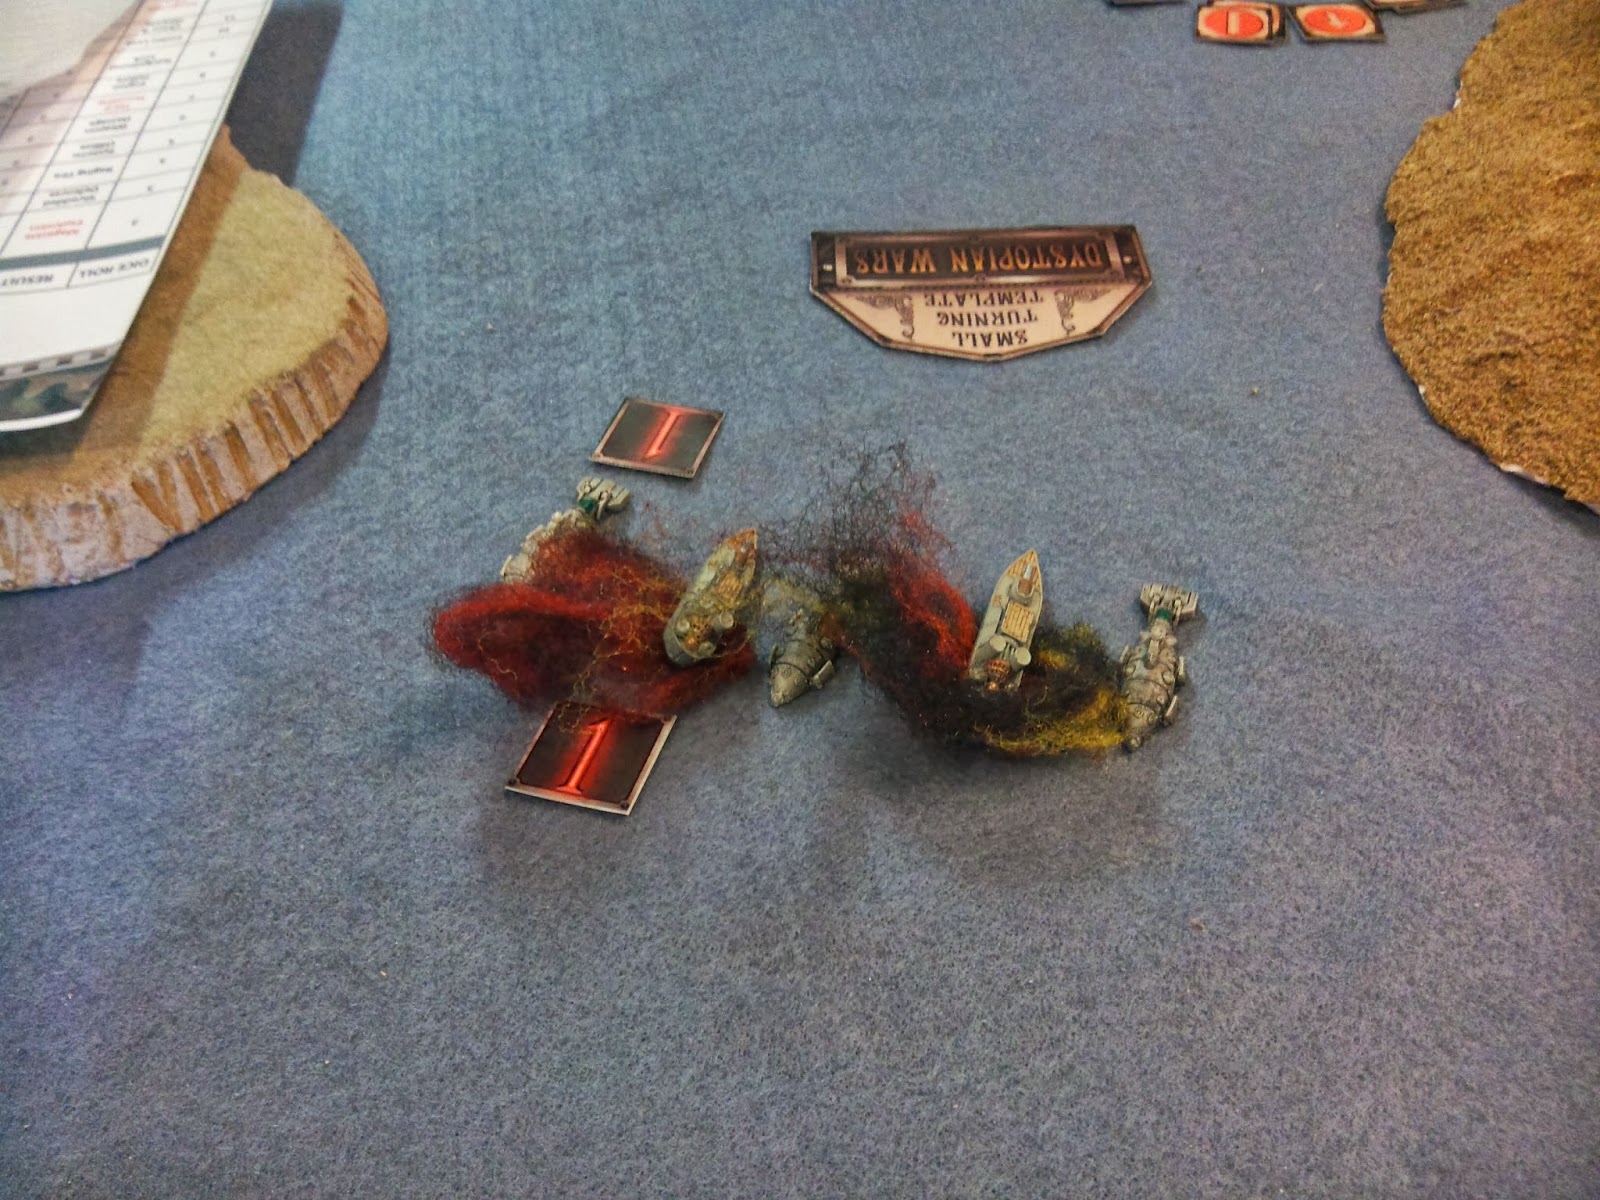
of the Zepps and Critting it (Raging Fire – 4AP left). The rest of the shooting from the Battleship
missed or failed to damage anything – but first significant damage of the game
was made!

The Prussian Frigates on the left moved forward at maximum
speed and fired on the Destroyers, sinking one.
First Blood to the Prussians!

CoA Frigates moved forward on the right about 4”. The last Prussian Fighter squadron moved and
landed on the Carrier to be re-purposed. CoA Cruisers moved forward and turned to the
left, bringing all their turrets to bear on one of the Prussian Cruisers. The Fresnel’s Accumilator activated
successfully and in some of the worst rolling of the game, barely managed to
crit one of the Cruisers (Nav Lock). It
should have double or triple crit the cruiser with the amount of dice being
rolled! Sadly for the CoA, this was
their last activation of the turn!
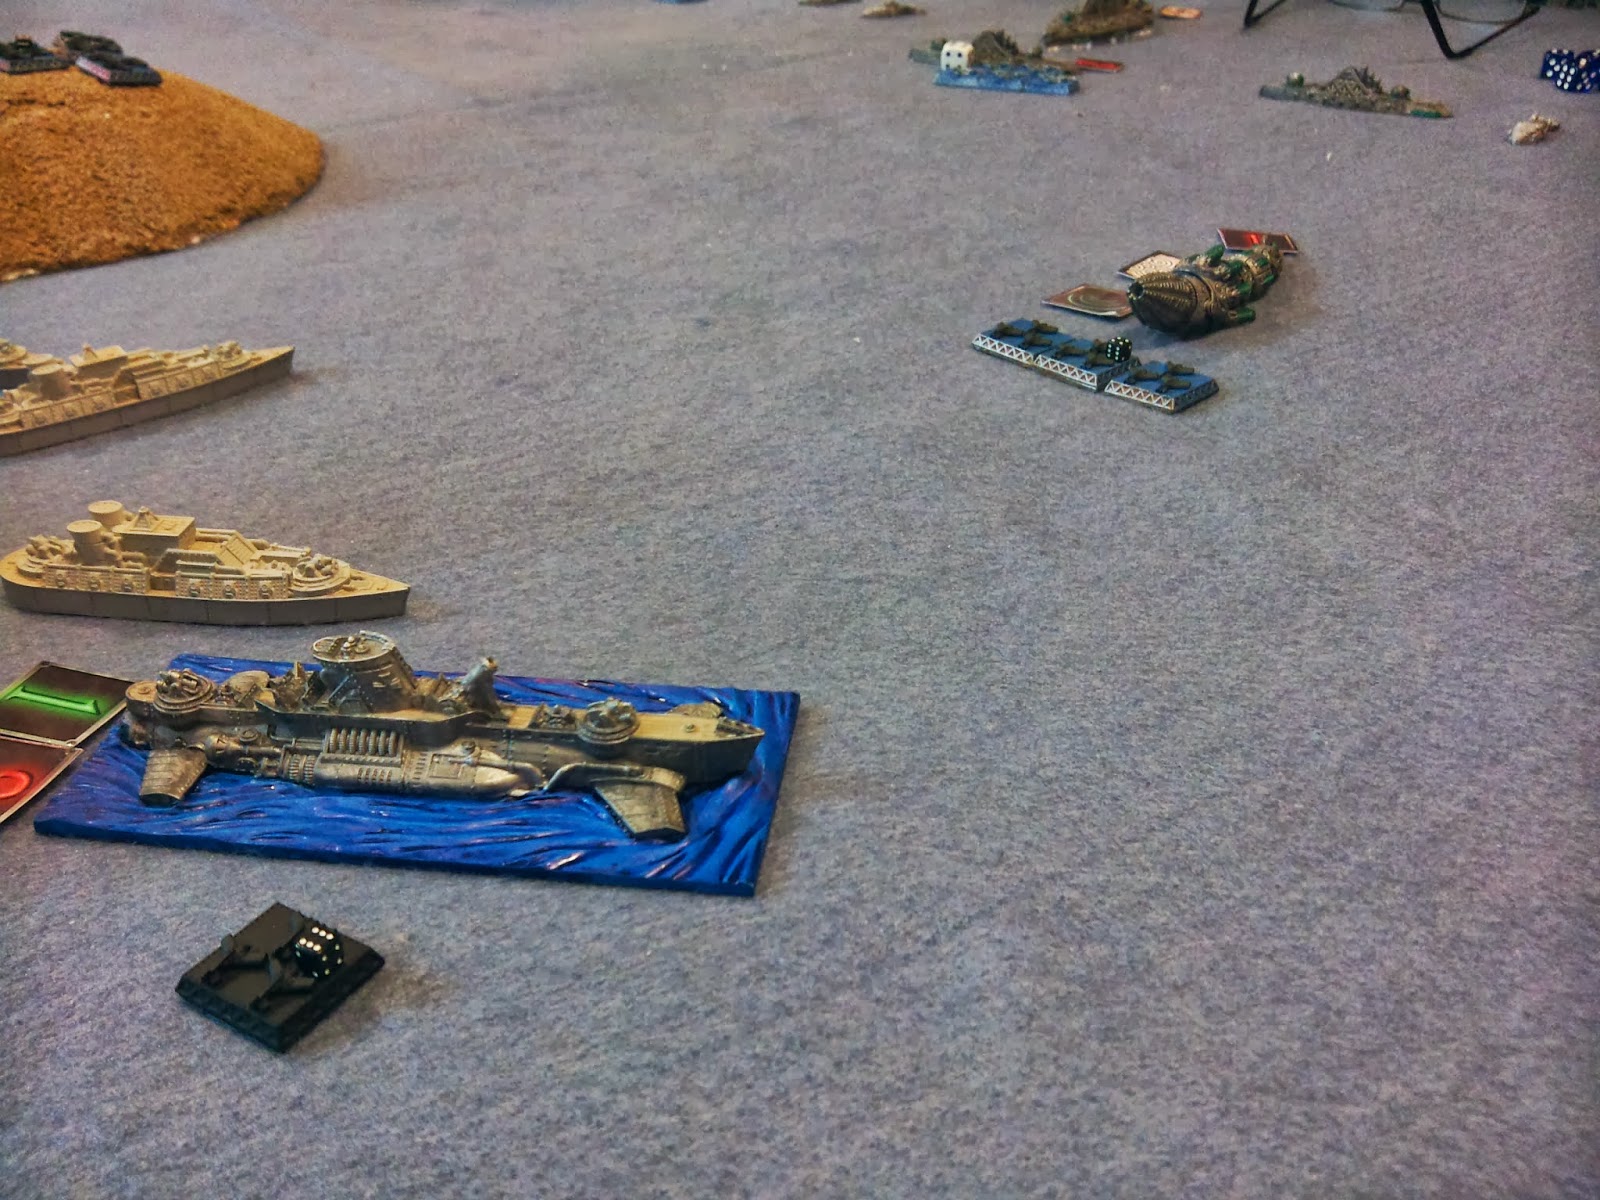
The Prussian Admiral realized that the Fresnel could not be
allowed to live. The Prussian Sub rolled
an extra 2” movement from the Tesla Generator and moved forward, then turned to
the right, presenting broadsides. The
Speerschleuder turrets managed to double-crit the Fresnel and sank it. Sadly, the Bombard failed to damage the CoA
Battleship. The CoA Cruisers did fail
their Break Test. The Sub failed to
Panic Dive – leaving it vulnerable on the surface.

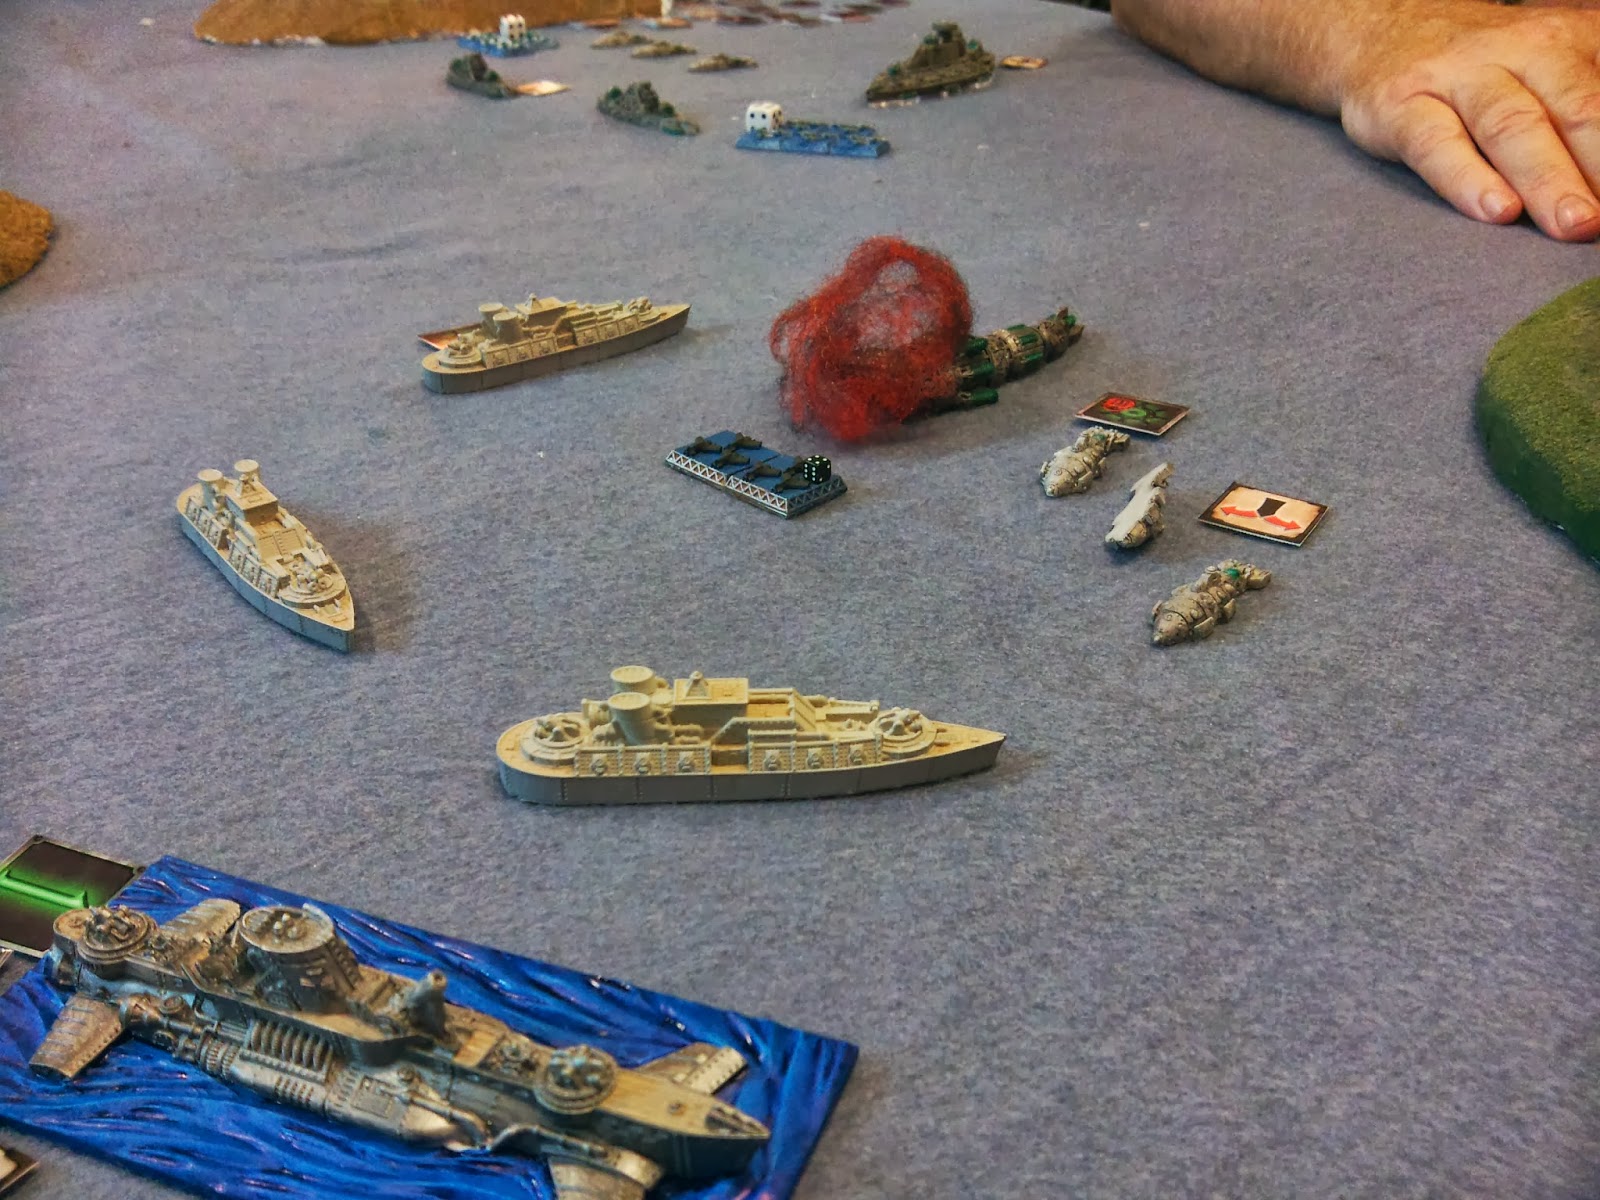
Prussian Cruisers went next – the one stuck moving straight
ahead, the other 2 turning to the left – hoping to protect the sub (but not
quite getting there. Linked fire from
the Cruisers managed to cause a Crit on one of the remaining Cruisers (Engine
Damage). Finally, the Carrier moved
forward 4”, hiding behind the island as best it could.
As the final activation, the Prussian Carrier moved forward
4”, trying to stay behind the island as much as possible.
In the End Phase:
The Prussians failed to repair the Nav Lock on the cruiser
AND failed to put out the fire on the Zepp (3AP left).
The CoA were able to repair their damaged Nav Lock on their Cruiser.
CoA: 147 pts
PE: 0! Nothing was crippled or sunk! (That wouldn’t last long!)
Turn 2:
CoA Won the Initiative!
CoA Won the Initiative!
So the Worm went first!
Though it failed its Sturginium Boost roll, it came to the surface and
attacked the Prussian Sub, getting a Crit (Hard Pounding – 1AP left!) with the
Particle Accelerator. The Worm then
fired off its Cloud Generator as it failed its Panic Dive. The Prussian Dive Bombers attacked the Worm,
causing 1 HP damage for the cost of 2 tokens.
The CoA Cruisers continued their course to the left of the
table and managed to Crit the damaged Zepp again (Guns Damaged – 1 HP left) - finally
crippling the Zepp.
The Prussian Sub moved forward and fired all weapons on the
Worm, but only managed to get 1HP of damage on the Worm. But that was enough – it also added a Lightning
Rod token to the worm.
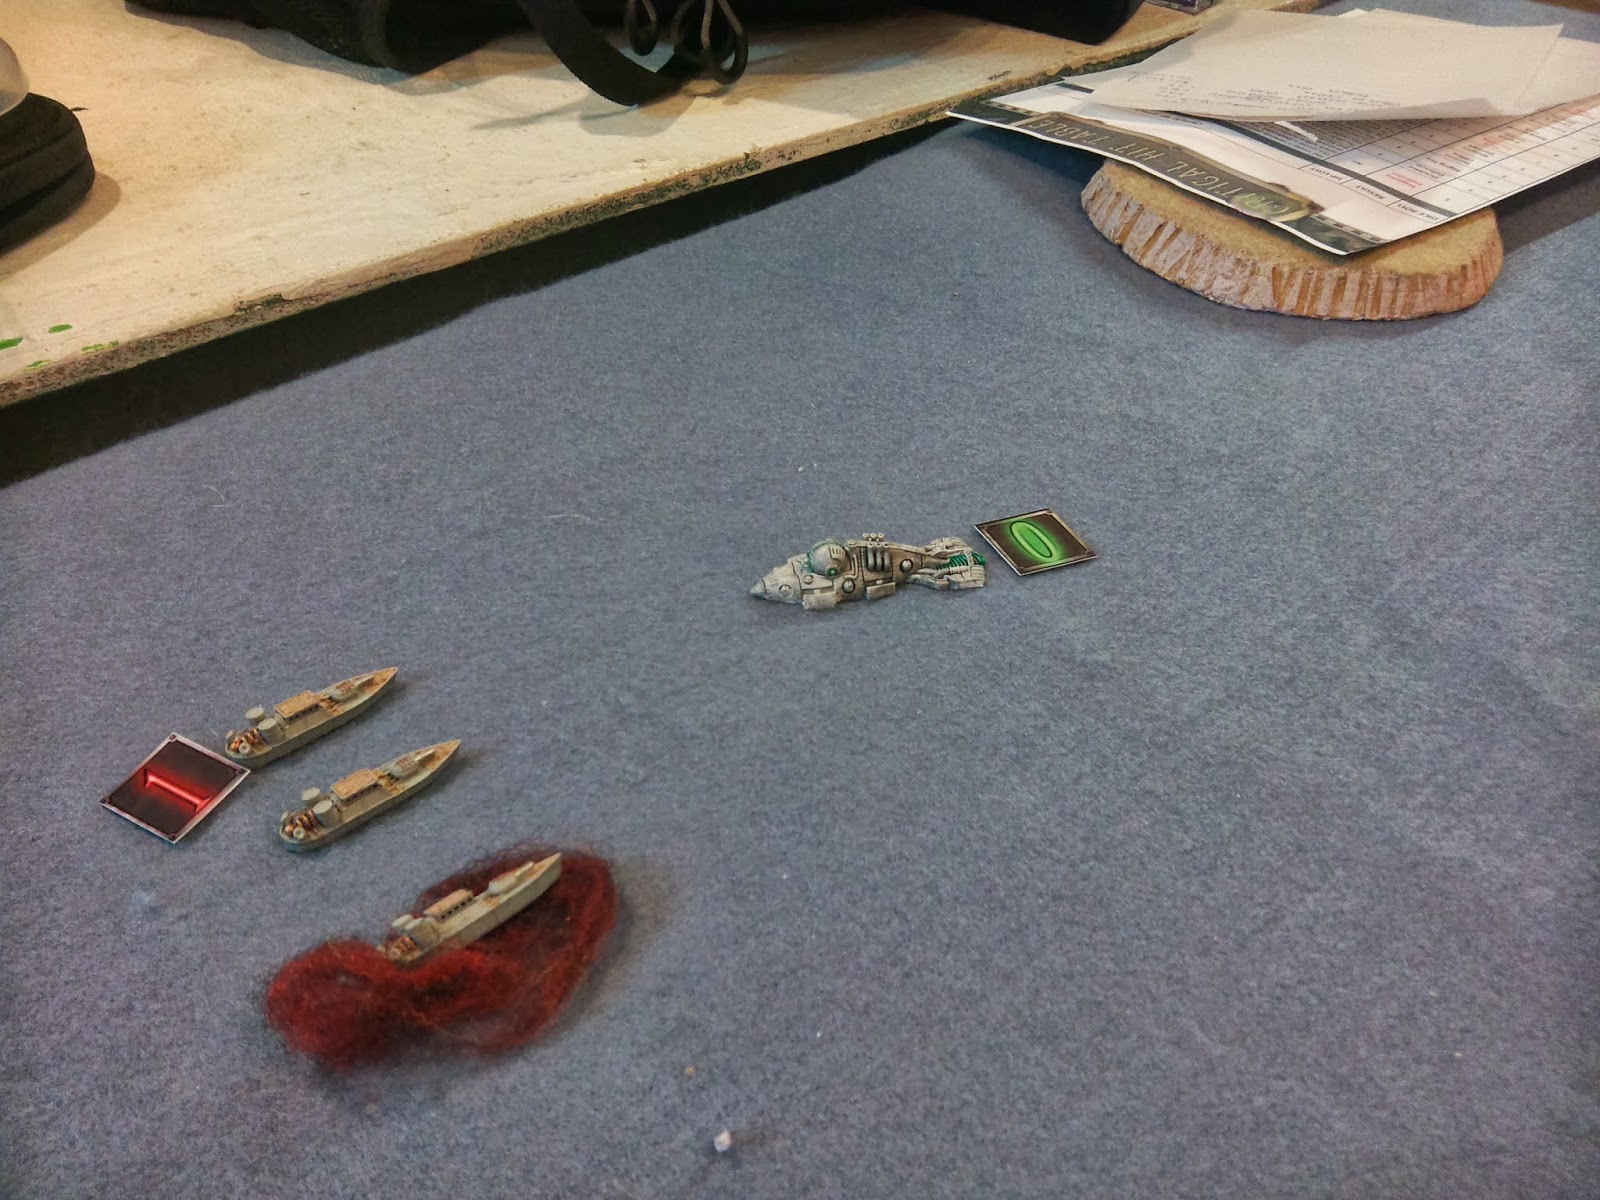
CoA Frigates made a torpedo run on the Prussian Sub, but
failed to damage it. The Frigates did
manage to shoot down another Dive Bomber.
PE Cruisers surrounded the CoA Worm and the Frigates. Thanks to the Lightning Rod, the Worm was
sunk with a double-crit and a Frigate was sunk with a Broadside shot while a
second Frigate was zapped by a Tesla Generator (Nav Lock). The lightning display was too much for the surviving
frigates – they failed their Break Test.
The CoA Battleship moved forward and opened fire, critting 2
Prussian Cruisers (the Damaged Cruiser was Fusion Leak – 1 HP left, a second
one was Nav Locked).
Prussian Fighters attacked a wing of Drones and shot down all
5 drones for a cost of 3 tokens. The CoA
Destroyers moved forward and sank 1 Prussian Frigate, damaged another and lost
all their AP attempting to board the 3rd Frigate on the left. The Frigates passed their Break Test.
The Prussian Frigates on the left charged past the CoA
Destroyer, firing aft Tesla as they passed and guns at the Frigates in front – the
result was to damage both the Destroyer and 1 Frigate. The CoA Frigates on the left moved forward
and caught the Prussian Frigates in a perfect cross-fire – sinking both!
The Prussian Carrier launched a full wing of Torpedo
Bombers, then moved forward 3”. The CoA
Skyship came down to Flying Height, turned to present broadsides and shot down
the damaged Zepp.

Prussian Frigates on the far right maneuvered around the
Subs and Cruisers to attack the CoA Frigates, and sank 1 Frigate.

The last CoA Drone Wing attacked the last 2 Prussian
Fighters, reducing their fuel to 1 for no losses in return. One of the Prussian Spotters landed on the
Carrier to re-purpose. CoA Frigates in
the center attempt a torpedo attack on the damaged Cruiser but failed to damage
it. The CoA Frigates did manage to shoot
down the last two Prussian Fighters. This
was the last activation for the CoA.
Free to act as they wished, the Prussians moved their last
spotter plane forward at ½ speed, and the Strike Bombers made an attack run on
the CoA Frigates in the center, splitting their attacks and damaging 2 of the 3
Frigates – as well as adding Lightning Tokens to both! Prussian Frigates attacked the lead (damaged)
CoA Cruiser and sank it with a double-crit.
Finally, the last Prussian Zepp dropped to Flying Height and sank the
last CoA Destroyer.


In the End Phase:
The CoA were able to repair the Tesla Effect on their Frigate, but were unable to dislodge the Lightning Rods. The Broken Squadrons failed their Rally Test.
The PE repaired 1 cruiser but failed to repair the Crippled Cruiser.

Sadly, at this point, we ran out of time.
Losses:
CoA: 396
PE: 182
CoA: 396
PE: 182
A Draw!
Well, that was a shock!
I got a charge out of that!
Sorry – I was just channeling my old Electronics teacher
there…
I would have liked another turn or two – just to see what
would/could have happened. I think the
CoA suffered more from bad dice rolls rather than bad tactics on his part or
brilliant tactics on my part.
So what’s my impression of the “Wolf Pack”?
The Sturmbringer Submarine is interesting, but a sub that is
unable to fire torpedoes or any other long-ranged fire while submerged. . I don’t
know. The fact that it has extremely
limited availability (1 per 1250pts or part thereof) means it won’t be too many
battles with multiple subs. I do like
the weapons load and it would have been nice if I could ever pass a Dive test,
but I’m still on the fence here. The sub
definitely needs more play-testing on my part to learn how best to use it. The sub does work well with the tactics of
the Support Cruisers. The extra Spotter
Plane token granting an extra activation was nice, too!
Donnerfaust Support Cruisers were very interesting. Unlike most Prussian ships, the Support
Cruisers don’t have large boarding potential and do require turning and
presenting their Broadsides to maximize their turrets. While the same is true with the Dreadnought,
most Prussian Battleships usually have a generator stuck on the back turret
ring and other mediums tend to be “forward firing” so that they can close (and
board) as quickly as possible. While a
departure from standard Prussian Tactics, the potential broadside attacks with
both Turrets is impressive and deadly!
The Zerstorer Strike Bombers are limited but useful in a
follow-up capacity. You need the numbers
in case some are lost on the way in.
Staying at Obscured makes them much harder to hit (6’s only for most
ordinance). I’d like another flight of
5, but I’m not sure I want the whole box set.
Definitely another choice I need to play-test some more.
I took the Pflicht Zepps because I wanted the “extra”
spotters for the Tesla Bombards. While I
don’t think it was a bad decision, I never did use them for that purpose. They did act as “Fire-Magnets” and the extra
HP damage it took to cripple and destroy them was a pain for the CoA. In this case, I think they earned their
points by distracting the fire from the Skyships and the Cruisers from more
important targets.
The Arminus Frigates did what they do best – spread destruction
and distraction as best they could.
While I lost one squadron on the left, the other two squadrons went out
and wreaked havoc on the right. Don’t
leave home without them!
The Rhine Carrier did what I wanted it to – provide a
landing and launch platform, I didn’t use it to its full potential. It would have been able to start bombarding
the CoA Battleship next turn and the Torpedo Bombers would have been in range
to attack as well. I would have been
able to launch another Wing the turn after (I could have done an under-sized
3-strong wing next turn, but figured the Bombard would have been more important
against the Battleship).
On the other side, the CoA were doing well until the dice
failed him. Once he started rolling bad,
he couldn’t seem to get out of the dumpster.
The Battleship was starting to make its presence felt and turning things
around. The game would be decided next
turn dependent on what happened with the Battleship next turn.
No comments:
Post a Comment